


As a software developer or newbie to software engineering and DevOps, you may wonder why the shift from the traditional software development approach to containers has gained immense popularity in recent years. The answer lies in the numerous benefits that containers bring to the table.
This article explores the realm of containerized pipelines with Azure DevOps, delving into their benefits and demonstrating how to dockerize your application using CI/CD pipelines on Azure DevOps while leveraging other Azure resources.
You will learn how to containerize your application, configure build, and release pipelines that deploy your container image to Azure Container Registry (ACR), and also auto-deploy to Azure App Service.
Overview of Containerization of an Application
The first question that comes to mind is to understand what containerization of an application is and why. Containerization of an application is the process of encapsulating an application, alongside its configurations, dependencies, and libraries into a self-contained unit known as a container. A container provides a lightweight and isolated environment that allows the application to function in a consistent manner across different platforms and machines.
Containers offer unparalleled portability, allowing applications to run consistently across different environments, from local development machines to production servers. This eliminates the age-old problem of “it works on my machine” syndrome and streamlines the deployment process.
The phrase “It works on my machine” syndrome describes the challenge encountered when a software application functions as expected on one developer’s machine and differently on another developer’s device or environment. It addresses this issue by creating a consistent and reproducible environment for running applications.
There are different tools used to containerize an application and the most popular is Docker. With Docker, you can package your application with its dependencies using a Dockerfile. A Dockerfile contains a list of instructions to build an application to a container image. These container images are standalone and executable packages of your application, typically a template for creating more instances of your application and are published to container registries such as Docker Hub or Azure Container Registry (ACR).
Benefits of Containerizing an Application.
Containerization introduces a wide range of benefits to software development aside from the case of consistency and compatibility already established as “It works on my machine syndrome”. Other benefits include:
- Efficient Resource Utilization: Containers are lightweight and consume fewer resources than traditional virtual machines, making them ideal for modern microservices-based architectures. This allows multiple containers can run on a single host utilizing system resources optimally.
- Isolation: Containers provide a secure and isolated environment to run applications, minimizing the risk of vulnerabilities
- Portability: Containers can be run in any environment, providing a consistent runtime experience across different platforms. This also ensures seamless migration and deployment across platforms.
Containerized Pipeline using Azure DevOps
In the context of containerization, Azure Pipelines is a component in Azure DevOps that enables you to create and manage build and release pipelines. It allows you to define custom build and release tasks, such as building Docker images, pushing them to Container Registry, and deploying them to Azure Kubernetes Service (AKS) or Azure App Services.
It seamlessly integrates with popular containerization tools such as Docker, ensuring containerized applications are deployed consistently and efficiently across different environments. Azure pipelines also provide end-to-end containerization support and lots of benefits, including:
- Flexibility: Azure Pipelines supports a range of containerization scenarios, including multi-container applications, Docker Compose, and Kubernetes.
- Security: Azure Pipelines provides built-in security features, such as image scanning and vulnerability assessments, ensuring that containers are secure and compliant.
- Automation: Azure Pipelines automates the entire containerization process, reducing manual errors and improving consistency.
Building a Containerized Pipeline for Node.js Application
In this section, you will delve into exploring containerization using Azure DevOps Pipelines. This will cover a step-by-step demonstration of building a containerized pipeline specifically designed for Node.js applications. By leveraging the power of Docker and Azure Pipelines, you will set up a seamless CI/CD pipeline to build and containerize a Node.js app and deploy this container image to AKS and also App Service.
To follow on, you will need to have the following:
- Azure Account with an active subscription
- Azure DevOps Account
- Git installed on your machine.
- VS Code (Code Editor)
Creating a Project on Azure DevOps
- Login to dev.azure.com, you will be signed into an existing organization, or you can create a new one if you are signing in for the first time. For details on creating a new organization and project see previous article link
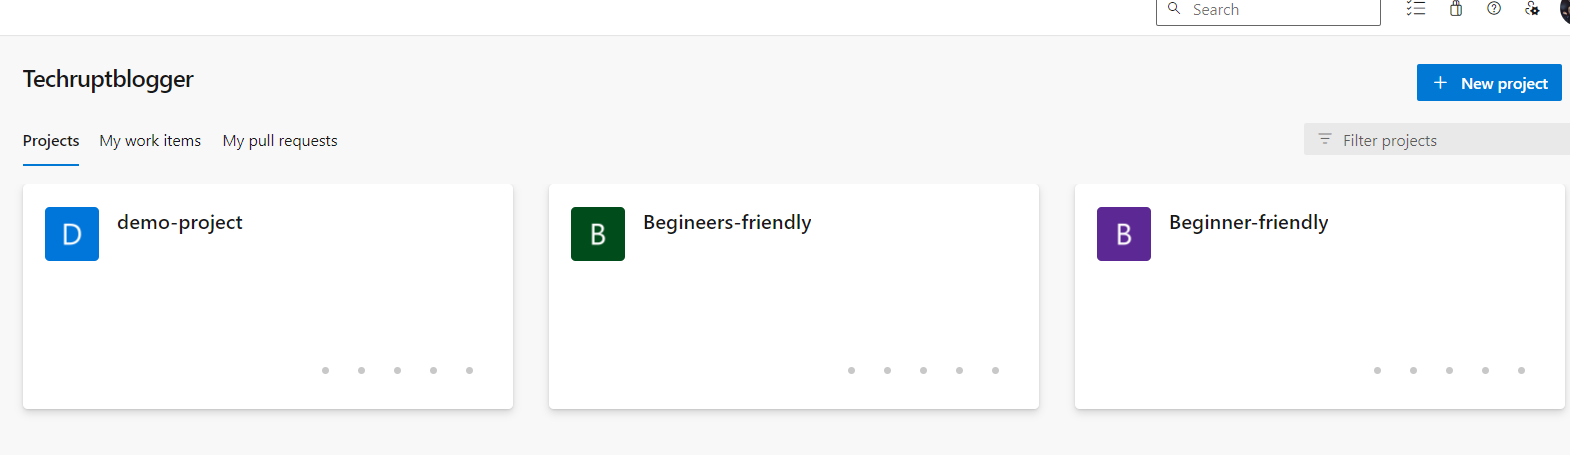
- Click on New Project or use an existing one:
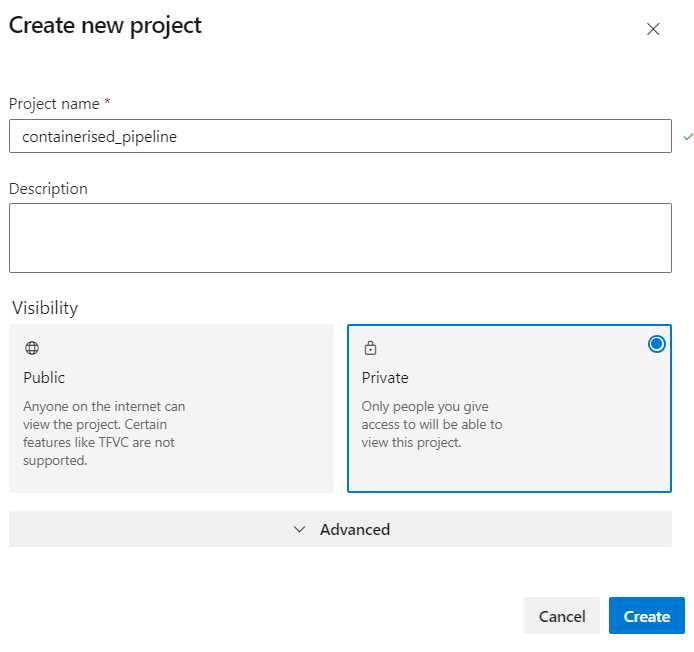
- This opens a dialog window as shown below. Enter a project name and click the Create button:
Setting up your Node.js Application in Azure Repo
Repos in Azure DevOps is a repository for storing and managing your source code. It supports Git and Team Foundation Version Control (TFVC).
Git is distributed version control system that manages repositories, that offers features such as branching, merging, and pull requests. TFVC, on the other hand, is a centralized version control system that uses a centralized server to store files.
Each project in Azure Dev comes with a default Repo, you will import your project files to this repo from your PC.
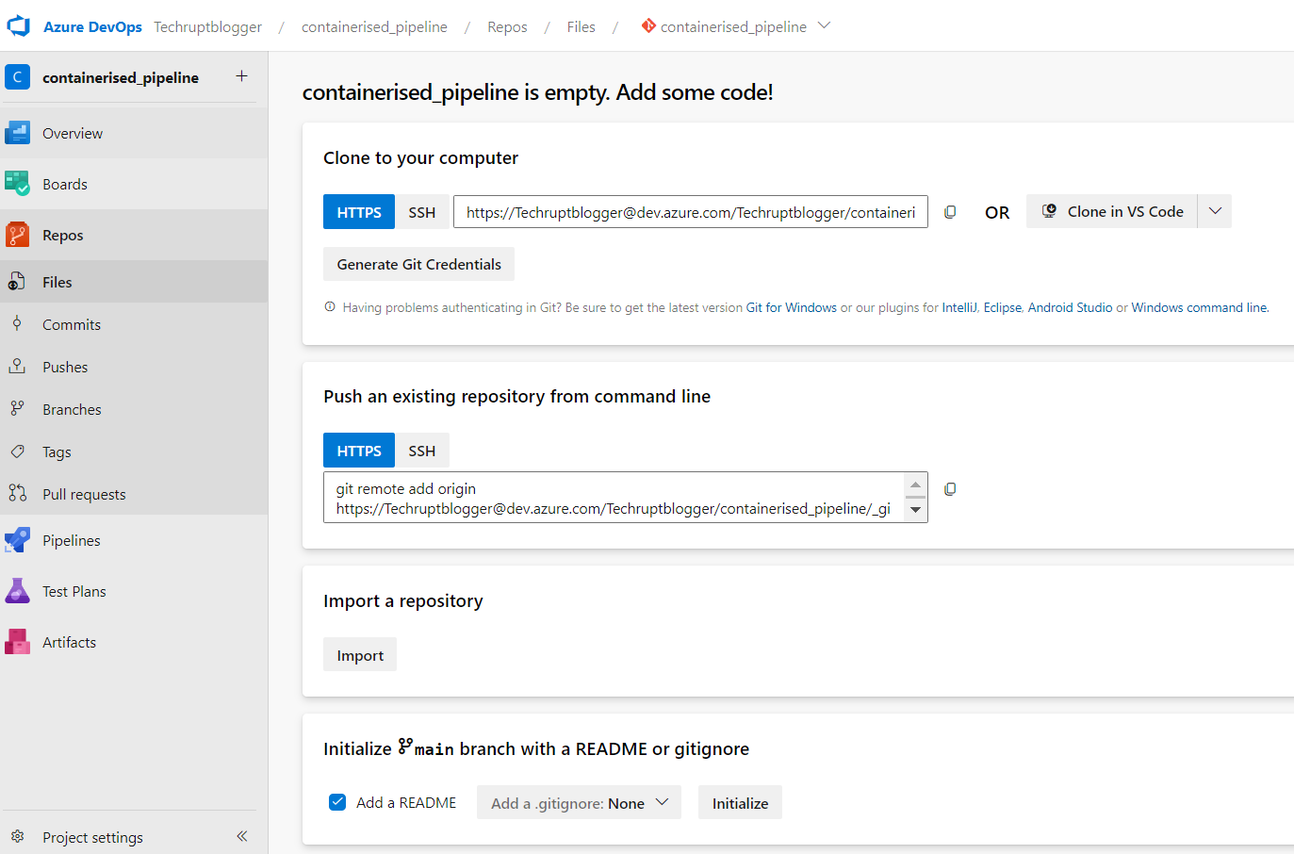
- Click Repos located at the left menu on your project dashboard, this opens the overview for Repos with options on how to proceed.
- Click the Clone in VS Code button:
- This opens VS Code on your machine and a window to allow you to select the folder to clone your project to.
- You can choose any folder or create a new one. Now, you have the Azure Repo cloned to our PC, you will proceed to clone a sample NodeJS Project:

- On VS Code, click on Terminal from the top menu items to open a new terminal. On the new terminal window run the command below to clone the sample project:
git clone <https://github.com/Azure-Samples/nodejs-docs-hello-world.git>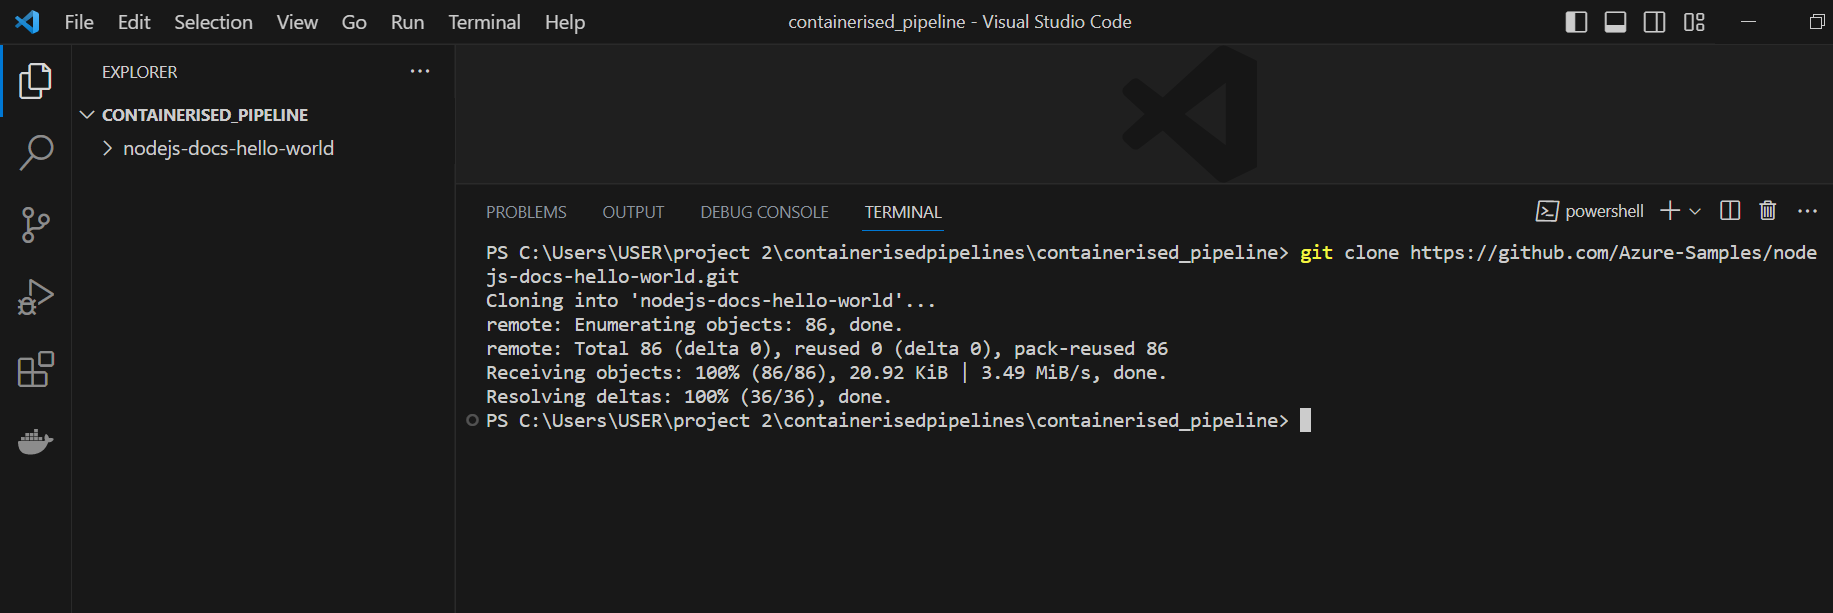
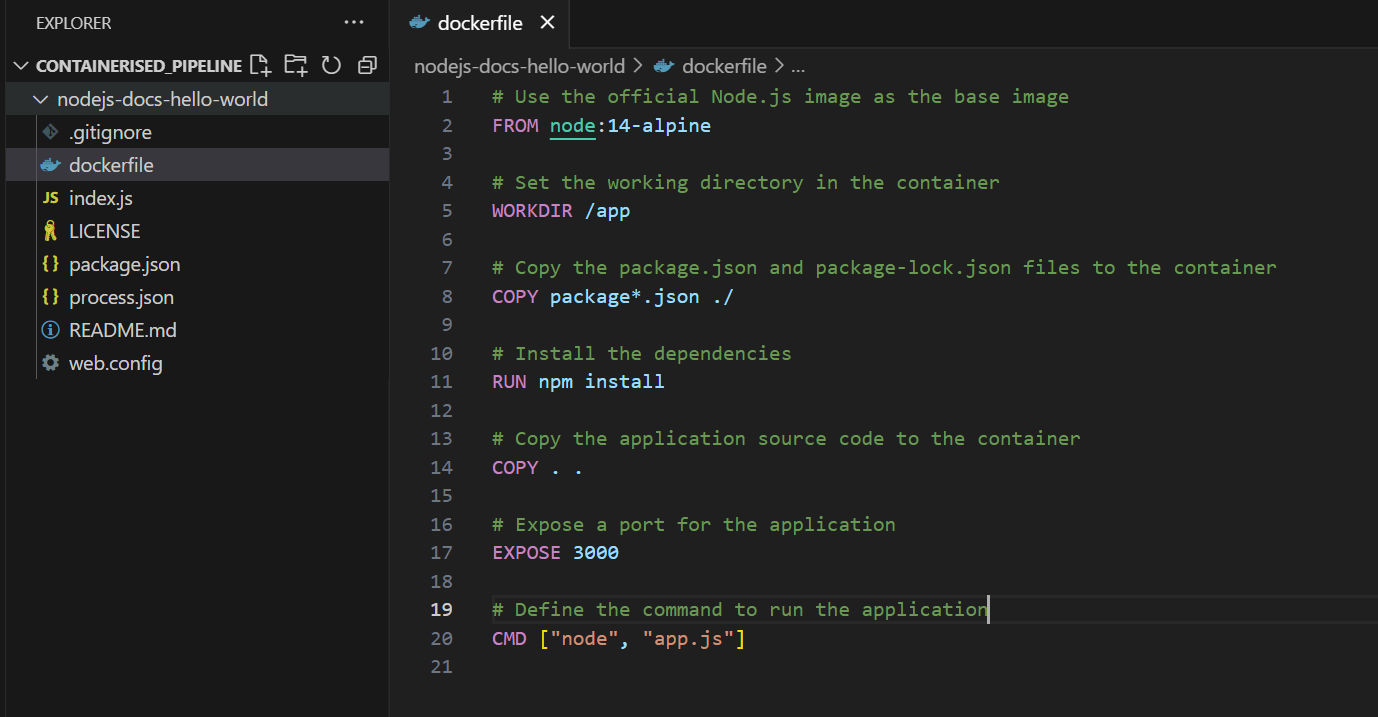
- Open the project folder node-docs-hello-world and create a file with the name dockerfile and no file extension. Paste the following code inside the dockerfile:
# Use the official Node.js image as the base imageFROM node:14-alpine# Set the working directory in the containerWORKDIR /app# Copy the package.json and package-lock.json files to the containerCOPY package*.json ./# Install the dependenciesRUN npm install# Copy the application source code to the containerCOPY . .# Expose a port for the applicationEXPOSE 3000# Define the command to run the applicationCMD ["node", "app.js"]This dockerfile contains instructions that encapsulate your application and its dependencies and outputs them as a container image during pipeline build.
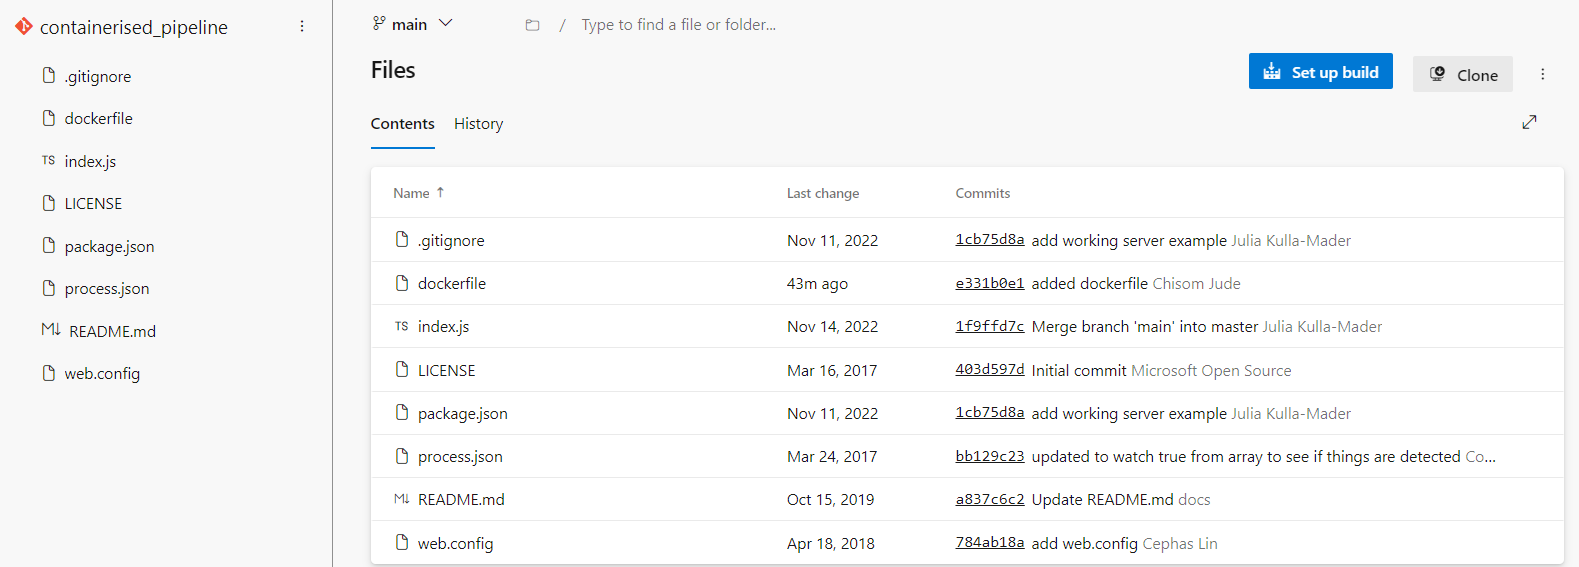
- After adding dockerfile, your project folder should look the same as the image below:
- Open the terminal again and run the following git command one after the other to push this update to Azure Repos:
# Change into the cloned directorycd nodejs-docs-hello-world# Add all new files and commitgit add .git commit -m "added dockerfile"# Remove existing remote origin from the cloned folder git remote remove origin# Add your Azure Repo's origin and pushgit remote add origin <https://[email protected]/Techruptblogger/containerised_pipeline/_git/containerised_pipeline>git push -u origin --allThese git commands add all files to your local machine and commit all changes made. Since the project is cloned, this implies that it has an origin, you will have to remove the first origin and replace it with the origin from your project repo and lastly push all files to Azure Repo. Find the instructions to update the URL in the next step.
- To get the link to your Azure repo origin, open Azure DevOps project click on your empty Repo > Files and scroll to the “Push an existing repository …” section as shown below:

- On successfully running the script, your files will be pushed to Azure Repos:
You have successfully pushed all project files to Azure Repo. You will need to set up other resources needed for this Demo such as setting up Azure App Service and Azure Container.
Creating an Azure App Service on Azure Portal
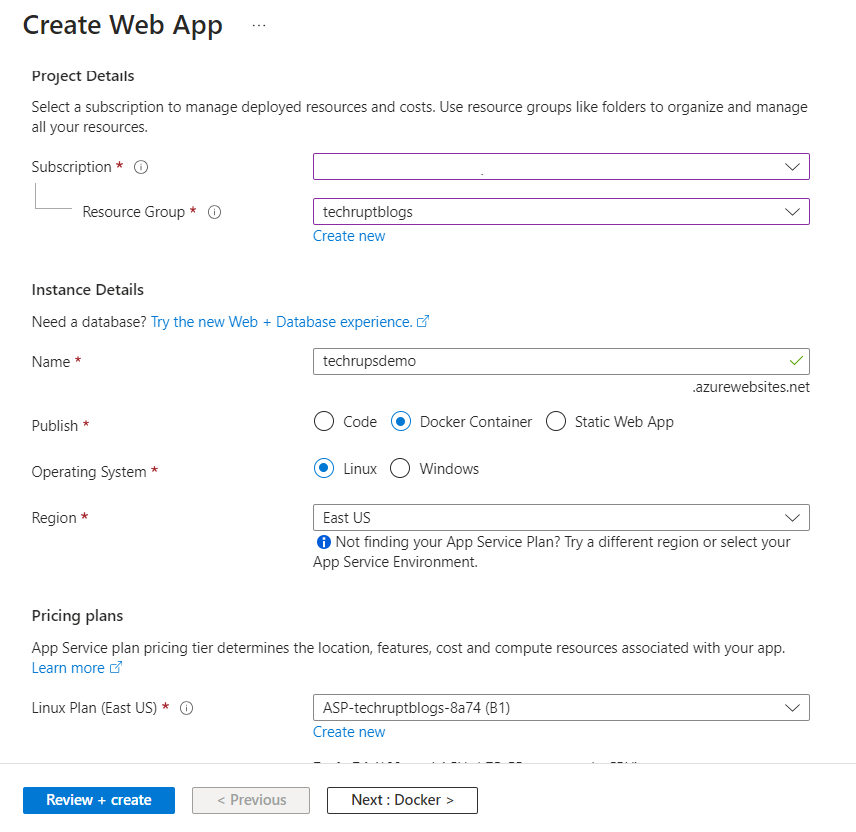
- Open portal.azure.com and search for App Service, ensure to select the Publish option as the code option as Docker Container. Fill in other option and click Review + Create:
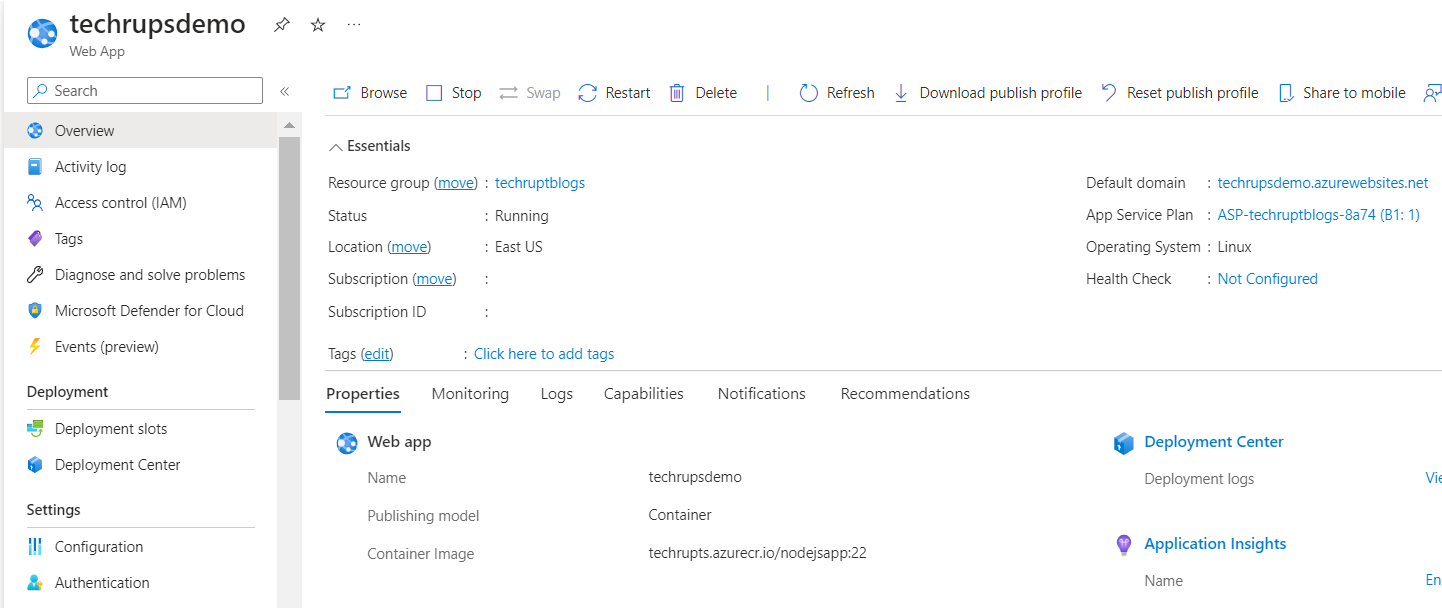
- This will take a few minutes to complete. On completion open the resource, this should look the same as shown below:
Create an Azure Container Registry (ACR) on Azure Portal
- On Azure Portal Search for Container Registry and create a Container Registry. Fill in the required input marked asterisk and click Review + Create:
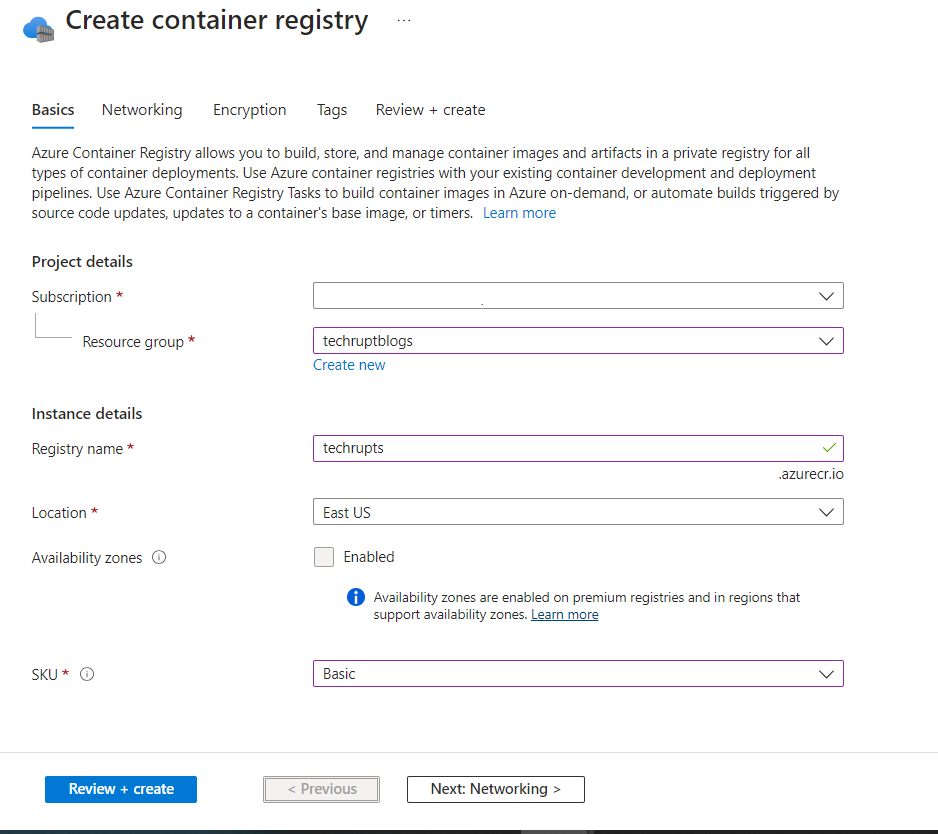
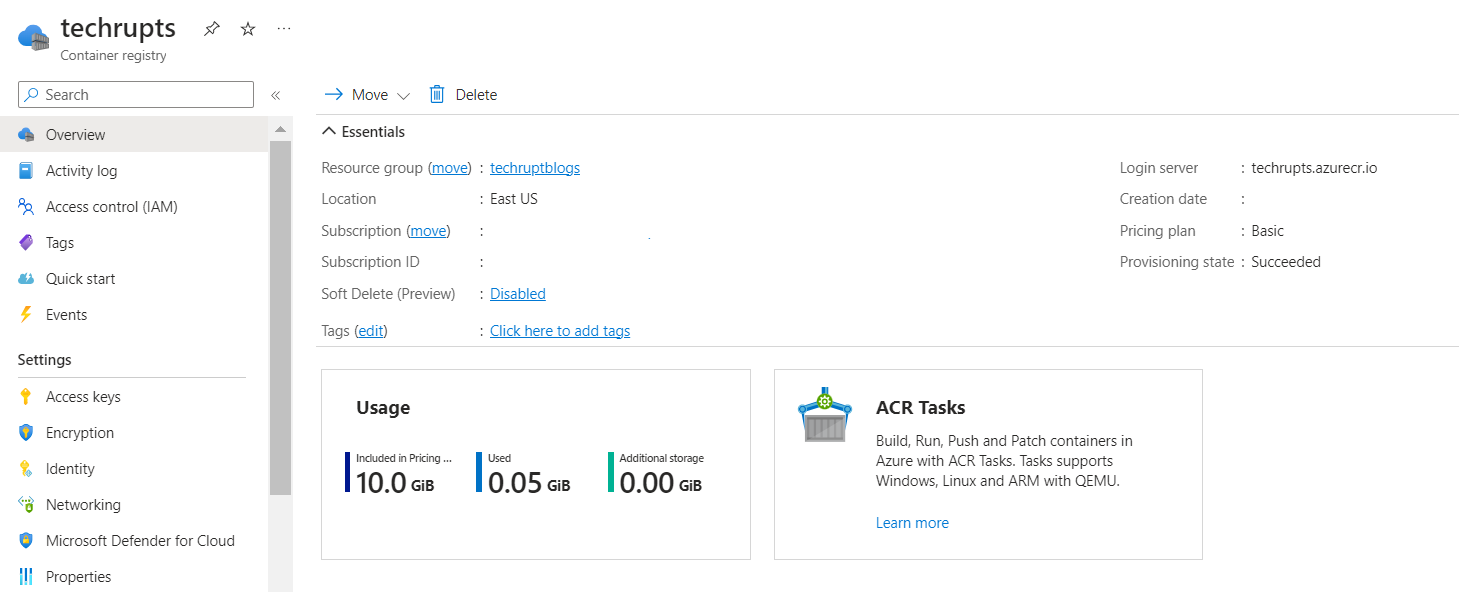
This will take a few minutes to set up your container registry. Below is an overview of the Techrupts container registry created:
Set up Managed Identity Access from Web App to Container Registry
Setting up manage identity simplifies the process of managing credentials and authentication by allowing resources to authenticate securely with other Azure services and resources. To enable seamless flow between ACR and App Service, you need to set up managed identity access.
- Open the newly created App Service (techrupsdemo) and navigate to System Assign under Identity on the left menu. Toggle the Status to enable it and click Save:
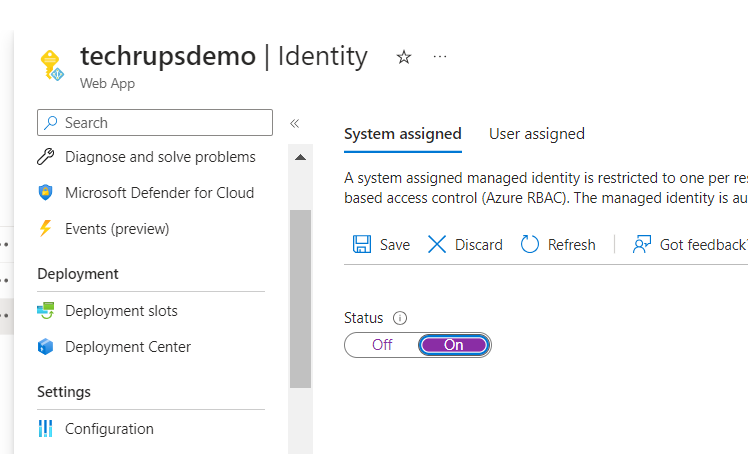
By turning this on, Azure assigned an identity to App Service, which enables it to authenticate itself with Azure AD and access other resources.
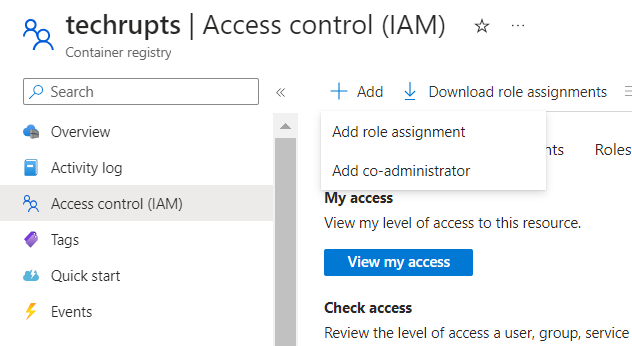
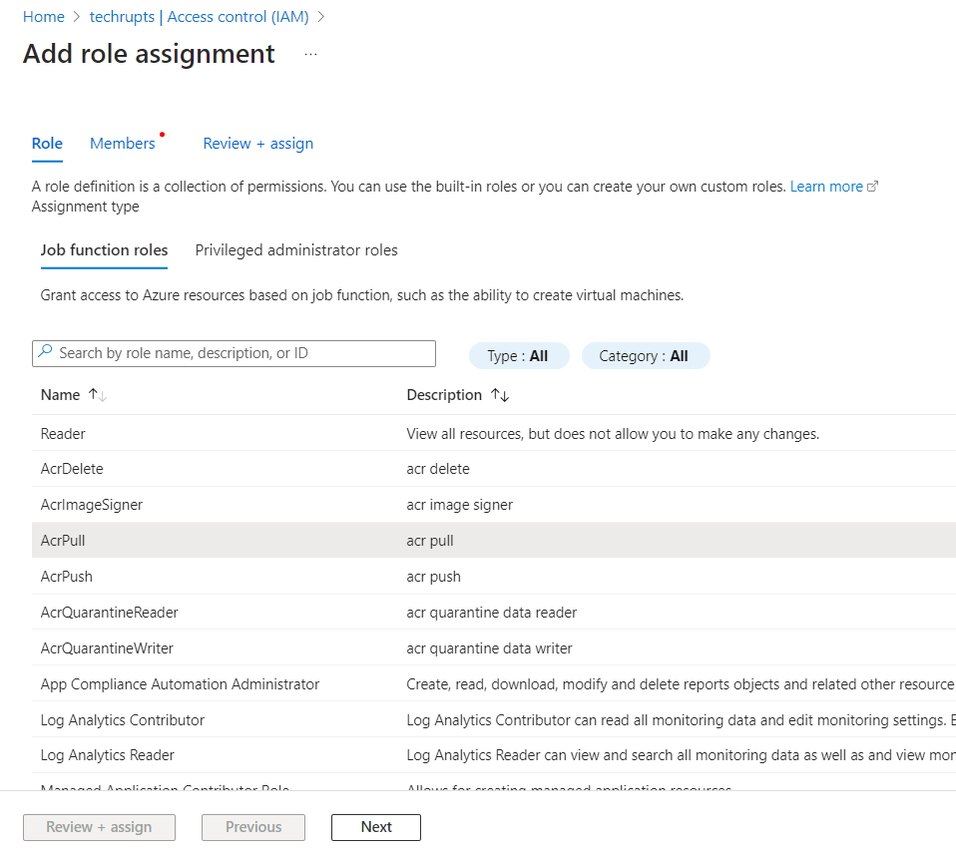
- On Container Registry, locate Access Control (IAM) on the left menu. Click +Add and select Add Role Assignment:
- On the Add role assignment window, select ACR Pull and click Next:
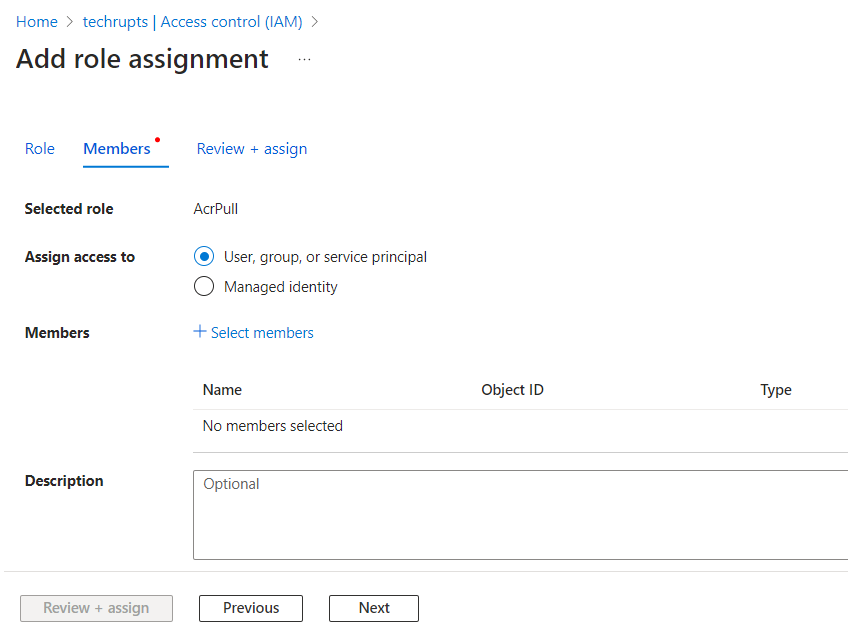
- On the Members tab of Add role assignment window, click + Select members to add the ACR pull role to App Service managed identity:
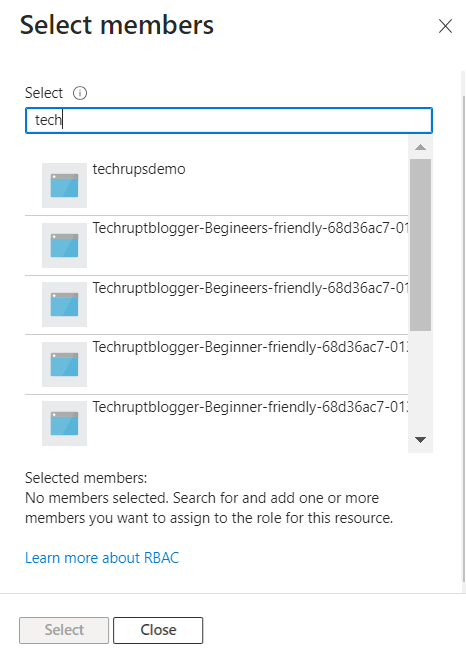
- Search and select the App Service name from the list and click Select to save:
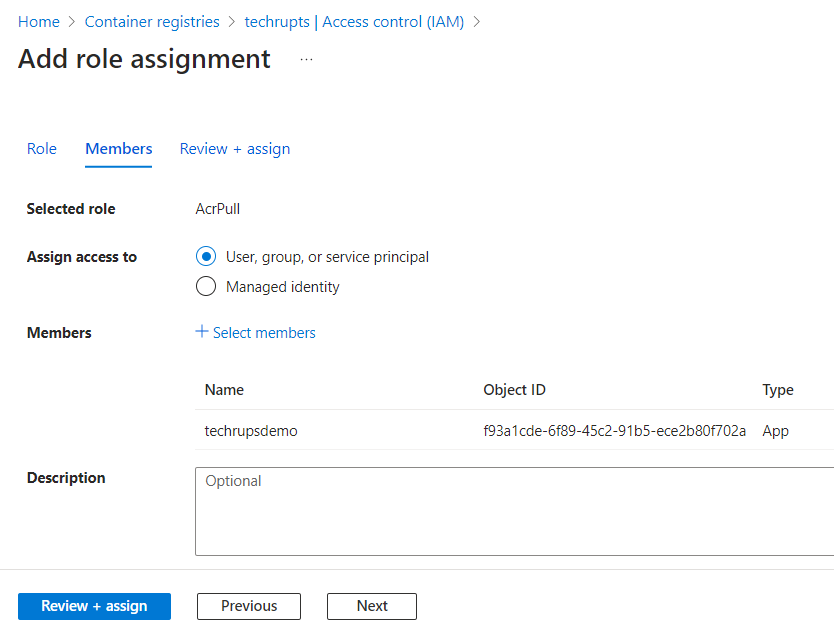
- You will be taken back to the Members tab. Click Review + assign and finish the role assignment:
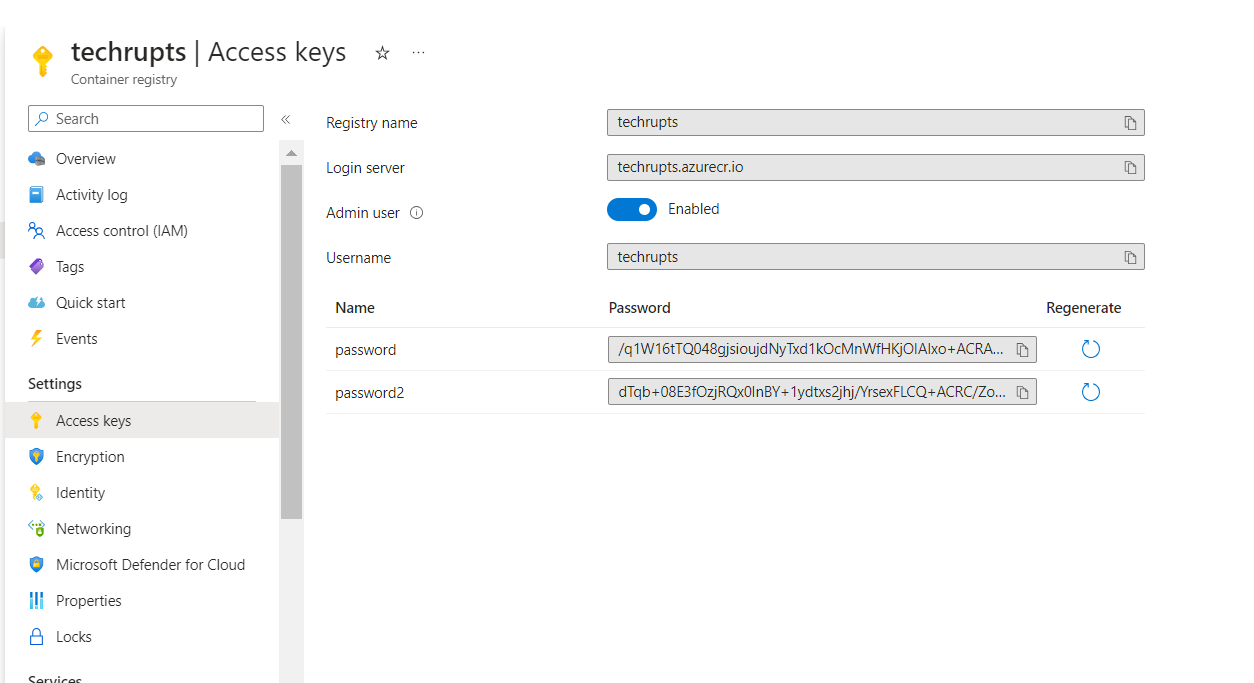
- To enable access credentials for the Container Registry, navigate to Access Keys and toggle Admin user to Enabled. Keep these details handy as you will need this information to authenticate your pipeline later:
Setting up Service Connection on Azure DevOps for Azure Resources
Creating a service connection provides a secure way to establish a connection between your pipeline and external services, in this case, Azure Subscription.
By adding a service connection, your pipeline can securely access these external services during the pipeline execution. If you have this set up proceed already, skip to the next step.
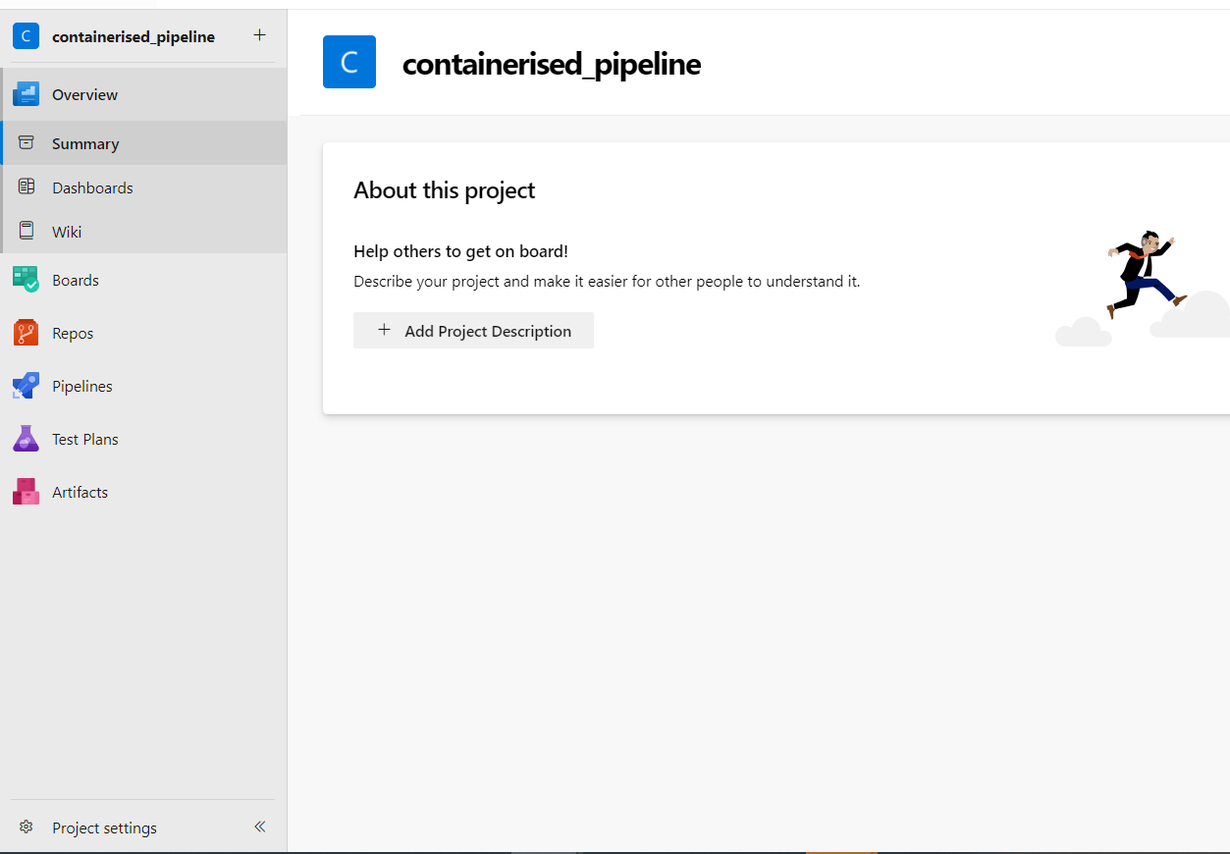
- Open your project on the Azure DevOps portal, and Click on Project Settings:
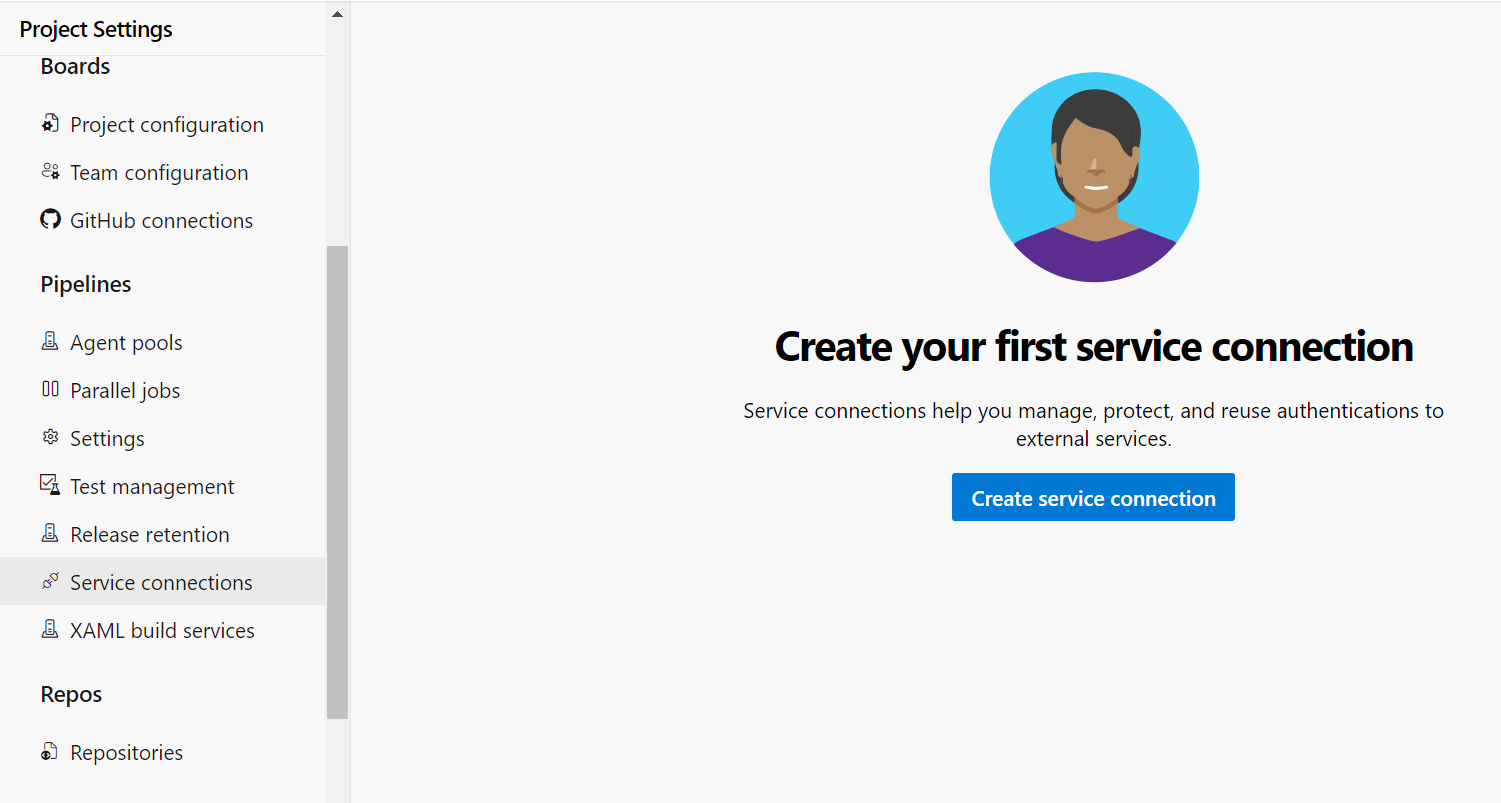
- Navigate to the Service Connections under Pipelines section and click on the Create Service Connections:
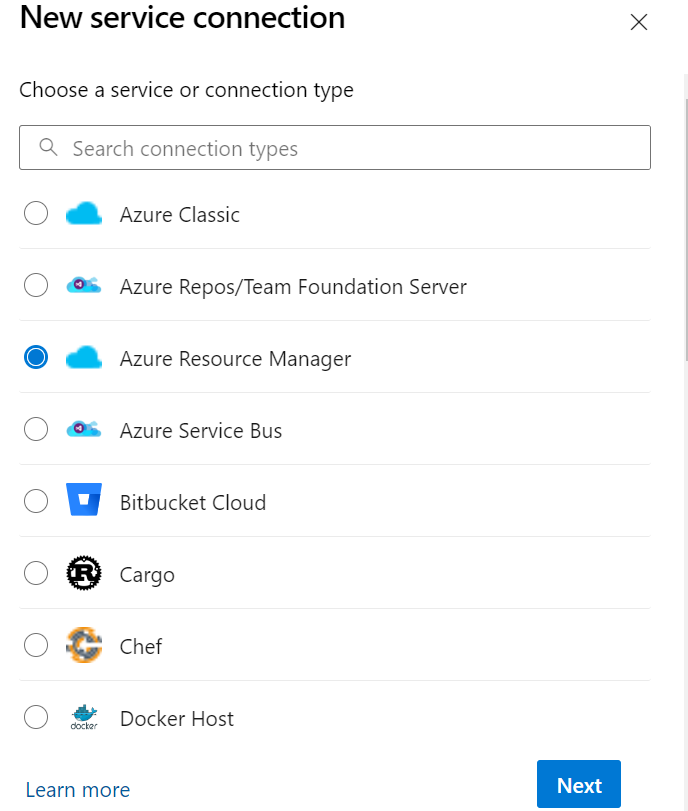
- On the New service connection window, select Azure Resource Manager and click Next:
- Select Service Principal (automatic) and click Next:
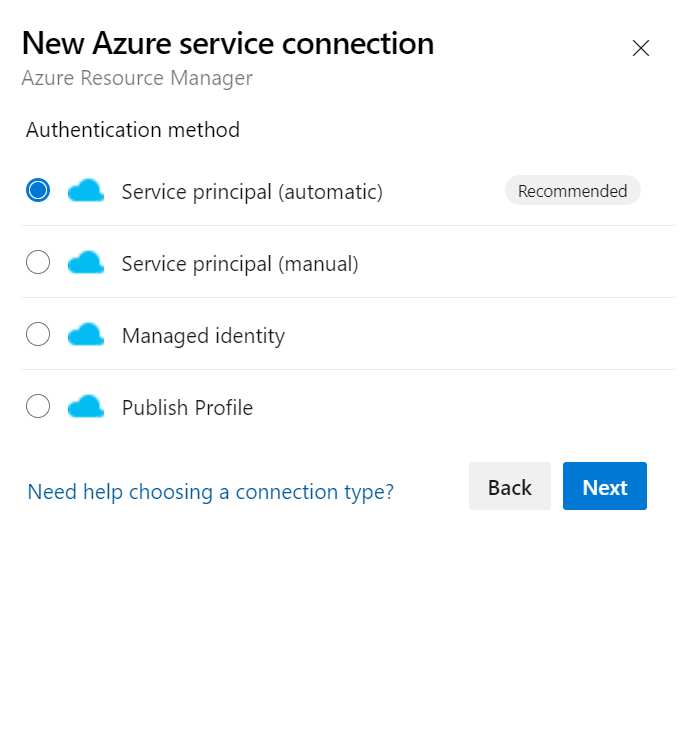
The next screen requires you to authenticate to Azure. Complete the authentication so this can load your active subscription on your account on the next screen.
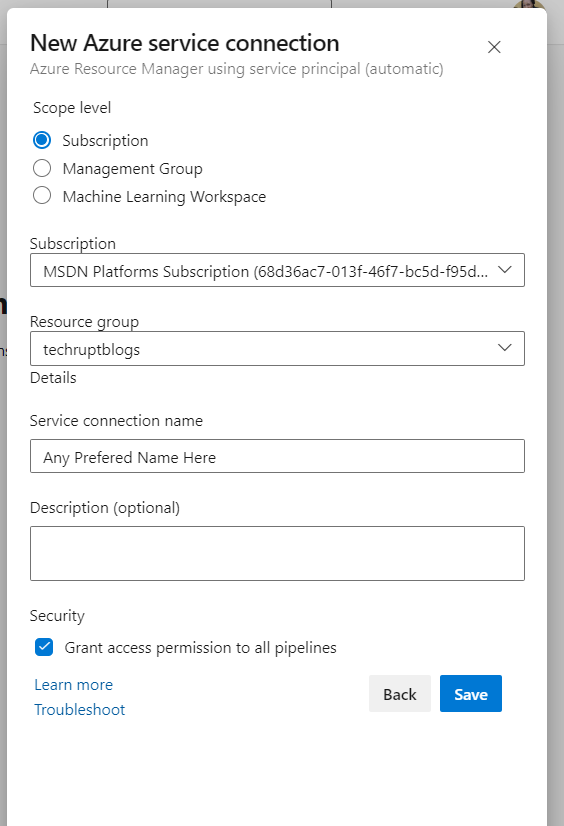
- Select the Subscription and Resource group associated with your Azure resources. Enter the Service Connection name and check the Security box for Grant access permission... Click Save once done:
Set up Azure DevOps CI/CD Pipelines
Now you have your project files on Azure Repo, you need to set up a pipeline to build the image and publish it to Azure Container Registry (ACR) and also a release pipeline to deploy an image to Azure Web App. This will be achieved by configuring a build pipeline and also a release pipeline.
Configuring a Build Pipeline to Build the Container Image
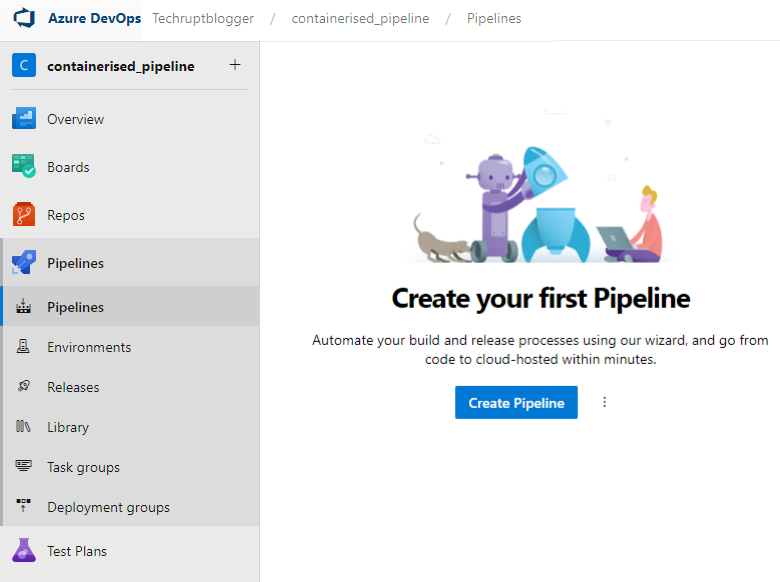
- Inside the Azure DevOps portal, navigate to your project and click Create Pipelines under Pipelines side menu:
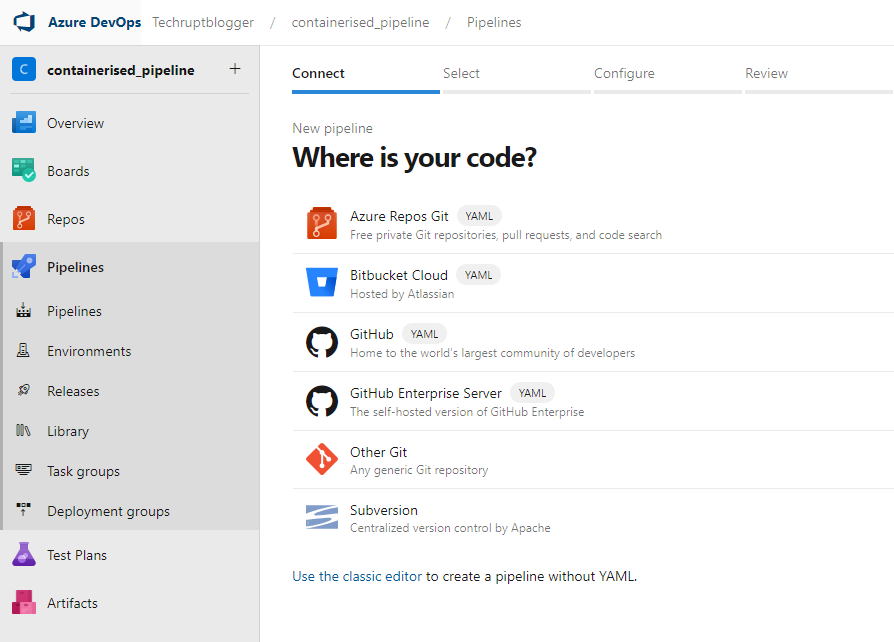
- Select Azure Repo Git under Where is your Code option:
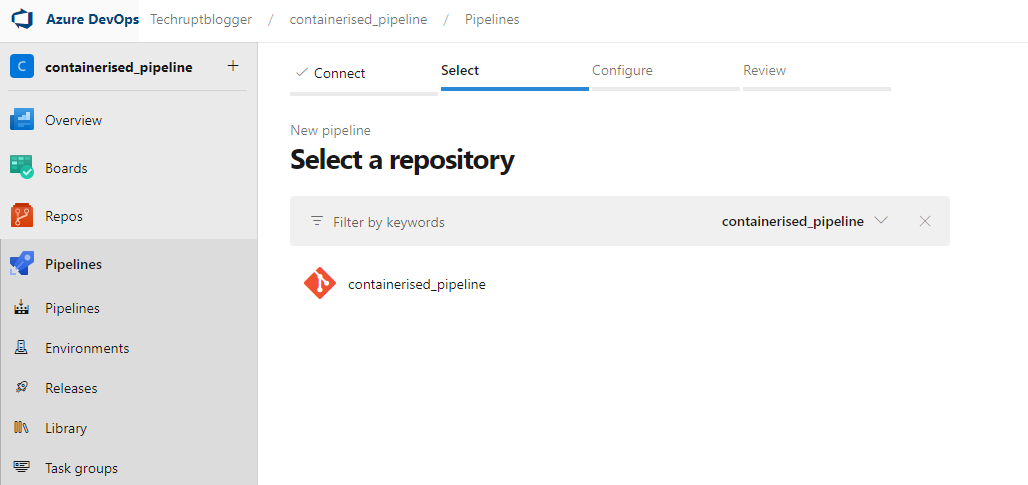
- Select your repository where you have the Node.js App:
- Select the 2nd docker option- Build and push an Image to Azure Container Registry from the list under Configure tab:

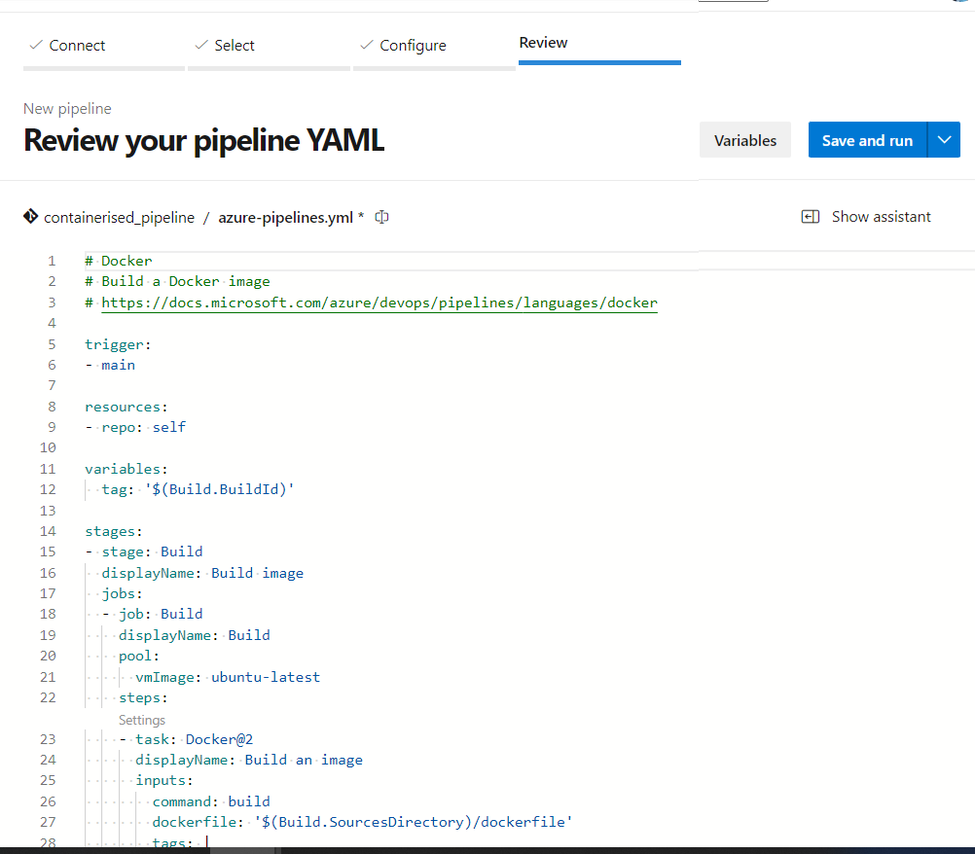
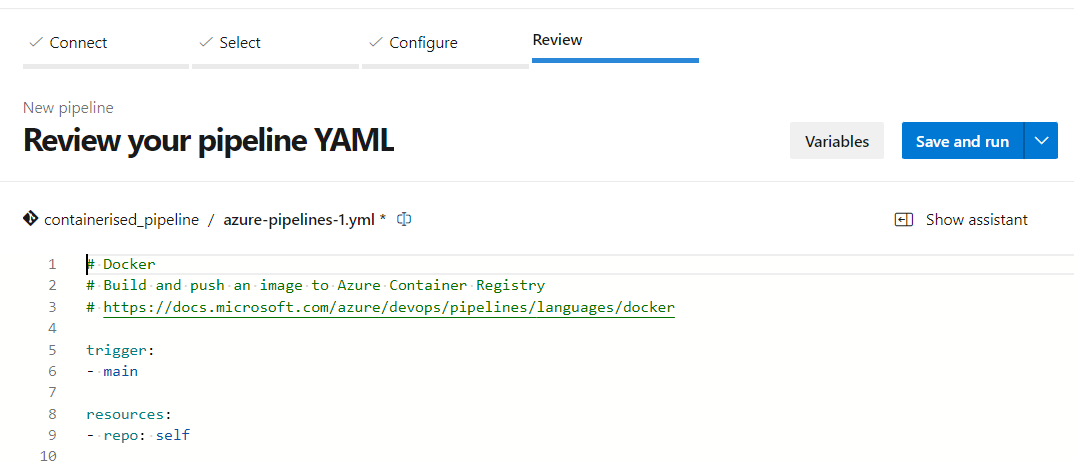
- The following window displays the auto generated Yml file (azure-pipelines.yml) that builds your container image and publishes it to ACR, you may want to edit and make changes to the file otherwise, click Save and Run:
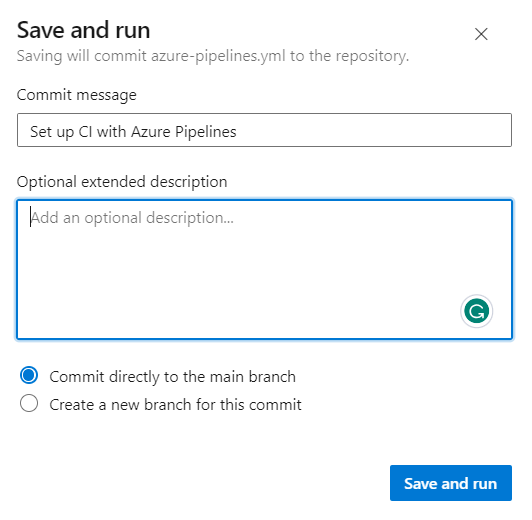
- Enter the commit message or use the default, this is needed as a comment to commit the build template file to your project repo, then click Save and Run:
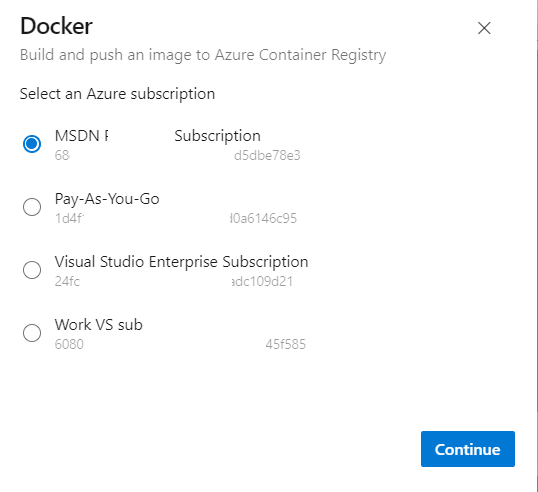
- This opens a few sub-windows, the first window requires your subscription, select the same subscription where you have your resources and click Continue:
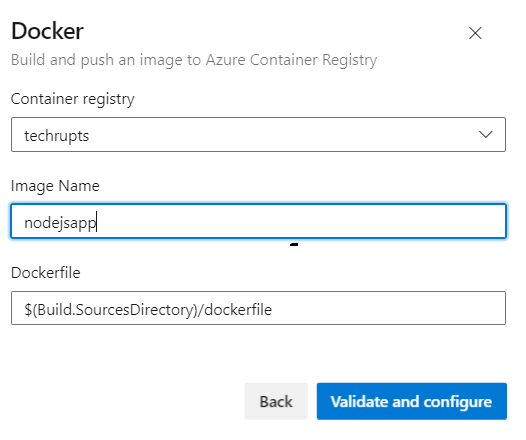
- Select the container registry, enter a name for your new image, and click Validate and Configure:
- This returns to the review window, click the Save and Run button again to complete the process and run the pipeline:
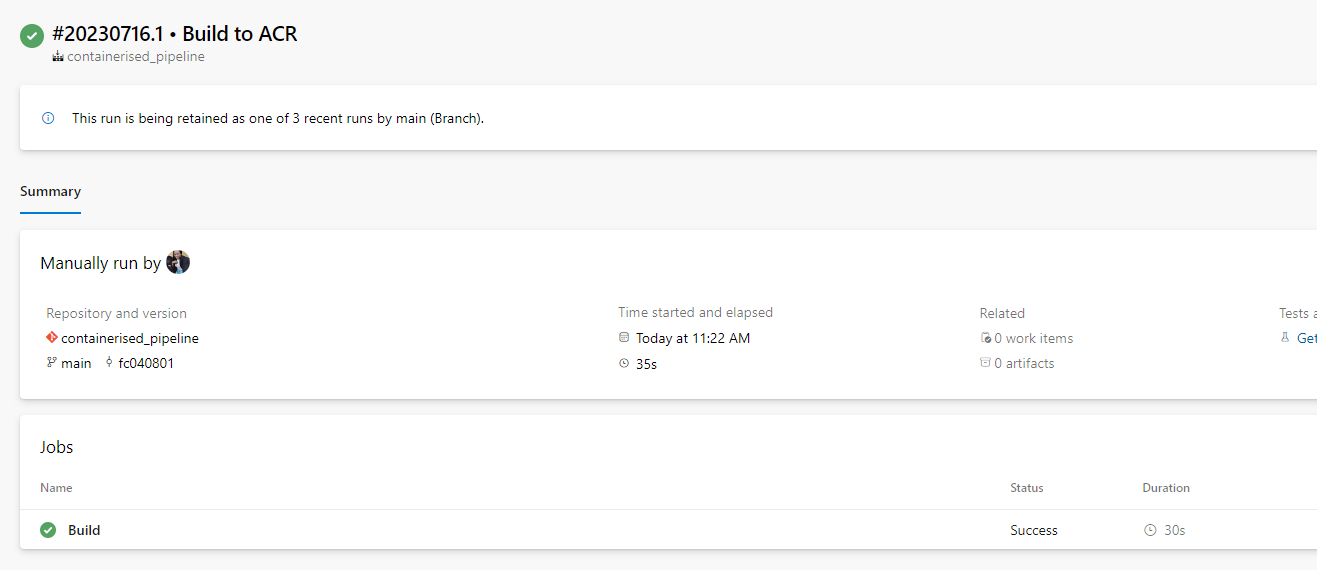
Once the pipeline execution is started, the build summary page is displayed. This is to enable you to monitor to your pipeline progress.
- To confirm your pipeline was successful, you will see the job status as Success:
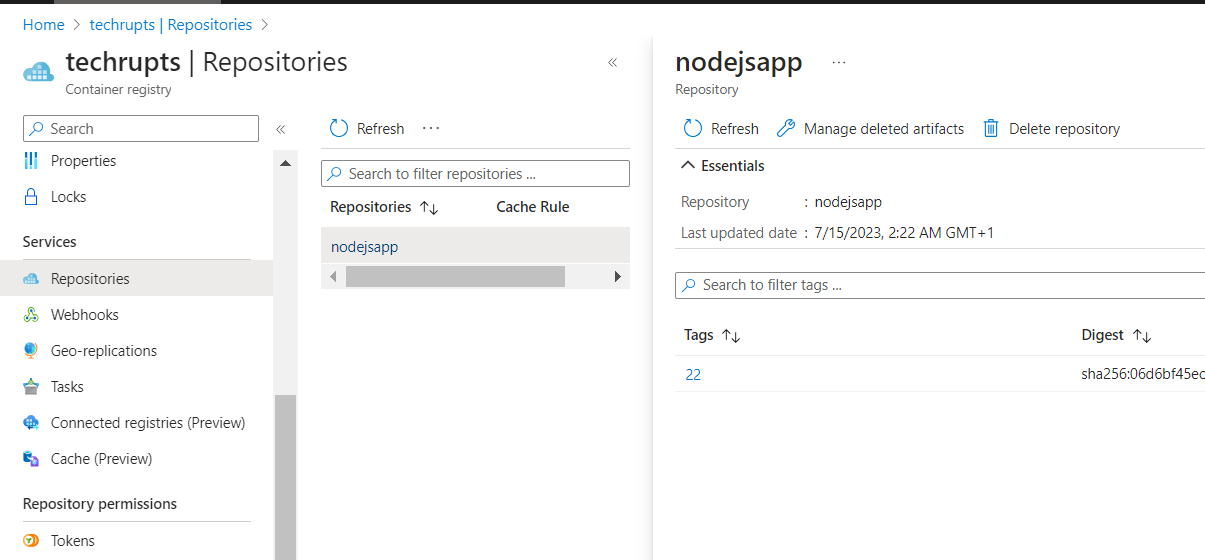
- Navigate to Azure portal, open Container Registry, navigate to Repositories, and confirm the image is published. Take note of the Tag as this will be referenced later:
Configuring Release Pipeline for Deployment
Now you have successfully built an image and published it to ACR, you configure a release pipeline to pull this image to a web app (App Service)
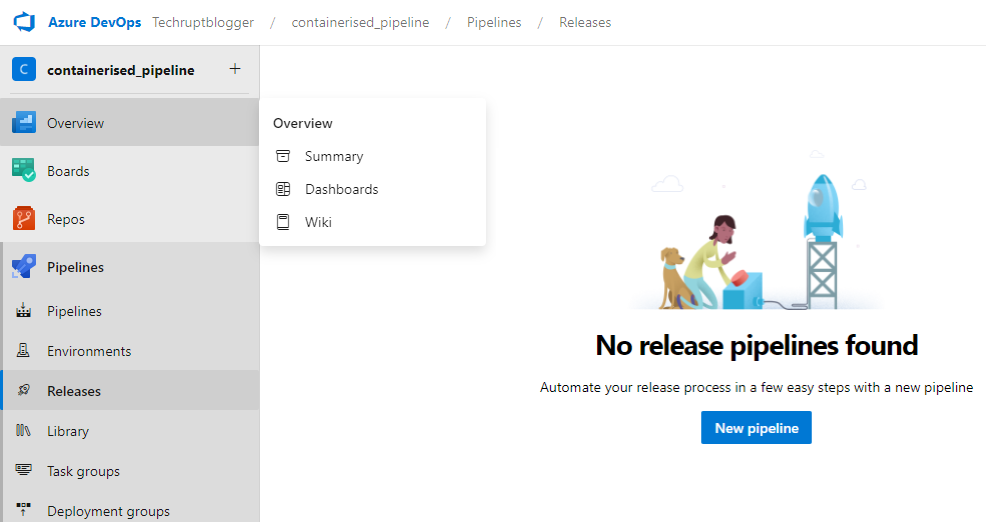
- Inside the Azure DevOps projects under the Pipelines menu, click Releases and New Pipeline to create a new release pipeline:
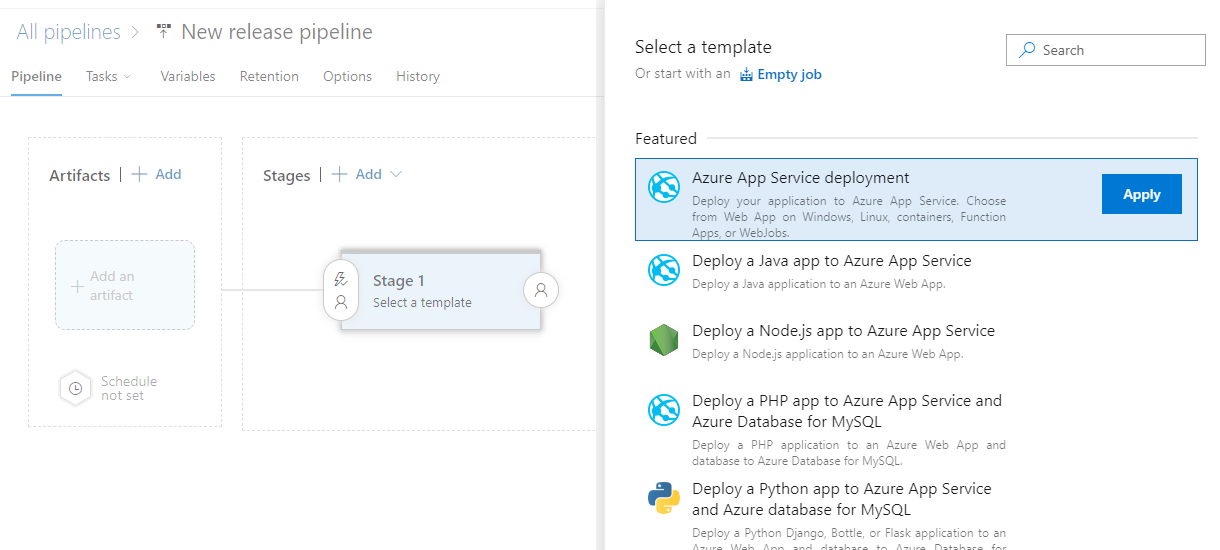
- On the Select a template window, select Azure App Service Deployment and click Apply:
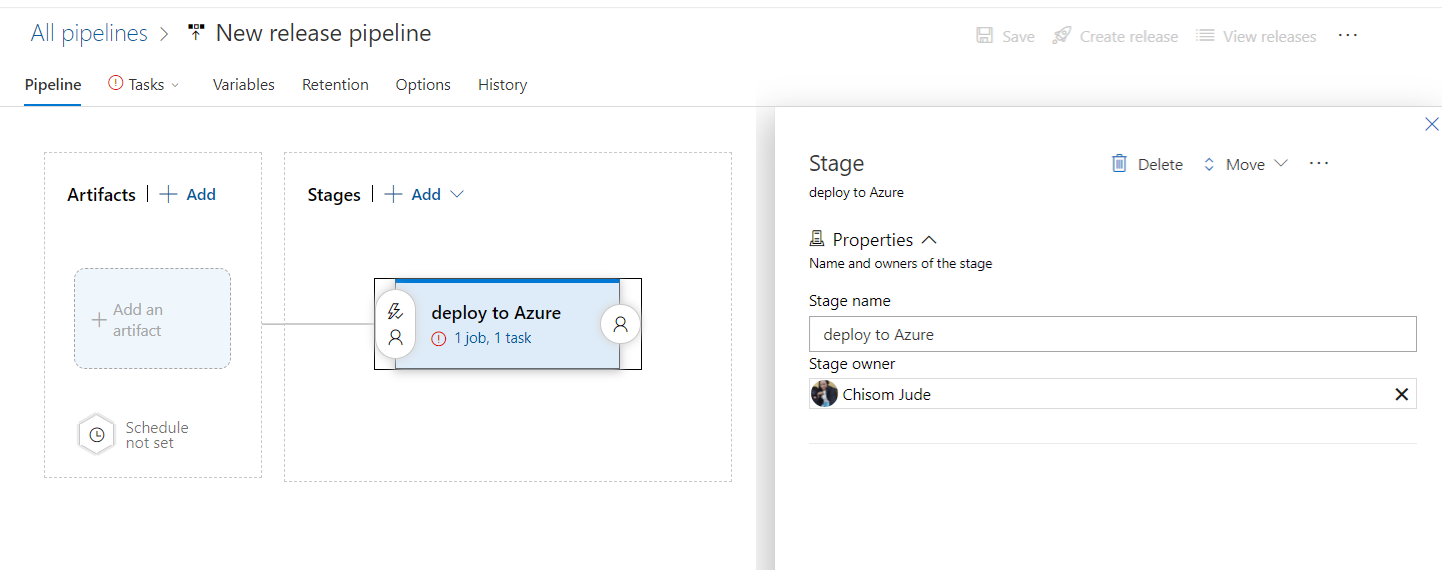
- Enter a name for the pipeline stage and click on the Stage box to expand the settings:
- On the Pipeline stage settings, select your Subscription and click Authorize:
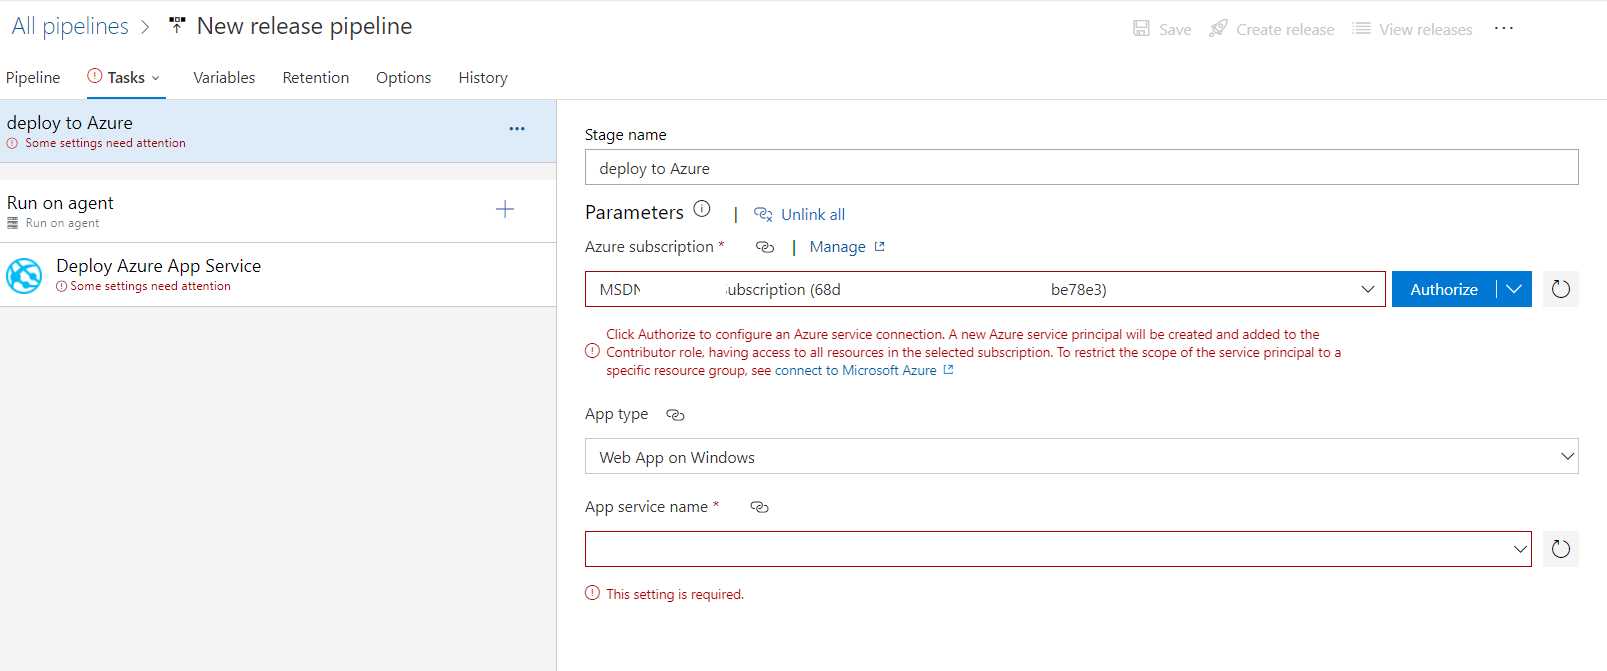
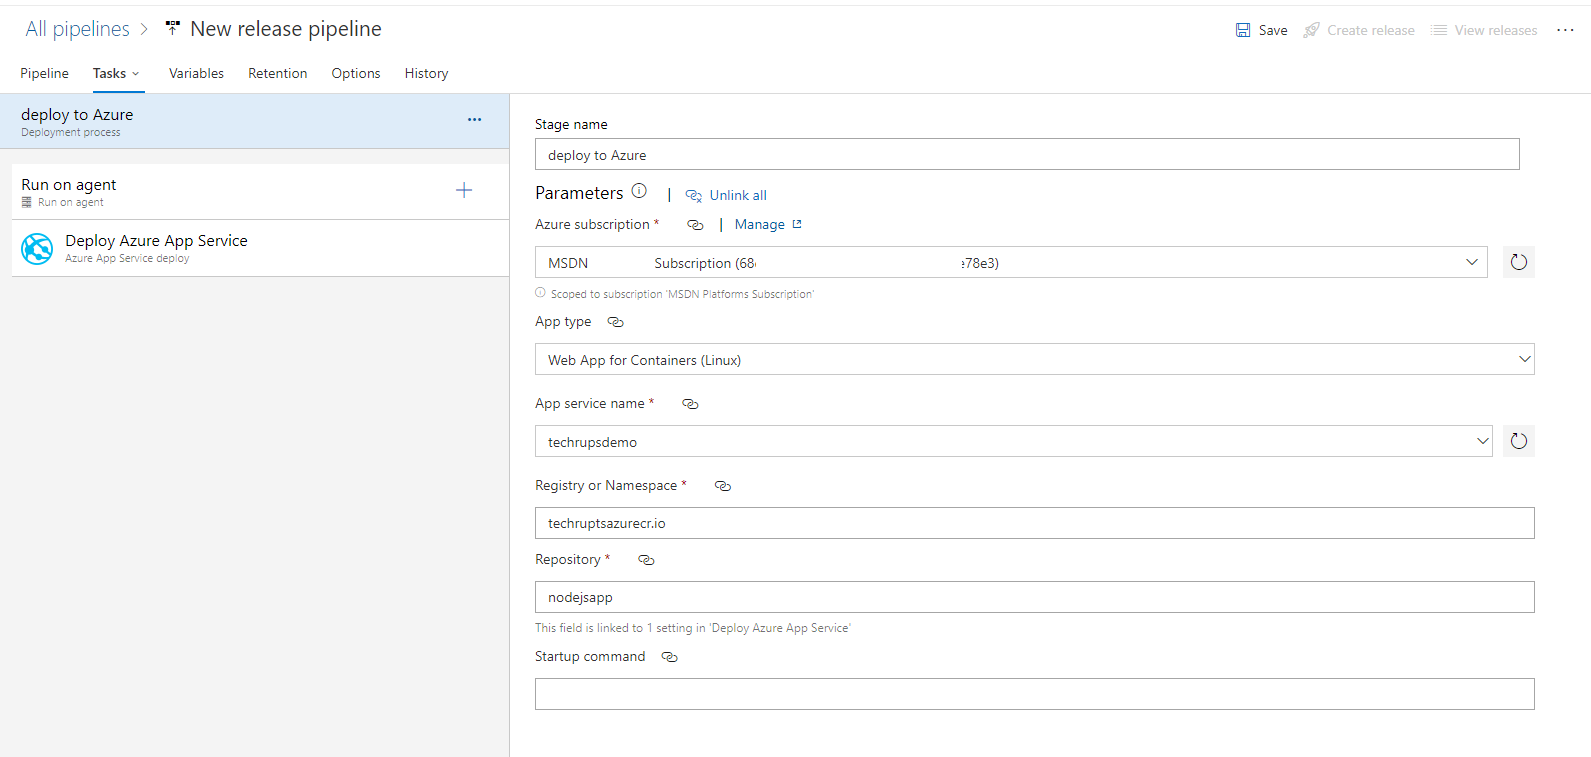
- Fill out the following information and click Save:
- On the App service type, select Web App for Containers
- Select the App Service name created earlier as the destination resource.
- On Registry or Namespace, enter <registryname>azurecr.io. <registryname> should be changed to the name of your container registry.
- On Repository, enter the Image name of your choice:
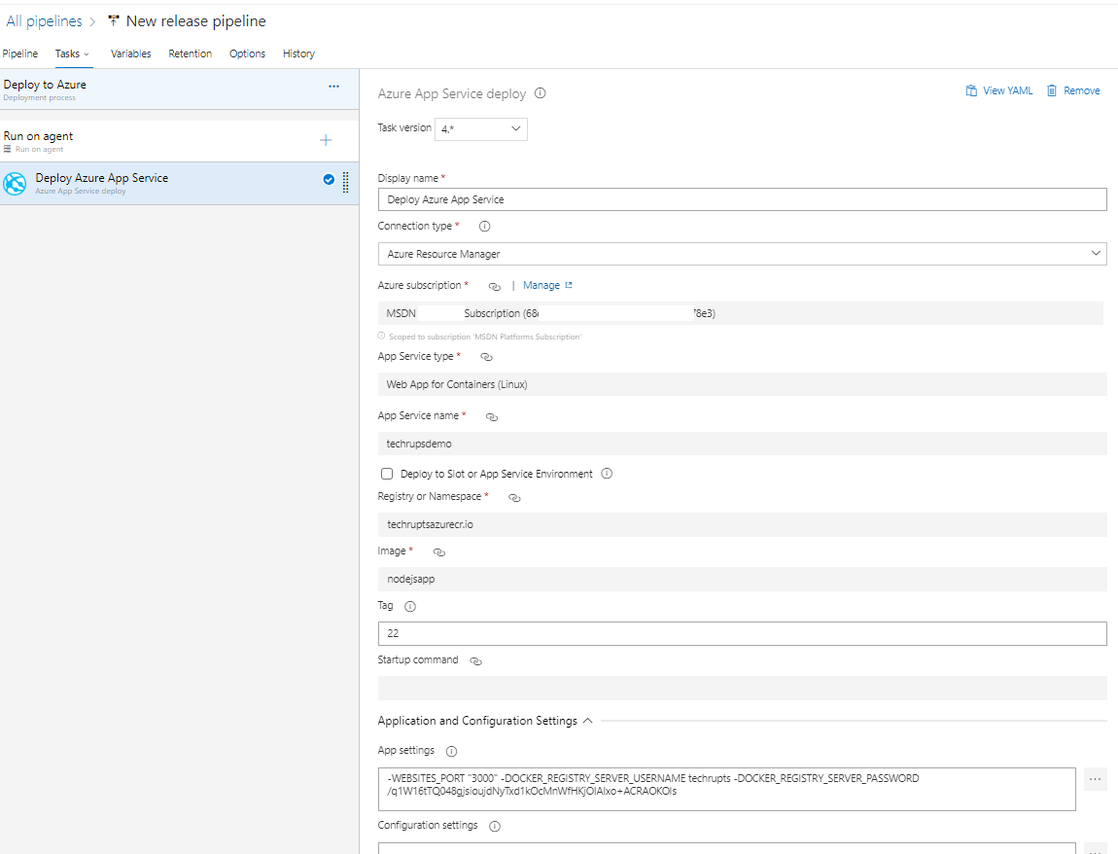
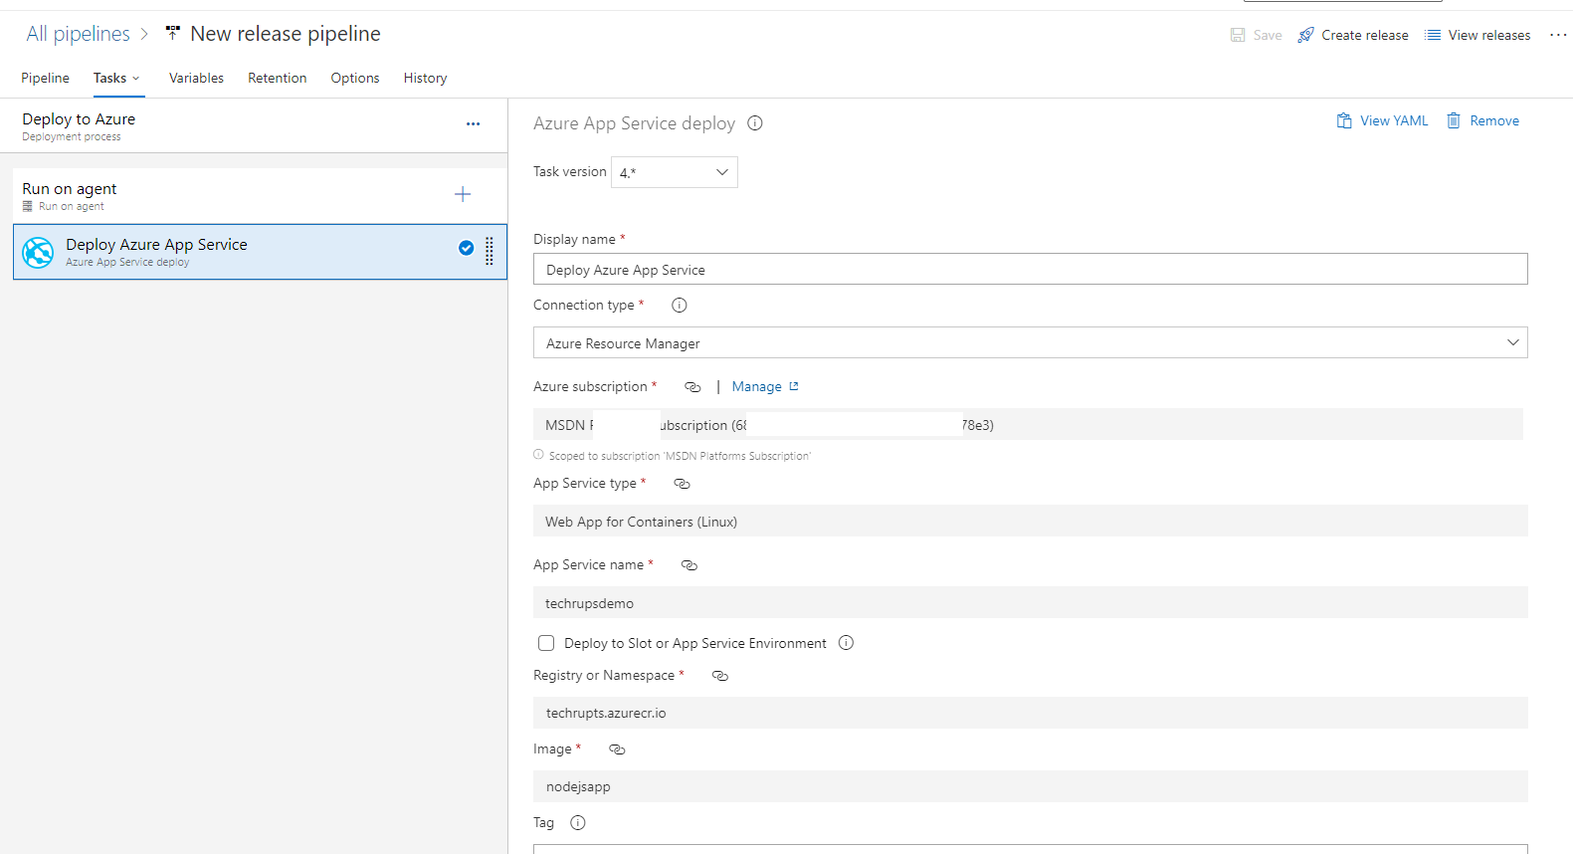
- Click on the Deploy Azure App Service task, you will notice every other option is auto-filled and greyed out except for Tag. Enter your image tag number as seen on your image repository (Review Configuring a Build Pipeline to build the container image)
- Expand the Application and Configuration Settings and click the three dots beside the App Service setting:
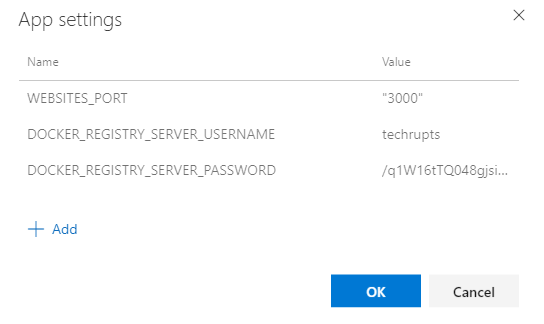
- This opens the App Settings window, add these configurations and click Ok.
- WEBSITE_PORT “3000” (ensure this is the same port configured on your dockerfile)
- DOCKER_REGISTRY_SERVER_USERNAME <enter credential as send on container registry admin access>
- DOCKET_REGISTRY_SERVER_PASSWORD <enter credential as send on container registry admin access>
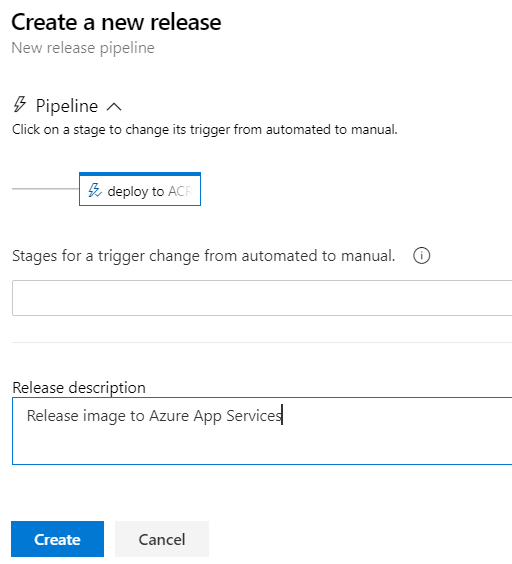
- Once saved, the Create Release button will be active, click Create Release:
- On the Create a new release window, ensure to check the release box to highlight a blue color and click Create. This changes the stage from Manual to automated:
Validating Deployment Progress
To confirm the status of your Release Pipeline, you have to open the release and locate logs.
- Click on Releases-1 under the Releases:
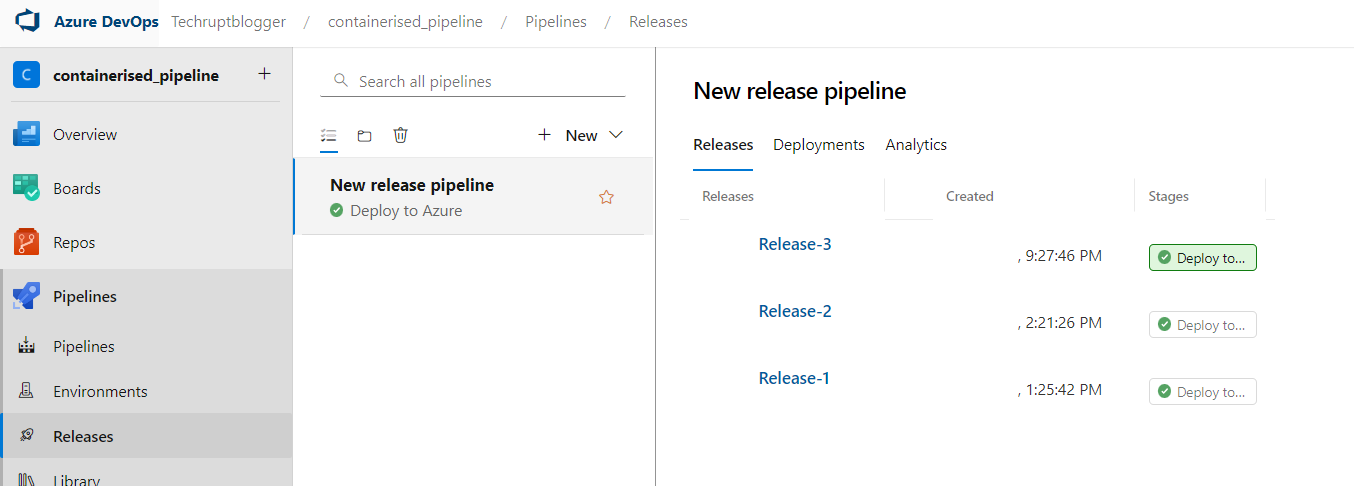
- As the release and stages box opens, click on Logs in the Stages column:
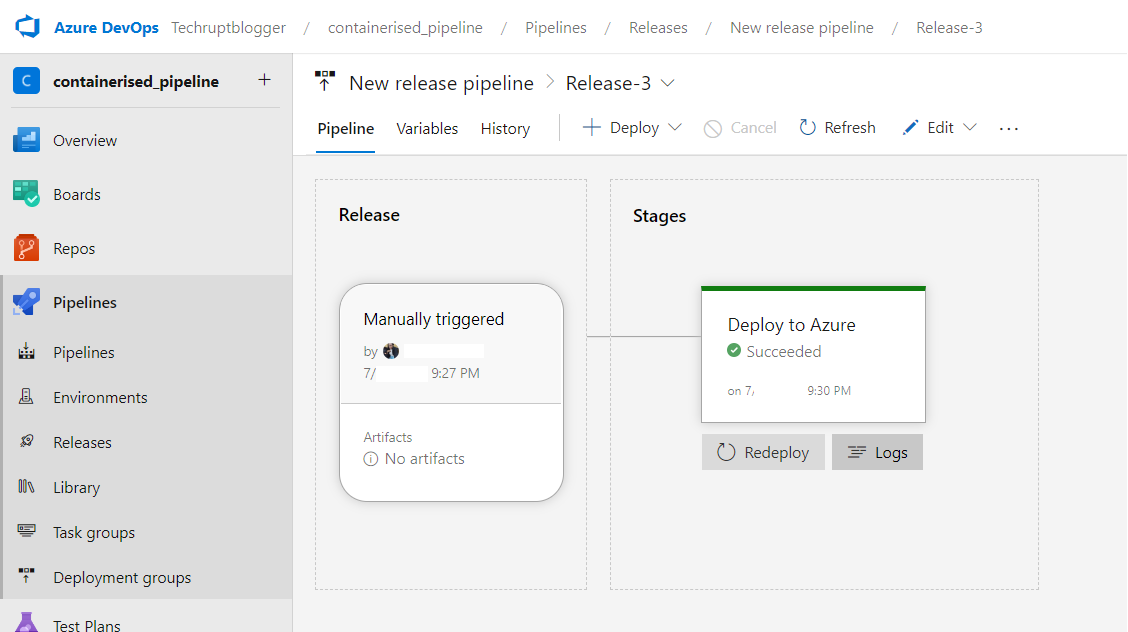
- This opens the deployment progress. You can monitor the progress of this release and ensure it deploys to App Service without any error:
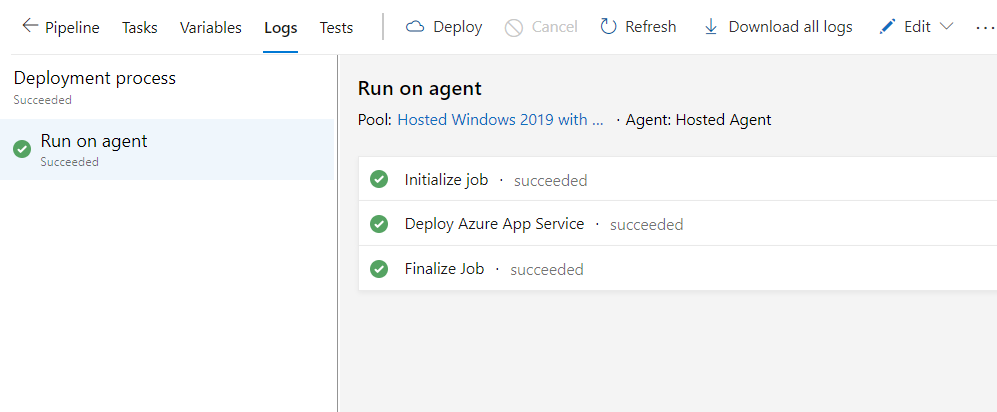
- On completion, navigate to App Service URL, and you will see a simple Hello world displayed:
Conclusion
Containerized pipelines with Azure DevOps offer a transformative and flexible approach to application deployment. By leveraging the benefits of containerization, developers can achieve improved portability, scalability, and consistency across environments.
This article provided a step-by-step demo of building a containerized pipeline for a Node.js application using Azure DevOps. From project setup to configuring CI/CD pipelines and monitoring deployment progress, it covered the essential components for successful deployments. Embracing containerized pipelines with Azure DevOps empowers development teams to streamline workflows and deliver high-quality applications efficiently.


