


It has never been any easier to de-couple your web application functionality and leverage serverless resources to handle some of the application workloads. The same can go for any production application using serverless code to dynamically update the data in real-time.
Azure Functions has provided a seamless and simple experience when working with serverless code and integrating it with your existing codebase. Which in return made it fairly easy for newbies to get started with serverless knowledge.
I’ll show you how you can leverage Azure Function to pull meta-data from multiple websites. I’ll be using a Node JS package called open-graph-scraper that pulls in the meta-information from websites.
If you are looking for a video version of this article, please check out the video below:
What is Header Meta Data?
Did you ever typed in a URL on Twitter or LinkedIn post, and wondered how does the URL gets the card-shaped information automatically? Let’s see how this is exactly done!
Meta information is used by various social media and open graph platform to create display card when a URL is used. Another reason for using meta-information is to increase your SEO visibility. There are many platforms that do this for you automatically, like Ghost, WordPress, etc. However, when working with custom build websites, you’d have to manually put in the information for the search engine to crawl and recognize the information about your website. You would often time go to various websites like heymeta.com or metatags.io to confirm if your website displays the card information.
The article will guide you on deploying an azure function that will display the meta-information inside the webpage to show you the results about any website you query. This project is based on the same idea of pulling-in the live data from your website’s meta-information and confirming if it will display the correct information on social media platforms or not. You can use it to query a website directly for SEO testing or alternatively also add this to your portfolio as a serverless cloud project.
Prerequisites
If you plan to follow along, please make sure you have the following pre-requisites in place:
- Node.JS installed with version below v14.
- Visual Studio Code with Azure Function Extension and Azure Function Core Tools. However, I’ll show you where you can install the extension in later steps.
- Azure PowerShell or CLI Module
- Azure Account and an active subscription
Azure Function Overview
Azure Function is an on-demand serverless compute service resource. Functions allow you to implement and use ‘block-of-code’ available to run on-demand when needed. The resource utilization is handled by the function resource itself that makes sure there’s enough compute available to support the runtime of the code. Some of the command usages of the azure function are to build a web API, process file uploads, serverless workflow, respond to database change, run scheduled tasks, process data in real-time.
That being said, you can run your code chunk to offload application tasks to function and let it handle the workloads for you without worrying about the memory, CPU, and other resource utilization.
Setting up the Function Locally
The first step towards using the Azure Function is to install the Azure Functions Core Tools. Follow the link and install the tools before proceeding. Since we are going to create a Javascript function, you need to install NodeJS version 12 at this point.
Once you complete the installation of function tools and nodejs, follow through with the rest of the steps to create your function.
Creating a New Function
After installing the Azure Function tools, you should be able to test the installation by using the following command in any terminal. Also, use the second command to confirm your installation of the Az PowerShell/CLI module.
func --version# PowerShell ModulePS> (Get-Module -ListAvailable Az).Version# CLI Module$> az --versionNow it’s time to create your function. Run the following command to build your function.
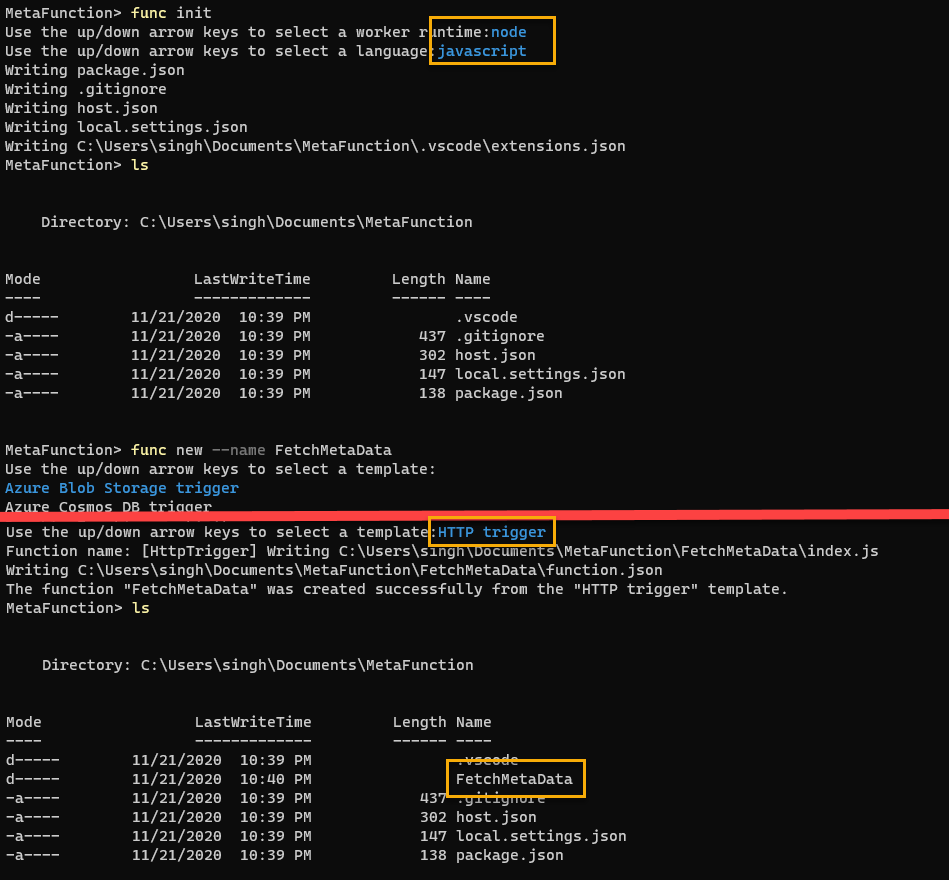
PS> func initThis would ask you to confirm the worker runtime and language for the runtime. Choose “node” as runtime and “javascript” as the language to use. The end results should look something like this:
MetaFunction> func initUse the up/down arrow keys to select a worker runtime:nodeUse the up/down arrow keys to select a language:javascriptWriting package.jsonWriting .gitignoreWriting host.jsonWriting local.settings.jsonWriting C:\\Users\\{user}\\Documents\\MetaFunction\\.vscode\\extensions.jsonMetaFunction> ls Directory: C:\\Users\\{user}\\Documents\\MetaFunctionMode LastWriteTime Length Name---- ------------- ------ ----d----- 11/21/2020 10:39 PM .vscode-a---- 11/21/2020 10:39 PM 437 .gitignore-a---- 11/21/2020 10:39 PM 302 host.json-a---- 11/21/2020 10:39 PM 147 local.settings.json-a---- 11/21/2020 10:39 PM 138 package.jsonThe next step is to create the function itself with HTTP Trigger. Use the following commands to do so. Feel free o use any name for the function instead of FetchMetaData that I’m using. When prompted for the template, choose HTTP trigger and hit enter.
PS> func new --name FetchMetaDataUse the up/down arrow keys to select a template: **HTTP trigger** The whole terminal session should look similar to this.
Installing NPM modules and VS Code Extension
Once the function is ready, use the VS Code to open the folder that contains the function components. You need to add some node packages for use in the script. Run the following commands in the terminal while inside the folder, to install packages required to run the scraper.
PS> npm install open-graph-scraperWith that, use the following screenshot as a reference to search for Azure Function Extension that you’ll need to push the code to Azure Subscription. I’d highly recommend installing Azure Function and Azure Tools to get the best experience while working with Azure Resources using VS Code.

Writing Code to Pull Header Data
Now it is time to write the code for the header metadata. You’ll modify the already available index.js file inside the folder named after your function name. In my case, it is called FetchMetaData. Follow the steps in the VS Code:
- On the left side panel, navigate inside your function folder and open
index.jsfile. - Replace the code with the following snippet.
module.exports = async function (context, req) { const ogs = require("open-graph-scraper"); const options = { url: `https://${req.query.url}` }; const data = await ogs(options, (error, results, response) => { return results; // This contains all of the Open Graph results }); console.log(data); context.res = { body: data, };};Here’s breakdown of each line if you need detailed explanation.
- OGS variable is used to call out NPM package to use for the script
const ogs = require("open-graph-scraper");- The options variable takes in the request as part of the URL so you can query webpages by feeding the URL at runtime. You’ll see the final URL with the URL passed in as a parameter.
const options = { url: `https://${req.query.url}` };- The data variable performed the request on the URL and fetches the results which contain all the open graph information.
const data = await ogs(options, (error, results, response) => { return results; // This contains all of the Open Graph results});- This part is optional as it will print the results inside the terminal on the host machine during testing.
console.log(data);- Finally we return the data received from the open-graph on the webpage itself as a JSON data.
context.res = { body: data,};Testing the Function Locally
Now it is time to run the function locally and test the functionality of the code. To run the code, simply run the following command in your terminal while at the root of the function folder.
PS> func startOutput:Azure Functions Core ToolsCore Tools Version: 3.0.2996 Commit hash: c54cdc36323e9543ba11fb61dd107616e9022bbaFunction Runtime Version: 3.0.14916.0Functions: FetchMetaData: [GET,POST] <http://localhost:7071/api/FetchMetaData>For detailed output, run func with --verbose flag.[2020-11-22T23:41:11.100Z] Worker process started and initialized.You should see a URL and logs in the terminal session as you trigger the function itself. Use the URL mentioned in the terminal and append some additional information that will help you get the meta-data. Remember, you used req.query.url as part of the URL in the code? You’ll need to pass in the parameter url so that it can be received and processed by the code.
https://localhost:7071/api/{funcName}?url={website.com}Here’s an example of results that you’ll see when a URL is passed in as a request parameter. It should also print the same information in your terminal session.

Deploying Function to Azure
You made it this far! Now the last step is to deploy this to the Azure Function resource in your Subscription. I’ll be using VS Code extension as it will let me create the resource and also deploy the function without leaving the VS Code session. Follow the steps below if you are following with VS Code:
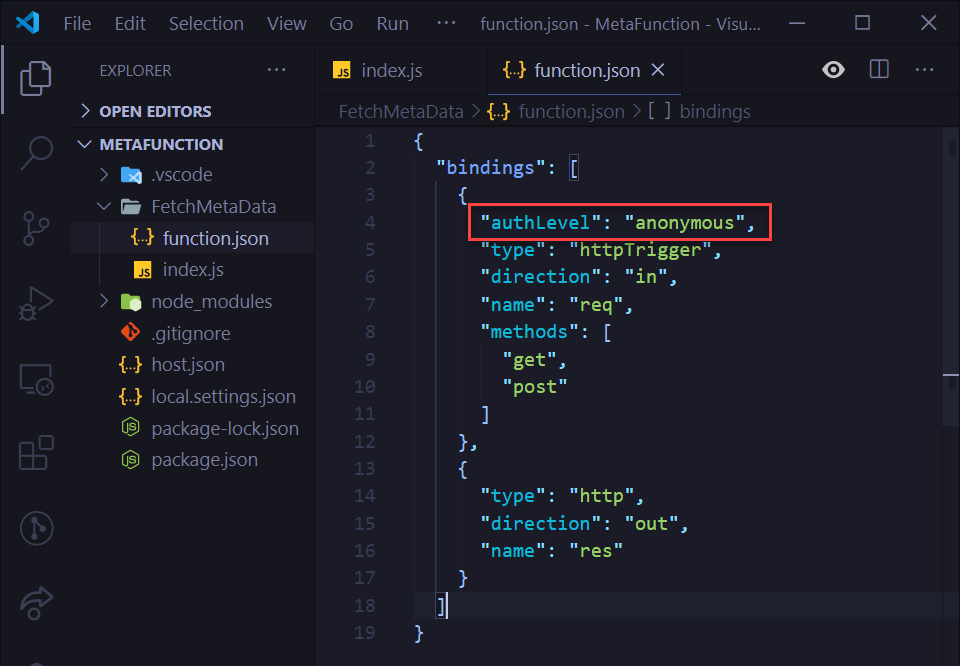
Before you publish this code to Azure, you should change the function auth type so that it’s available for use without any token. I’m doing this for testing only, DO NOT DO THIS, if you don’t want your function to be open to the internet without any security token.
- Open the
function.jsonfile and change theauthLeveltoanonymousto make it accessible to everyone.
- Navigate to the Azure Extension on the left side blade and click the highlighted arrow to start the deployment.
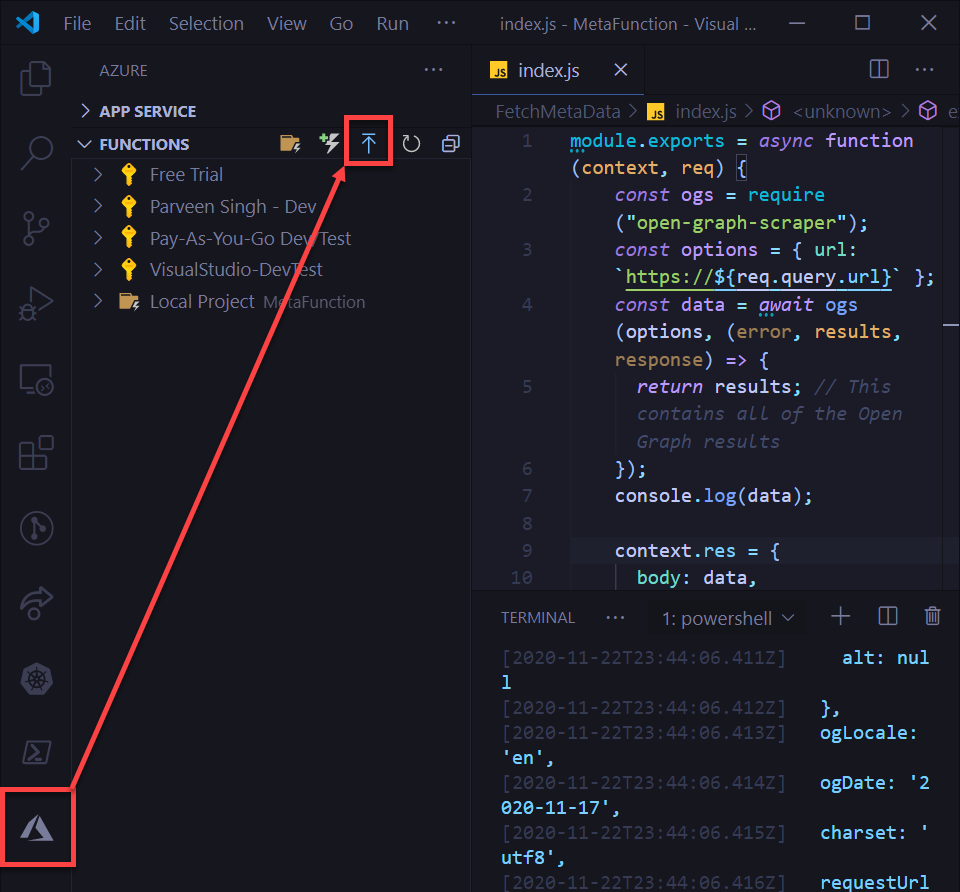
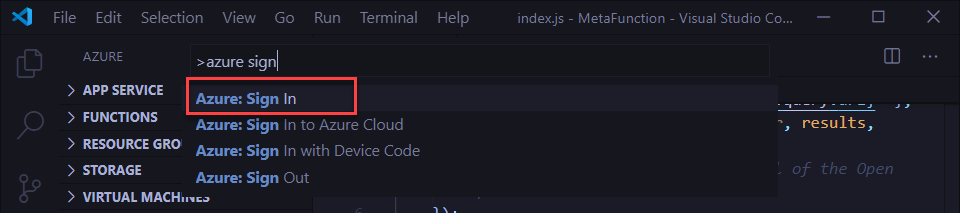
- If you don’t see any resources of subscription in this panel, make sure you are logged in to your Azure account with VS Code. Press
ctrl+shift+Pto open a command search and typesign inwhich should give you an option to sign-in to Azure.
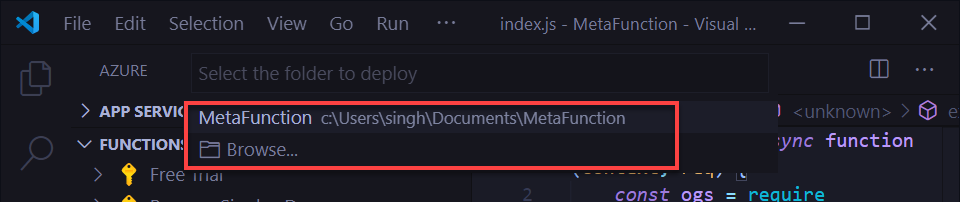
- Select the folder that contains your function code. It should show you the folder automatically based on your VS Code open folder.
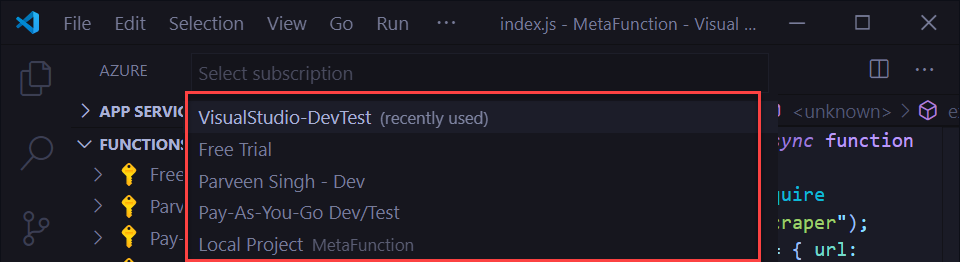
- Next step is to choose the subscription where you’d like to host the function.
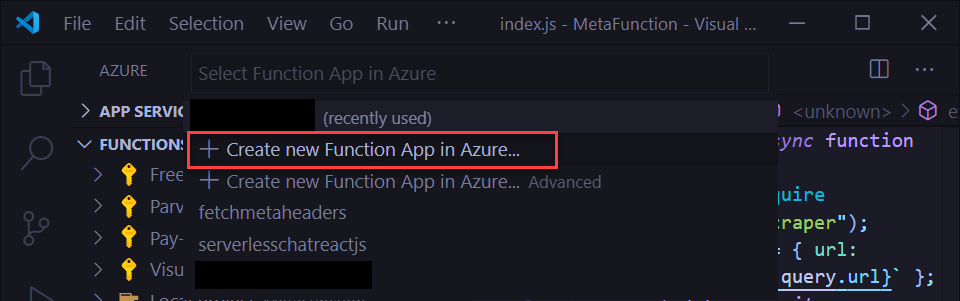
- If you already have a function that you’d like to reuse, this is the time to choose one. If you want to use a brand new function, click “+ Create new Function App“
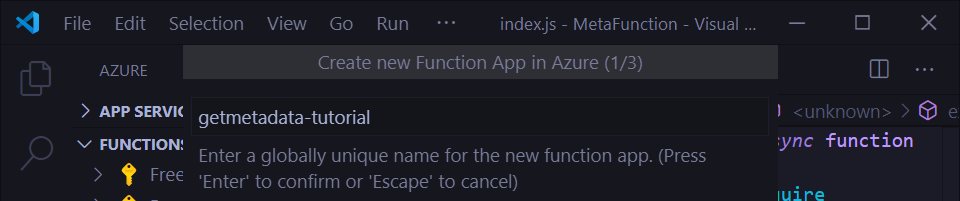
- Choose a globally unique name for your function.
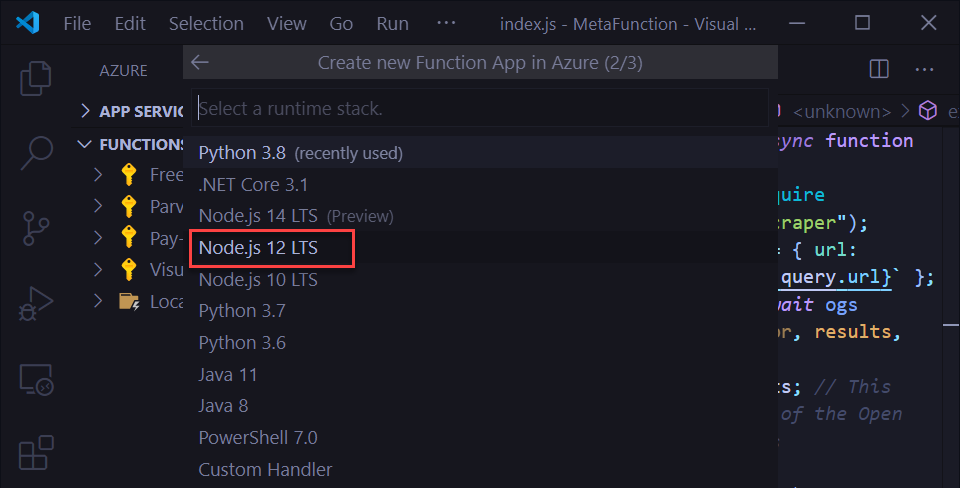
- Select the runtime environment to be “Node.js 12 LTS“
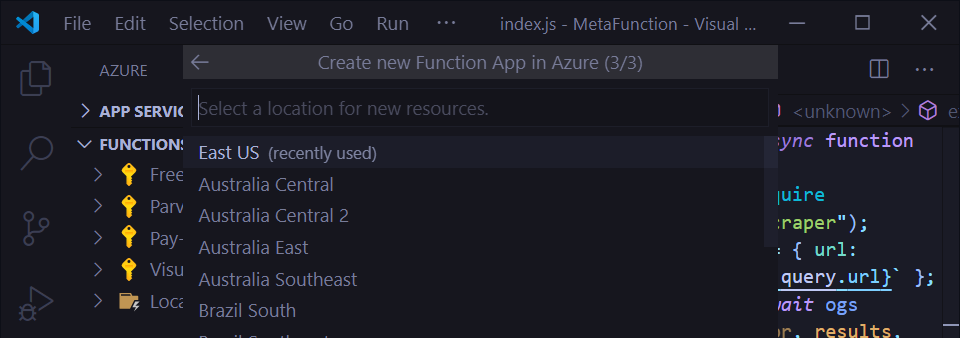
- Finally choose a location where you’d like to host the Azure resource.
- Keep an eye on the bottom left of the screen for the progress on the resource deployment.

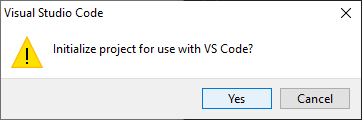
- Once the function resource is deployed, you still have the last step to publish your code to the newly created function. Click “Yes” when prompted to Initiate the project.
- Again, keep an eye on the bottom left for the code initialization on your subscription. Click “View Output” to see the results for your function app.

- The output terminal contains a URL that you can access directly now using a web browser.
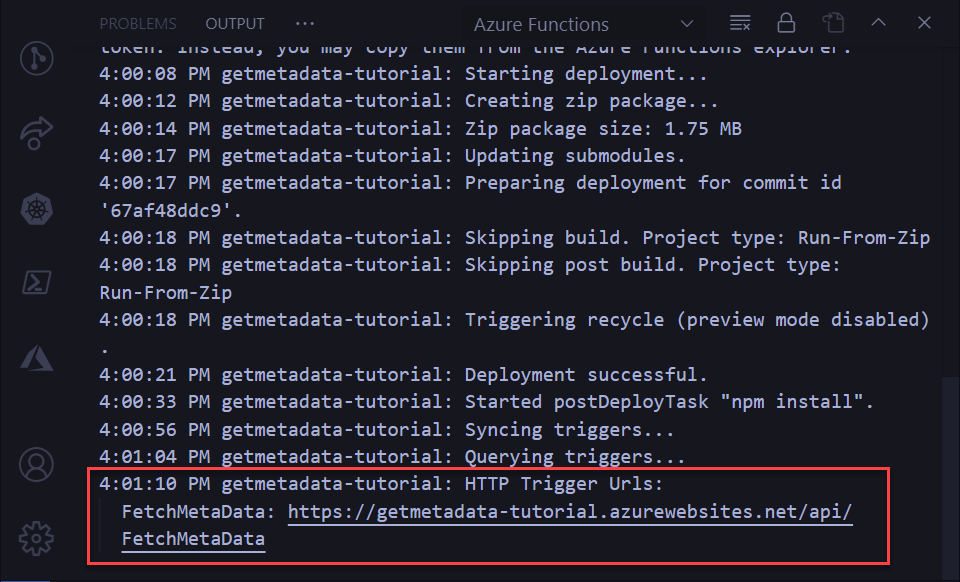
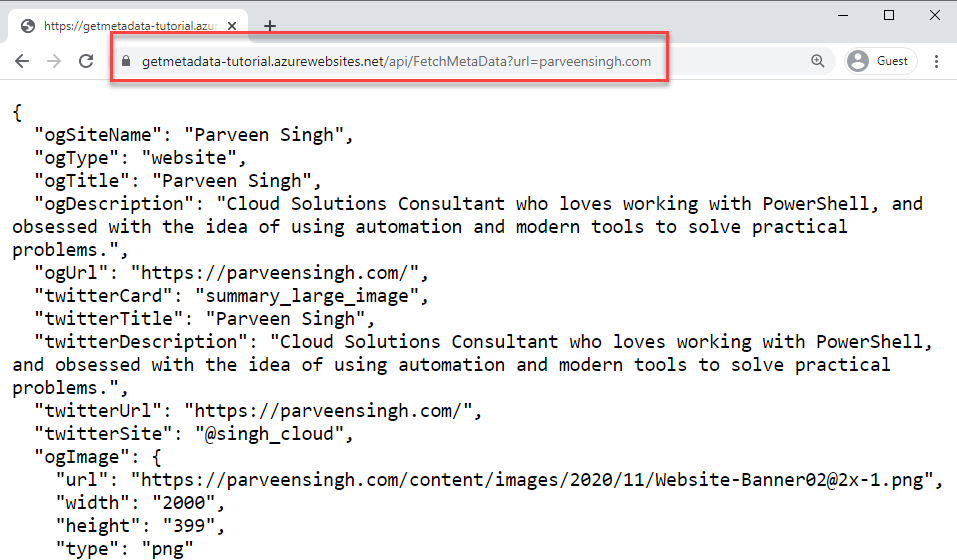
- Use the URL mentioned in the output terminal and pass in the
URLparameter with the address to query a website for its header meta-data as shown below.
How Is This Useful At All?
I’m glad you asked! I build my portfolio using dynamic data where I leveraged this same Azure Function to pull the meta-header information from my multiple project website and display the results in a form of a card. If you are still wondering, check out the URL below to see this in action.

Conclusion
I hope you enjoyed the article and learned something new about Azure Function while also getting exposed to a little bit of NodeJS. If you are looking for more resources on what cloud projects you can build and showcase in your portfolio, please check out my other blog articles and follow me on Twitter for regular updates.
💡 Looking for Cloud Project for your Portfolio?
Check out my article on building Next.JS Application with CosmosDB and Azure App Service.
Tip: Use Vercel free hosting if you don’t want to use App Service#100DaysOfCloud #100DaysOfCode #NextJS #cosmosdb https://t.co/CPue2oBzKv
— Parveen Singh (@singh_cloud) November 22, 2020


