
Step-by-Step Guide to Building Data Pipelines with Azure Data Factory
In today's fast-paced digital landscape, effective data integration is essential for organizations striving to stay ahead. Enter Azure Data Factory, the cutting-edge cloud-based solution that empowers businesses to seamlessly orchestrate and automate their data pipelines. In this comprehensive hands-on article, we will take you on a journey through the intricate workings of Azure Data Factory, from initial setup to advanced techniques. Whether you're a seasoned data architect or a curious learner, this guide will empower you to confidently navigate the intricacies of ADF and achieve flawless data synchronization between Azure Storage Account and Azure SQL Database.
What is Azure Data Factory (ADF)?
Azure Data Factory (ADF) is a cloud-based data integration service provided by Microsoft Azure. It enables seamless and scalable data movement and orchestration across various sources, including Azure Storage accounts and Azure SQL databases. ADF acts as a powerful Extract, Transform, Load (ETL) tool, allowing users to efficiently transfer, transform, and process large volumes of data. With its robust capabilities and intuitive user interface, ADF empowers organizations to streamline their data workflows, automate data pipelines, and ensure data integrity throughout the entire process. Whether you need to ingest data from multiple sources, transform and enrich it, or load it into various target destinations, ADF provides the flexibility, scalability, and reliability to handle complex data integration scenarios effectively
Prerequisites to Deploying Azure Data Factory
Before you proceed with the article, you need to have the following prerequisites in place:
- Azure Account with an active subscription: The first thing you need to do is sign up for an Azure account if you don't already have one. You can sign up for a free trial account that will give you access to a limited amount of Azure resources for a limited time.
- Permission to create resources in the subscription: Once you have an Azure account, you need to make sure that you have the enough permissions to create and interact with Azure Data Factory, Azure Storage Account and Azure SQL Database resource. You can work with a contributor role on the subscription or resource group to create these resources.
Througout the article, you’ll interact with the following resources:
- Azure Storage Account and Container
- Azure SQL Server & Database
- Azure Data Factory and Pipelines
Creating an Azure Data Factory using Azure Portal
The first step in building a data pipeline with Azure Data Factory is to plan out your pipeline. This involves identifying the data sources and destinations, as well as any transformations or processing that needs to occur along the way. You'll also need to consider the frequency of data updates and any dependencies between different components of the pipeline. By taking the time to plan out your pipeline in advance, you can ensure that it meets your business requirements and is scalable for future growth.
In this section, you will create an Azure Data Factory using Azure Portal. Follow these steps below to begin:
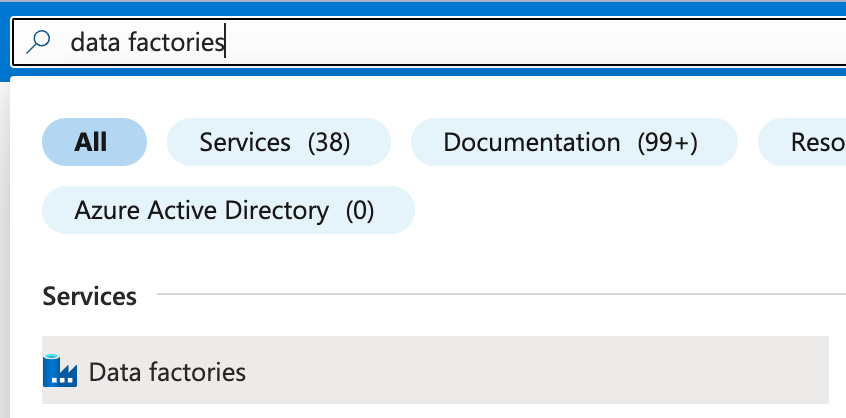
- While in the Azure Portal, type Azure Data Factory in the search bar and click Data factories under the Services:
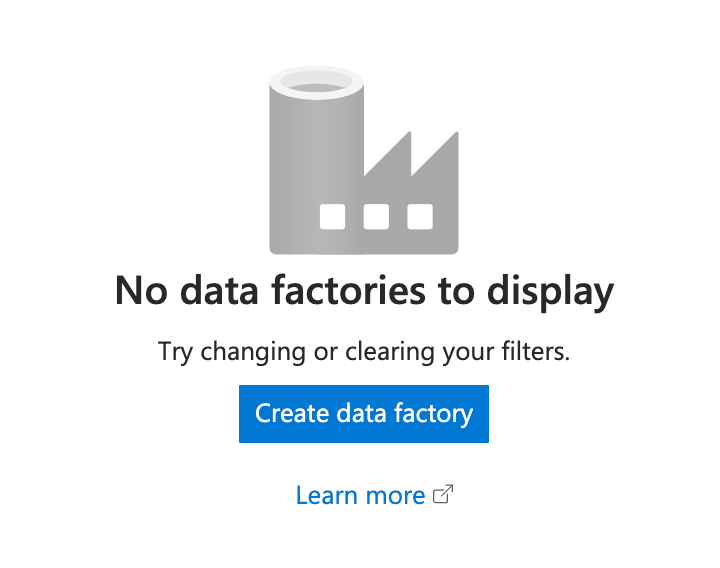
- Click the Create data factory button to create a new Azure Data Factory instance:
-
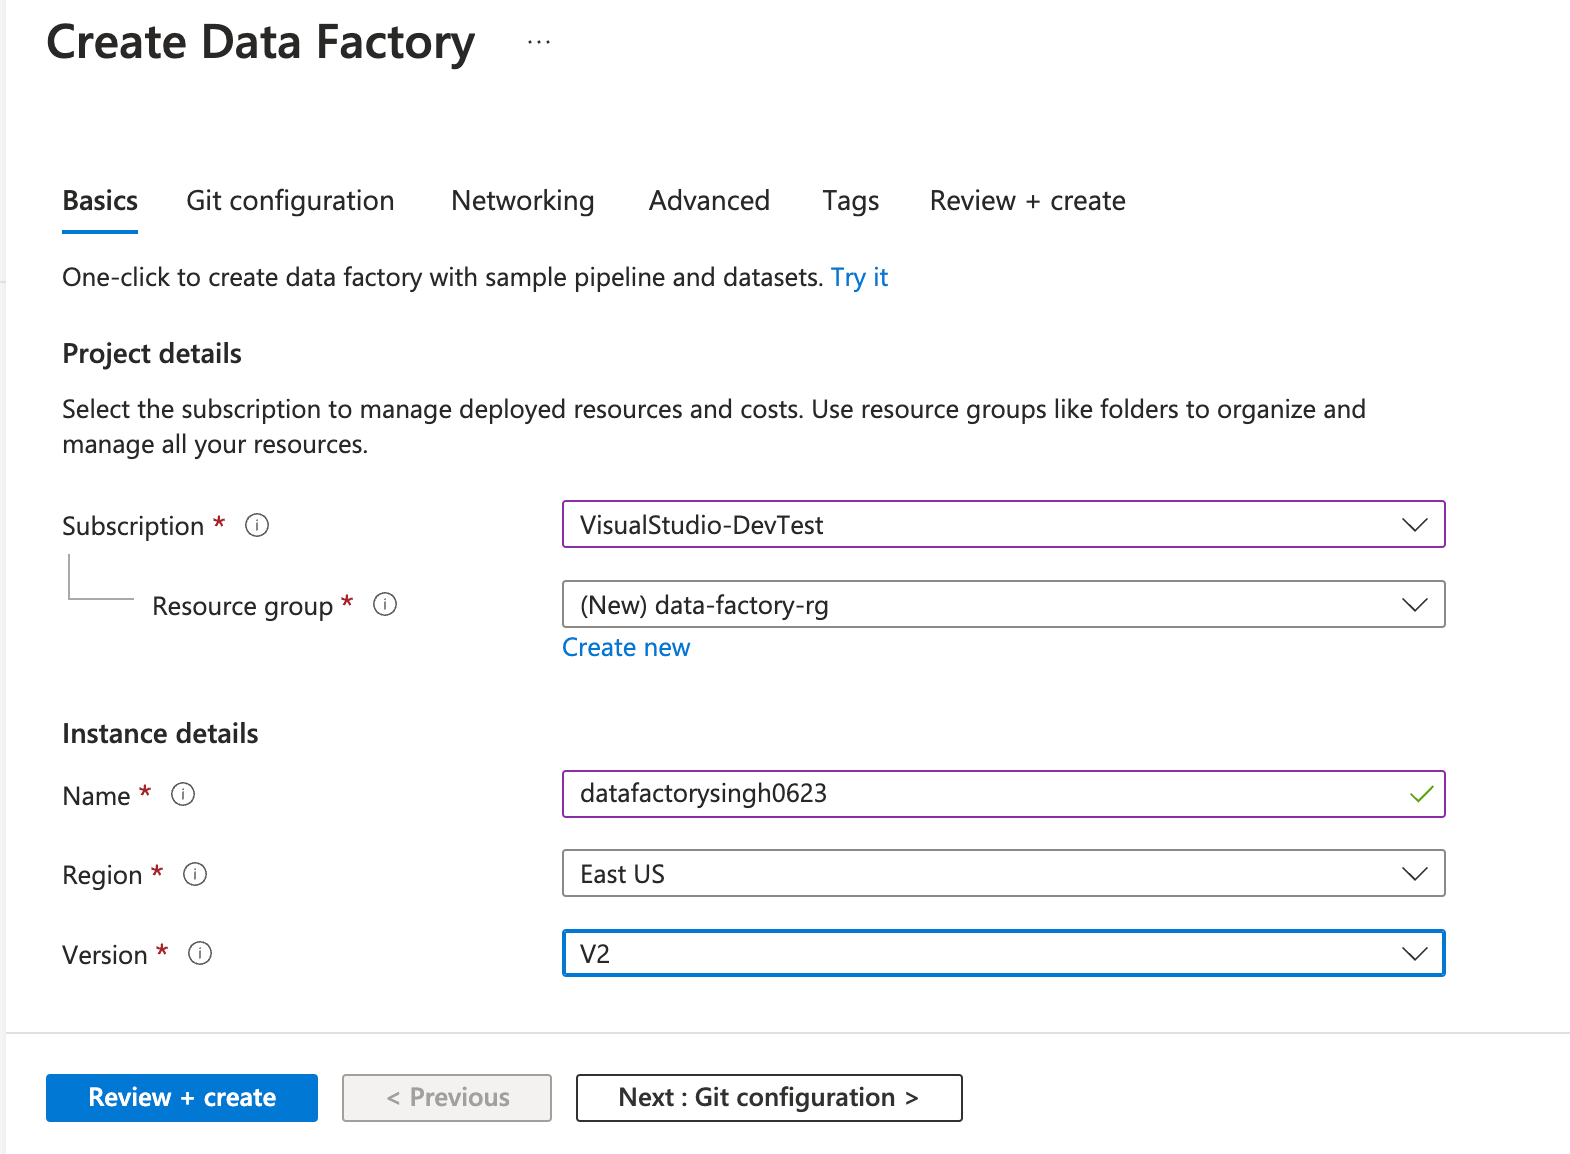
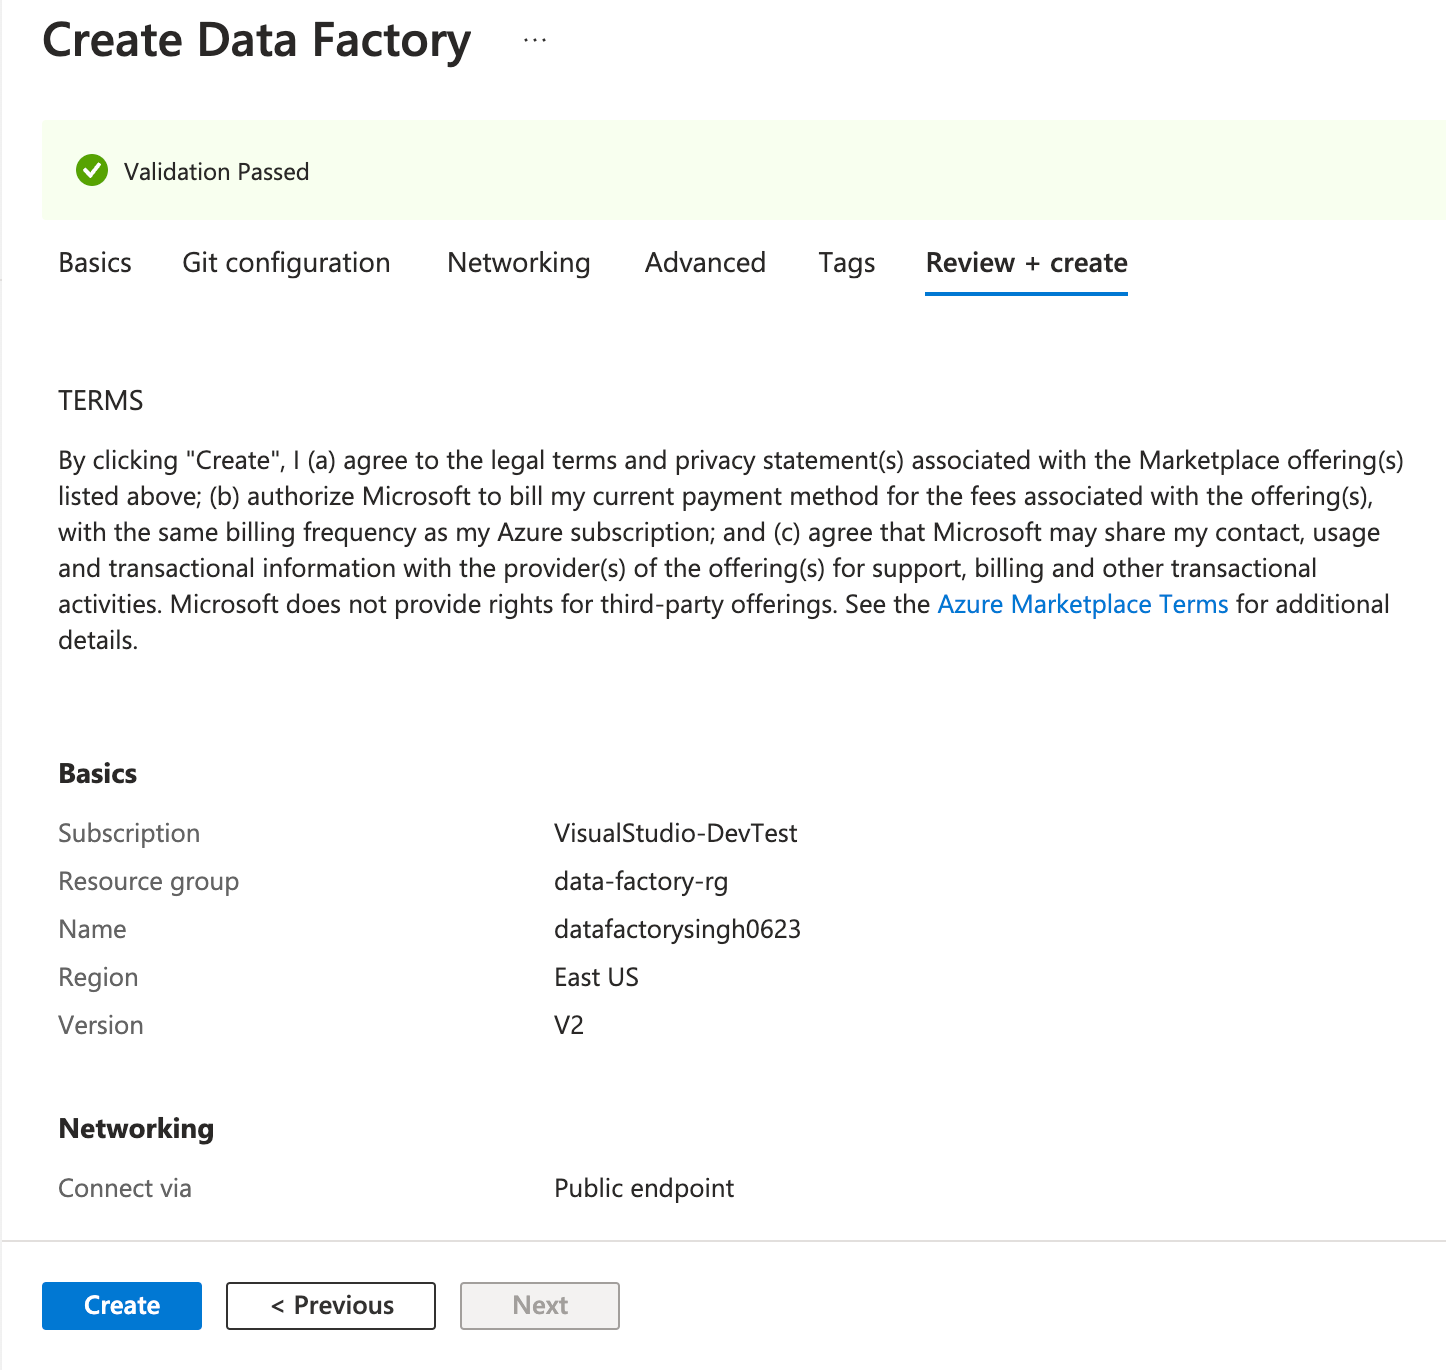
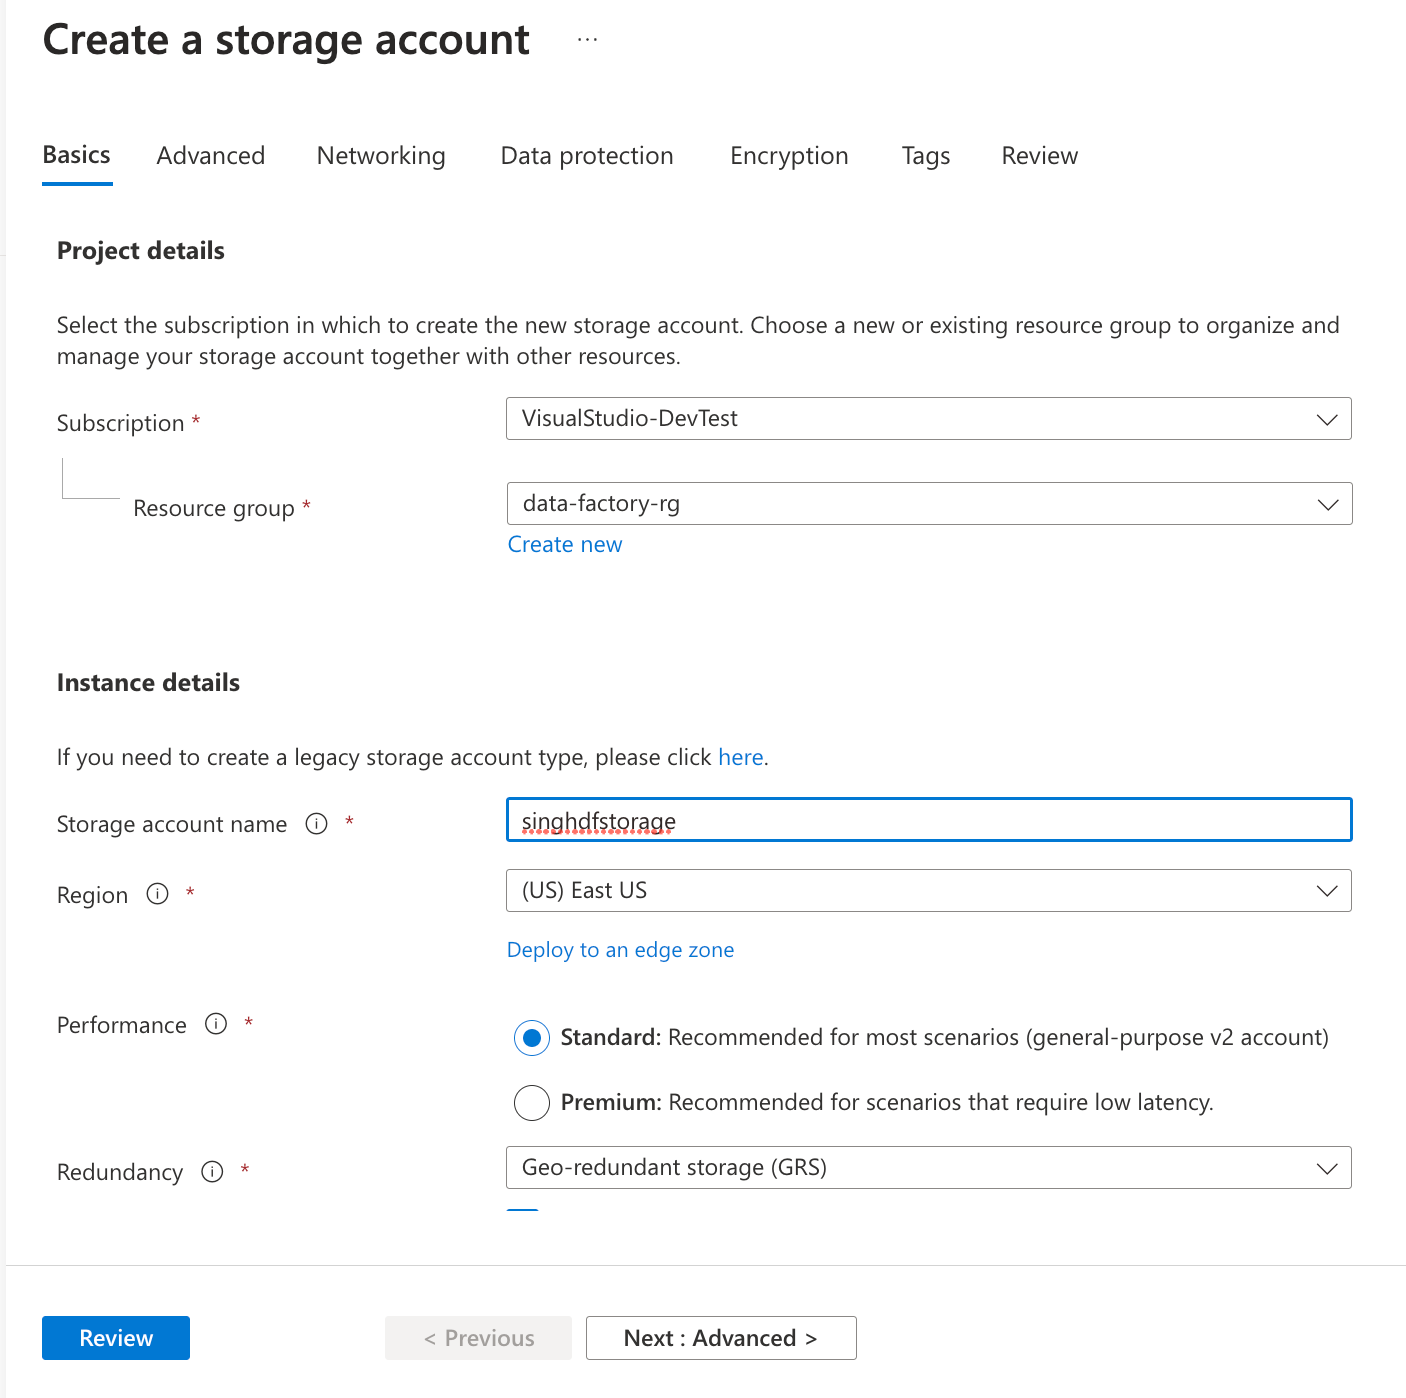
Fill out the following on the Create Data Factory popup under the Basics tab and click Review + create:
- Resource group: Select the resource group created earlier.
- Name: Enter any name of your choice. Ensure that the name is globally unique.
- Region: Choose a location of your choice. (East US in this case)
- Version: Select V2 version from the dropdown
-
Click Create once validation passes:
Note: If you are creating ADF in your production environment you can use Networking tab to adjust the network settings. The following options are available for the endpoint:
- Public Endpoint: Traffic can reach the service resource from on premises without using public endpoints. A Service Endpoint remains a publicly routable IP address.
- Private Endpoint: A Private Endpoint is a private IP in the address space of the virtual network where the private endpoint is configured.
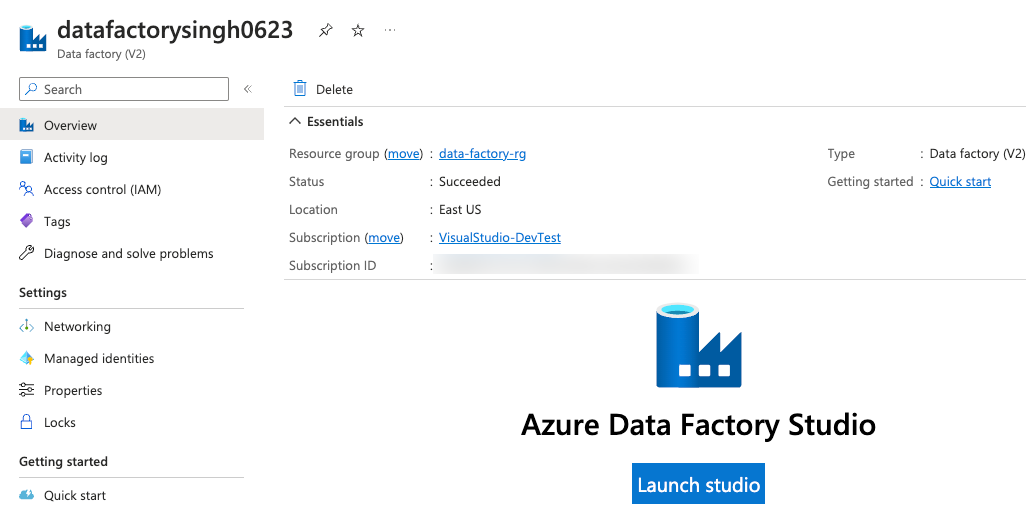
- The deployment process will take a few minutes. Wait for the deployment to finish and click Go to resource.
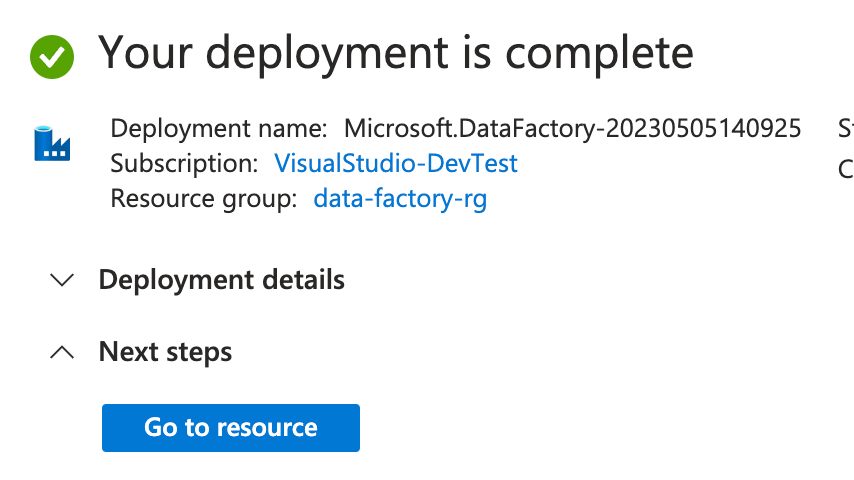
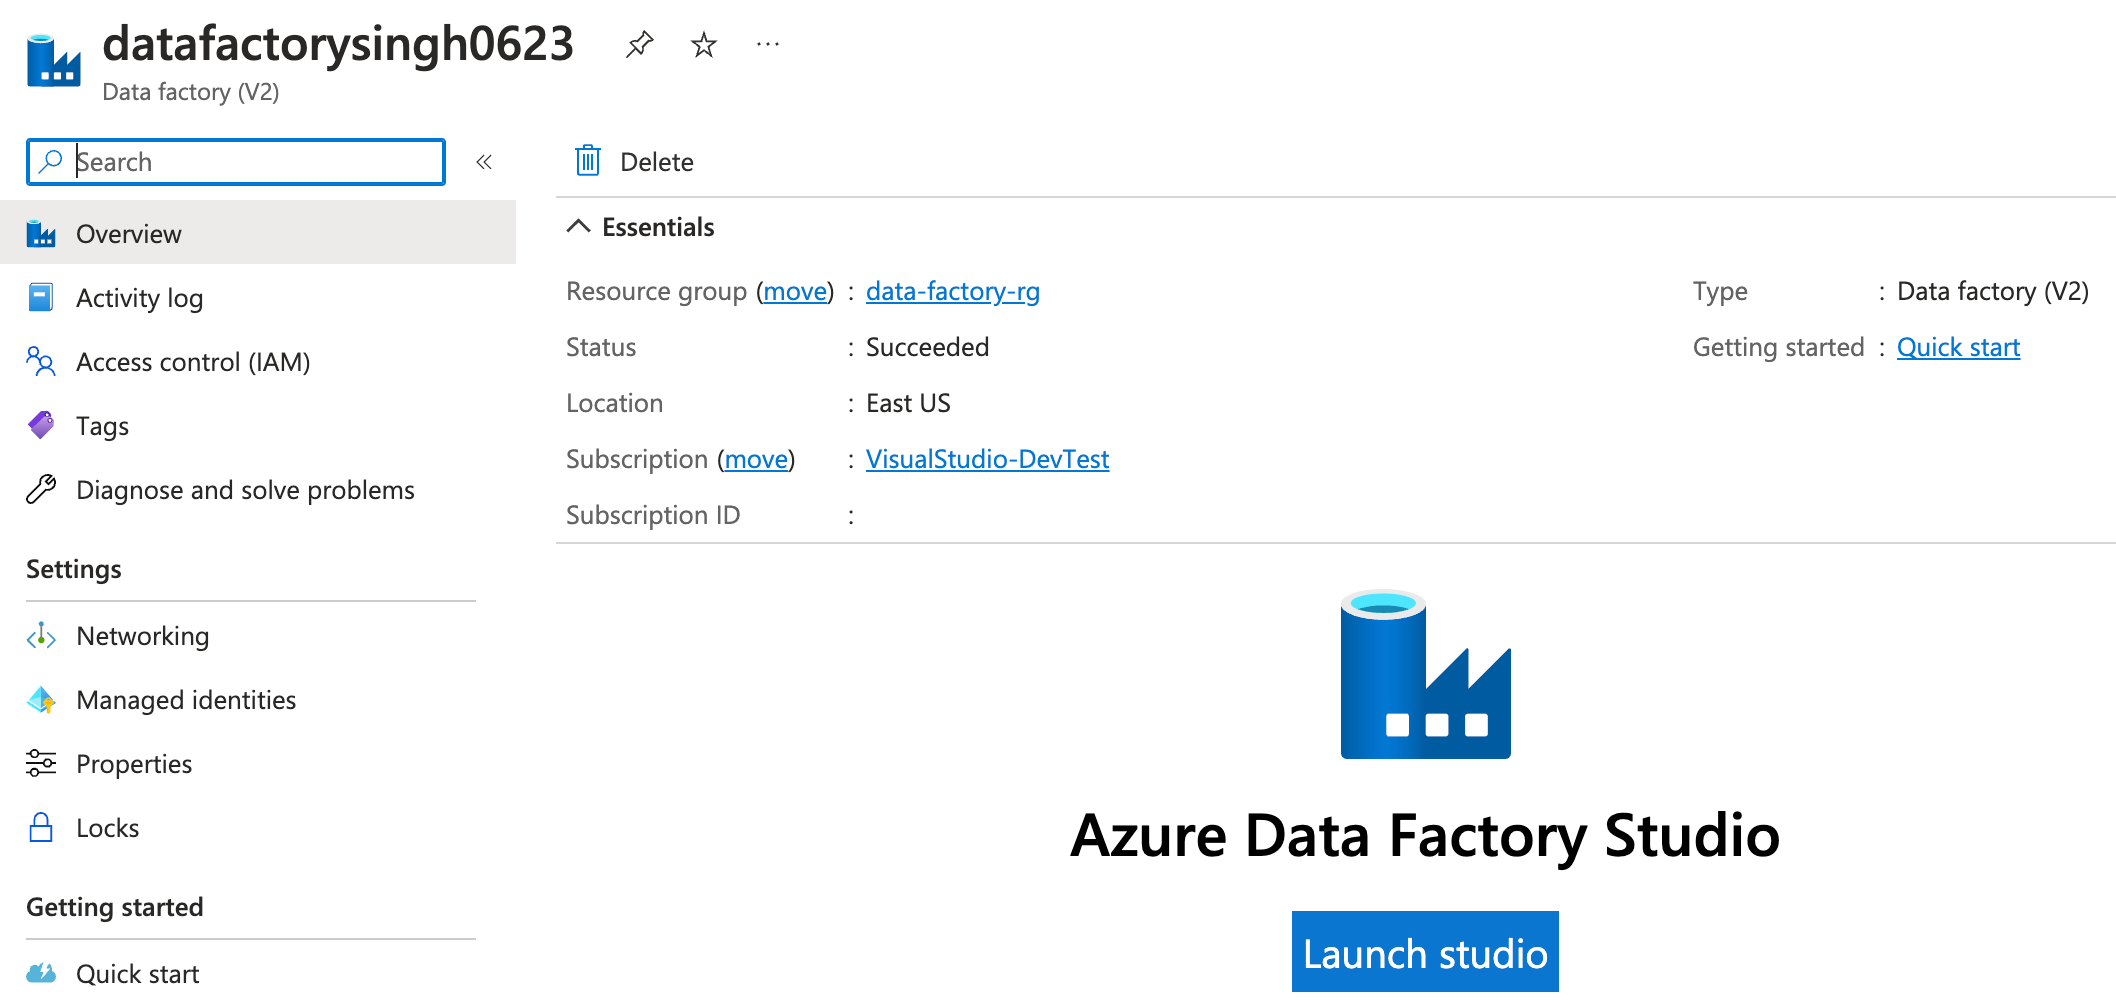
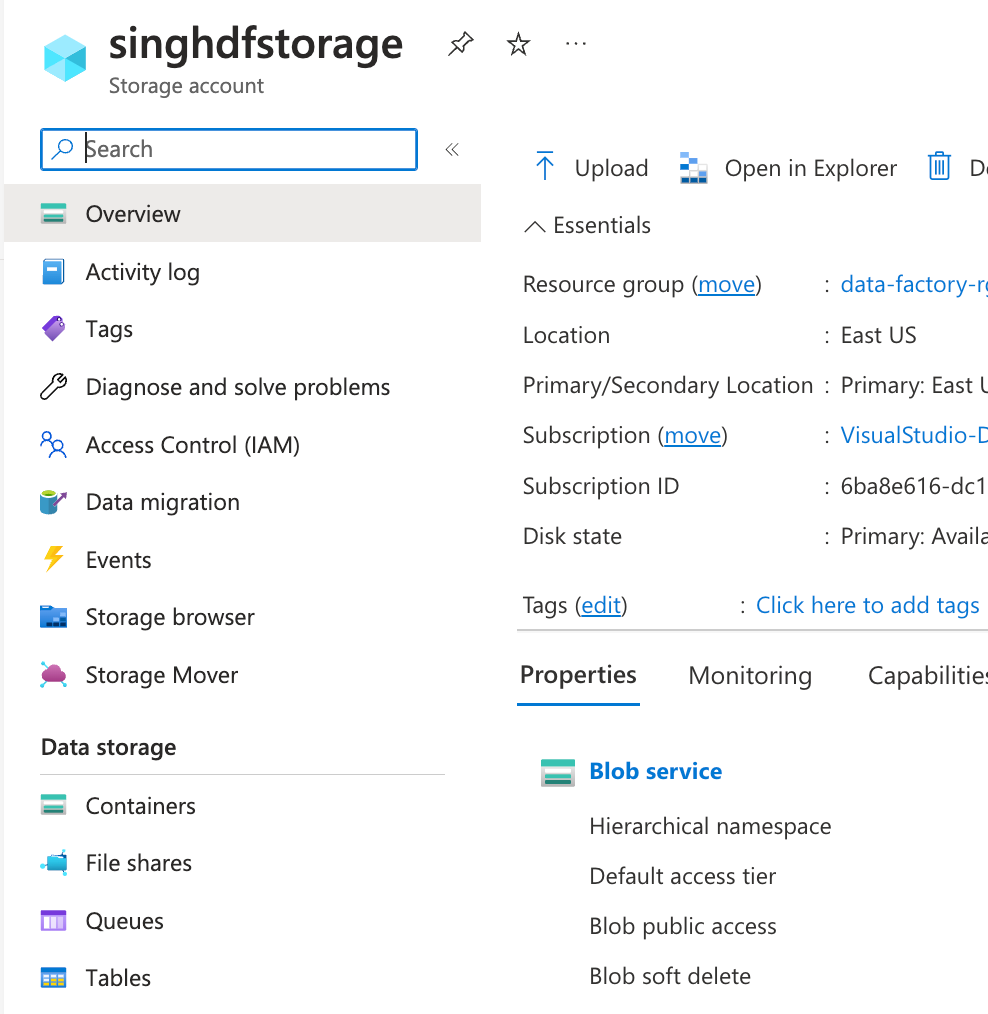
- You will be taken to the Data Factory resource Overview tab where you will see the resource configuration and an overview of the data factory resource.
Preparing Azure Storage Account to use with Azure Data Factory as a Source
Once the Data Factory resource is created, it’s time to configure your Source for the Data Factory. You need a sample data file stored in Azure Blob Storage that you will be using to move, transform, or process in your pipeline. This section will walk you through on deploying Azure Storage account and uploading a sample file that you will use for reference.
Creating Azure Storage Account to Store Sample File
Create a storage account in your Azure subscription to store the sample file by following the steps below:
-
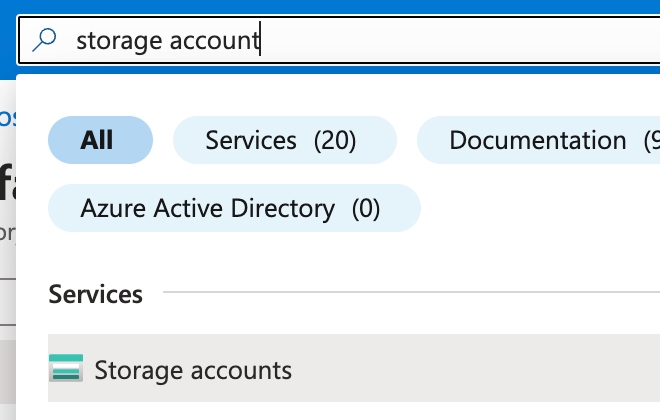
Type storage account in the Azure Portal search bar and click Storage accounts under Services :
-
Click + Create on the top left of the screen to create a storage account:
-
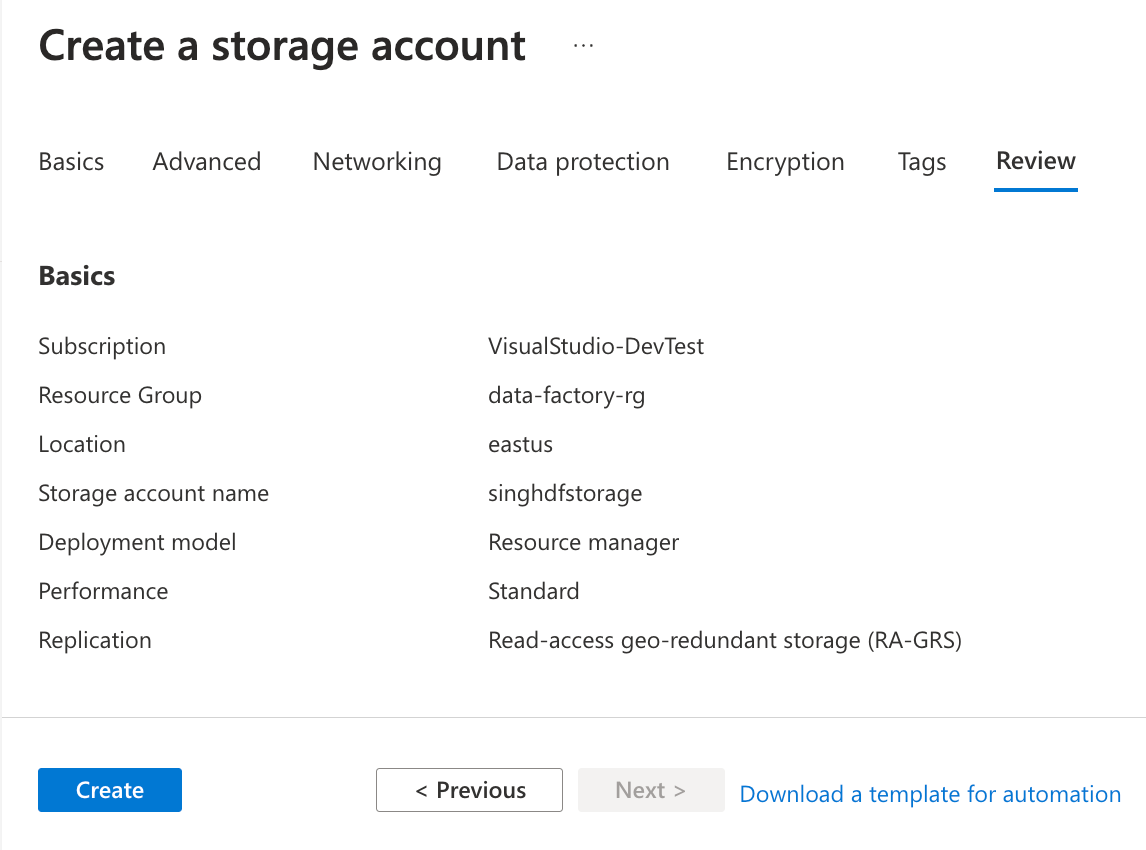
On the Basics tab of Create a storage account window, enter the following information and click Review:
- Subscription: Select the subscription of choice from the list.
- Resource group: Select the resource group used for data factory earlier.
- Storage account name: Enter a globally unique name for your storage account.
- Location: Select the region to create the storage account. East US in this case.
-
Review your configuration and click the Create button to begin creating your new storage account:
Creating and Uploading Sample Data file to Azure Blog Storage
Once your storage account is created, you will upload the sample data file to it. Follow the steps below to upload a file to Azure Storage Account using Azure Portal:
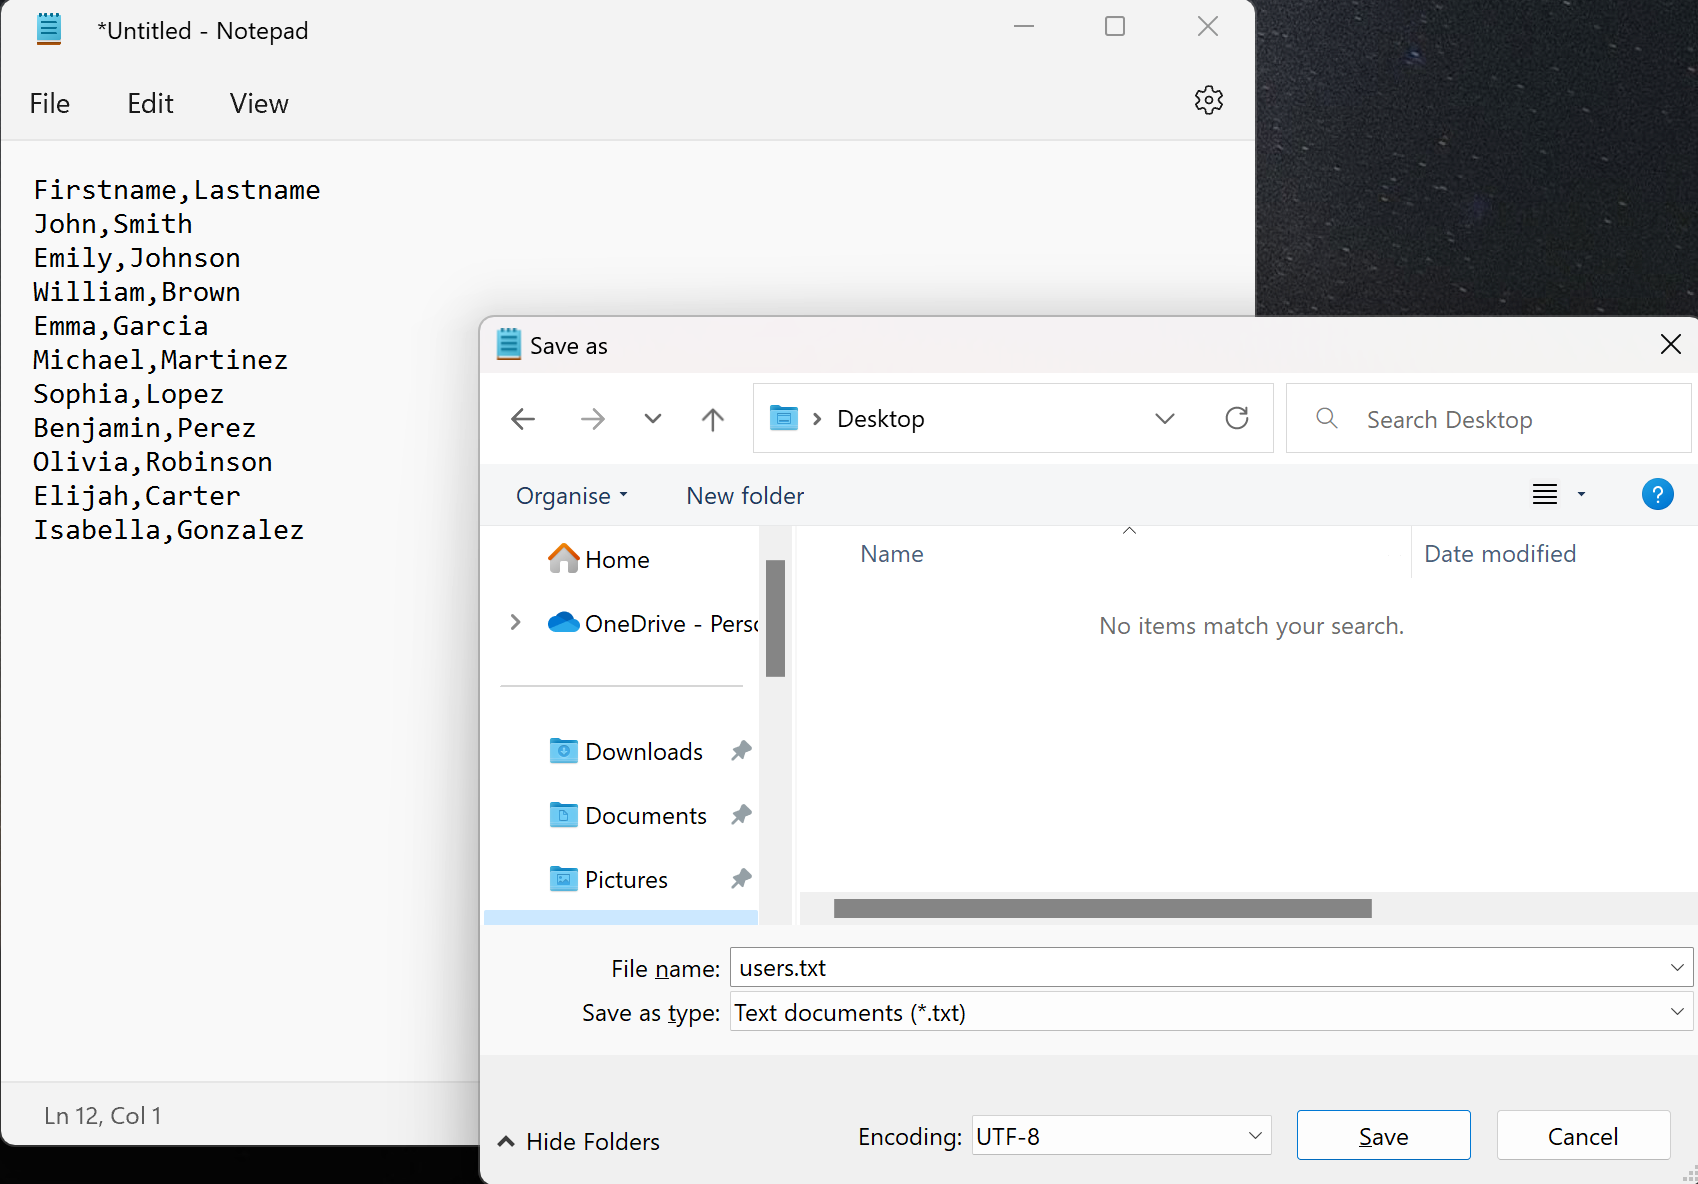
- Launch the notepad on your computer and paste the text below. Saved the file as test.txt on your desktop:
Firstname,Lastname
John,Smith
Emily,Johnson
William,Brown
Emma,Garcia
Michael,Martinez
Sophia,Lopez
Benjamin,Perez
Olivia,Robinson
Elijah,Carter
Isabella,Gonzalez
-
Navigate to your Storage Account resource in the Azure Portal:
-
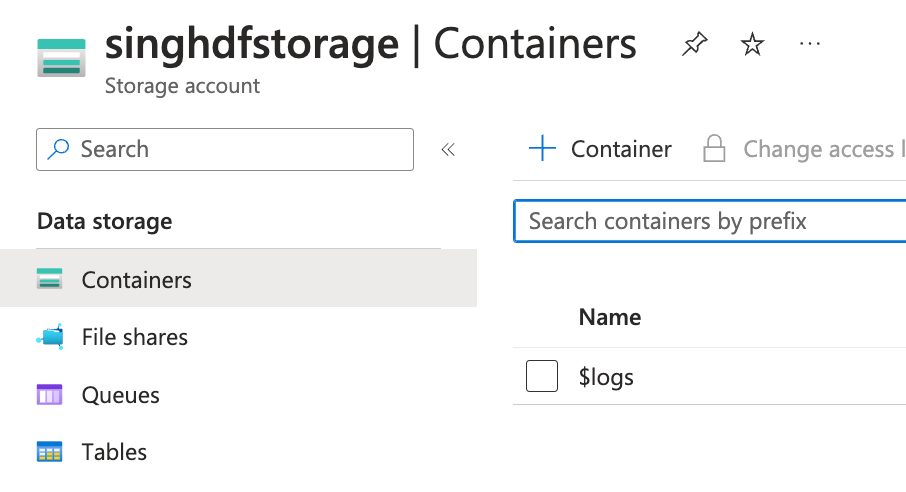
Click Containers under Data storage section from the left blade menu and click + Container:
-
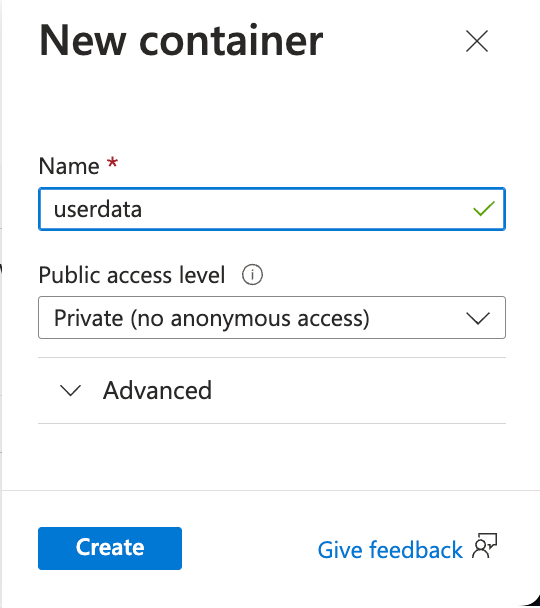
On the New container popup window, enter userdata name for your container and click Create:
-
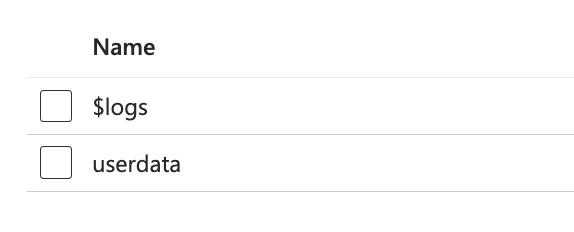
Once created, click the container name from the list:
-
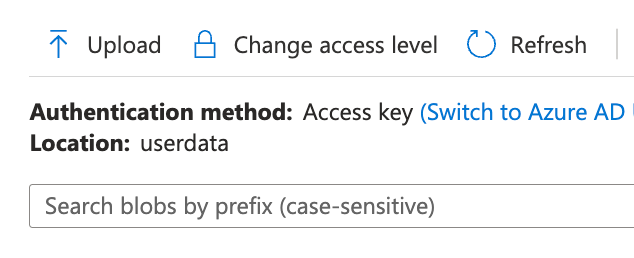
Click the Upload button to upload your sample data file:
-
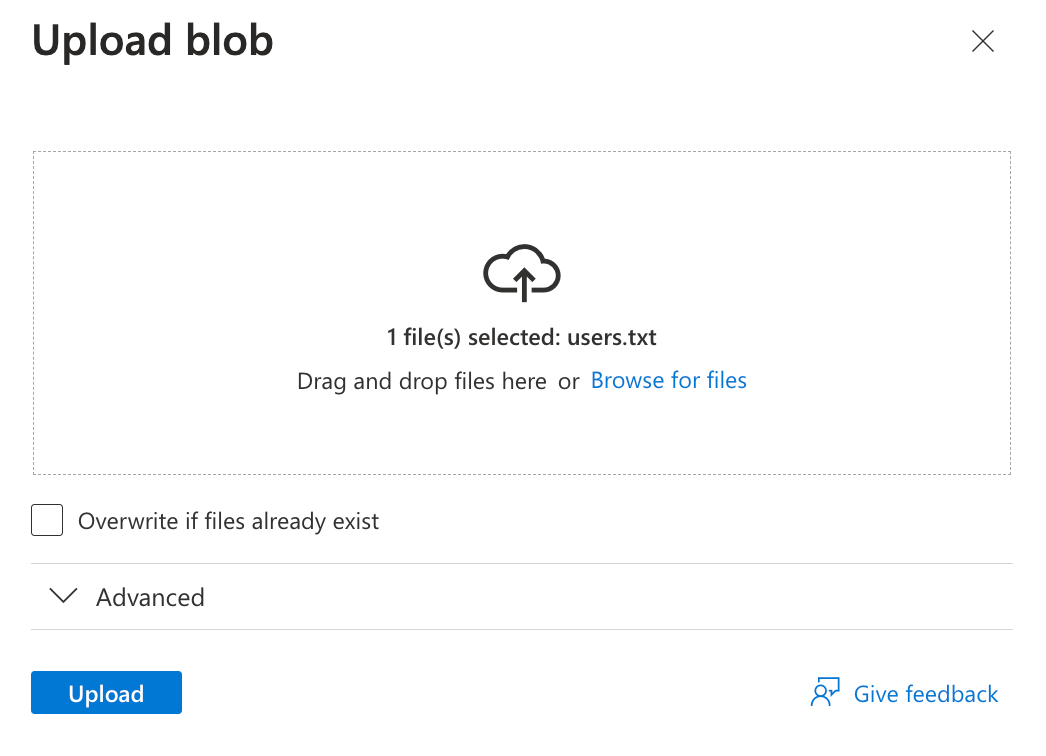
On he Upload blob popup, select your sample data file which you created earlier and click Upload:
-
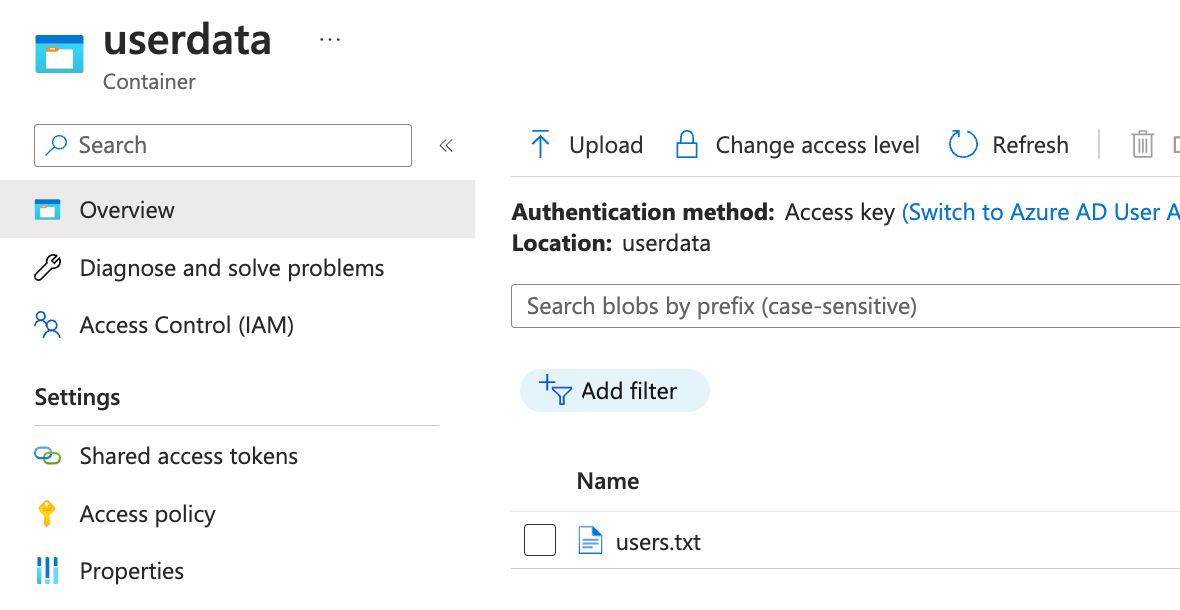
Observe the user.txt file inside the userdata container once uploaded:
Now that you have the storage account and sample file set up, it’s time to work on Data factory pipeline.
Deploying Azure SQL Database & Server for Data Factory Sink
Az SQL Database can be utilized as a sink in Azure Data Factory to store and manage data efficiently. As a cloud-based relational database service, Azure SQL Database offers a scalable and secure platform for storing and processing structured data. When used as a sink in Azure Data Factory, it becomes an integral part of the data integration and transformation pipeline.
Follow the instructions below to create a SQL Database and then prepare a sink service for ADF.
Create an Azure SQL Database & Server.
-
While in the Azure Portal, type SQL Database in the search bar and click SQL database under the Services:

-
Click + Create to create a SQL server instance:
-
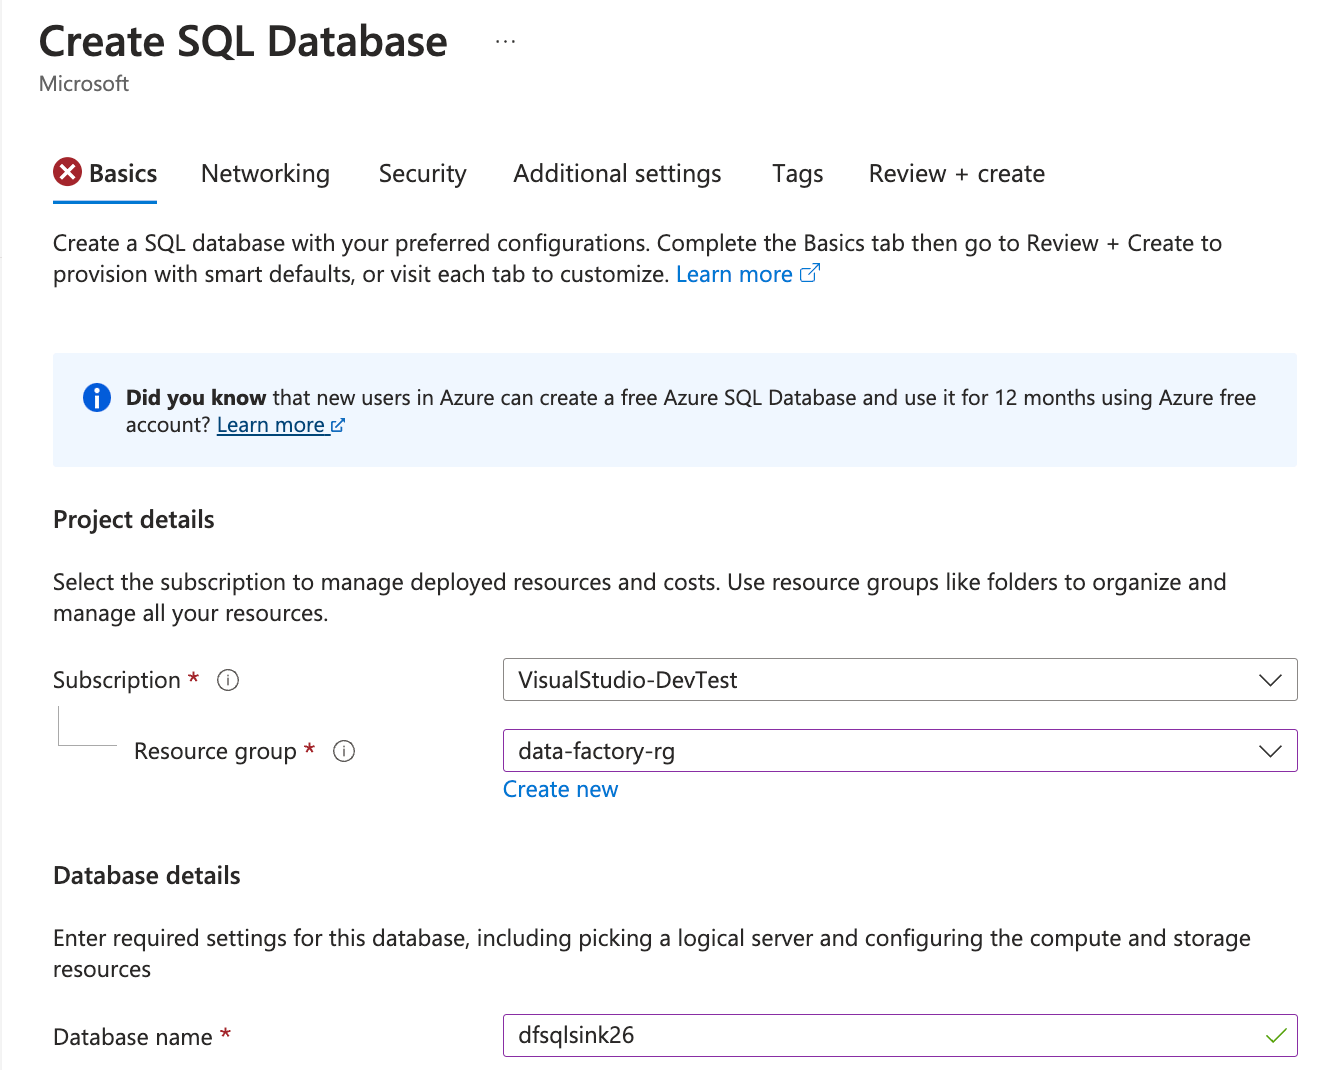
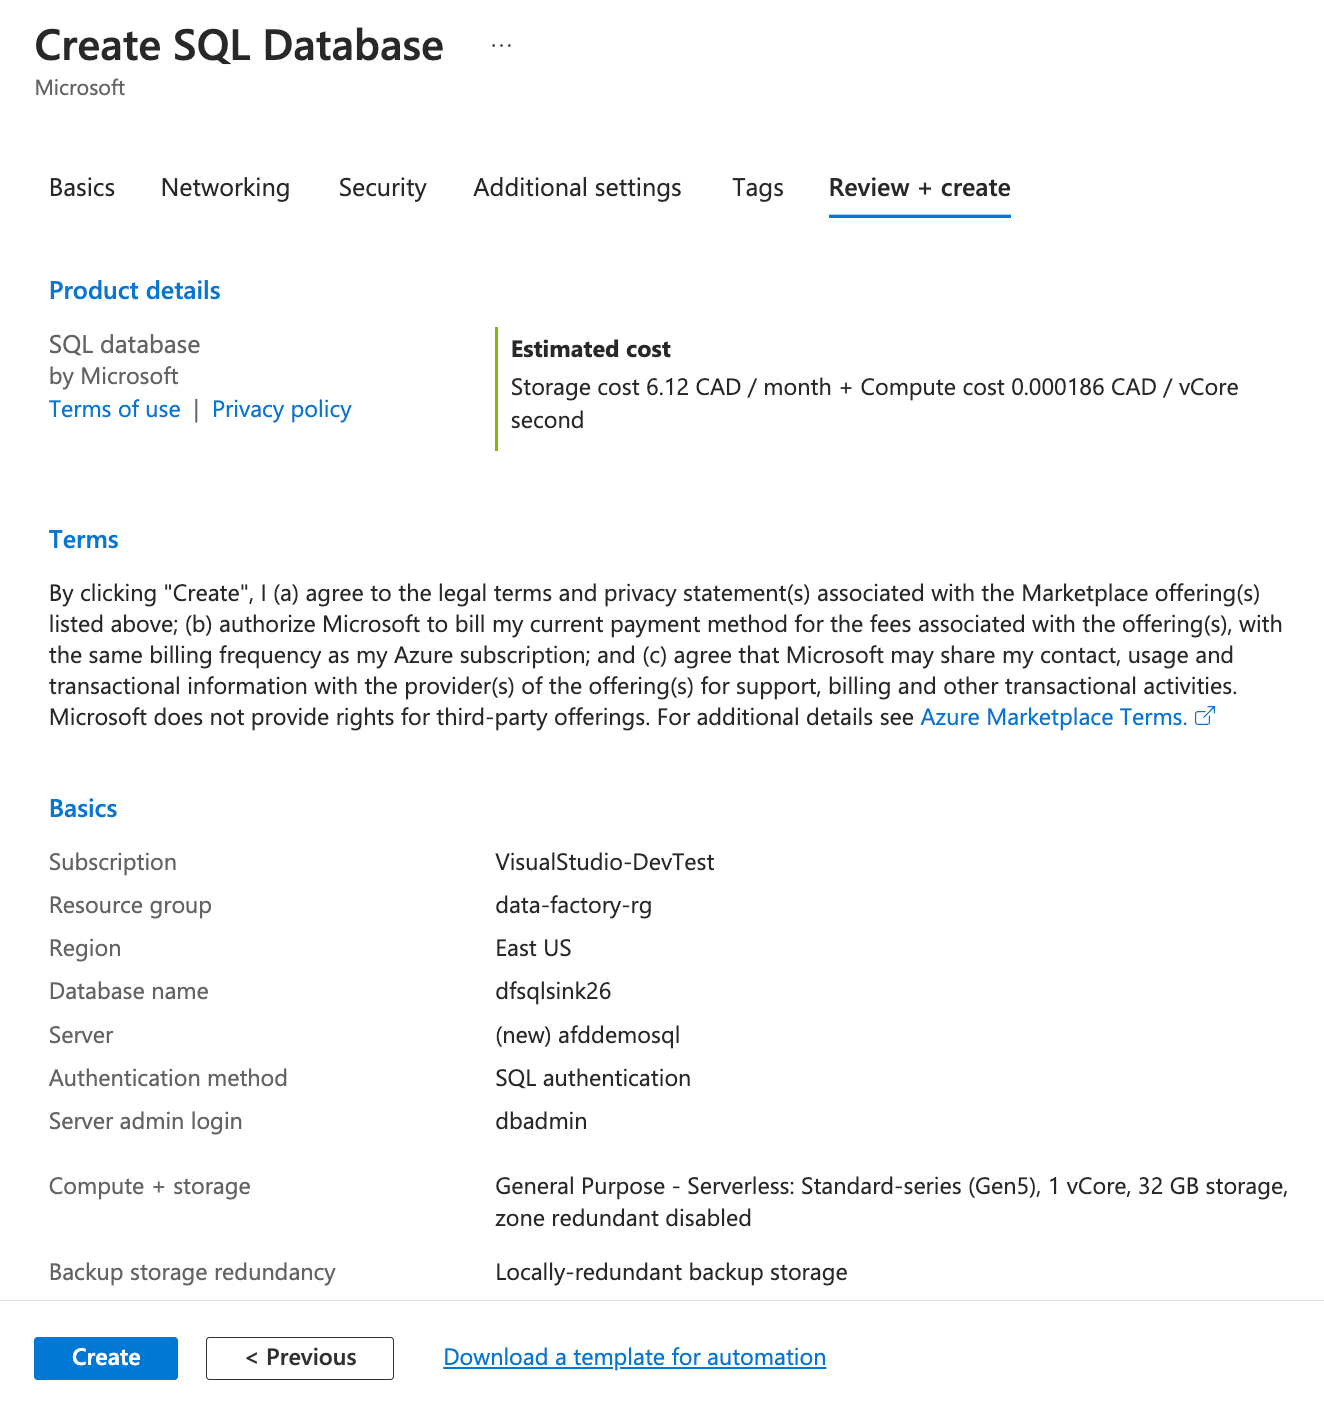
On the Basics tab of Create SQL Database, fill the following information:
- Resource Group: Select the resource group used for data factory earlier.
- Database Name: Enter a globally unique name for the database.
-
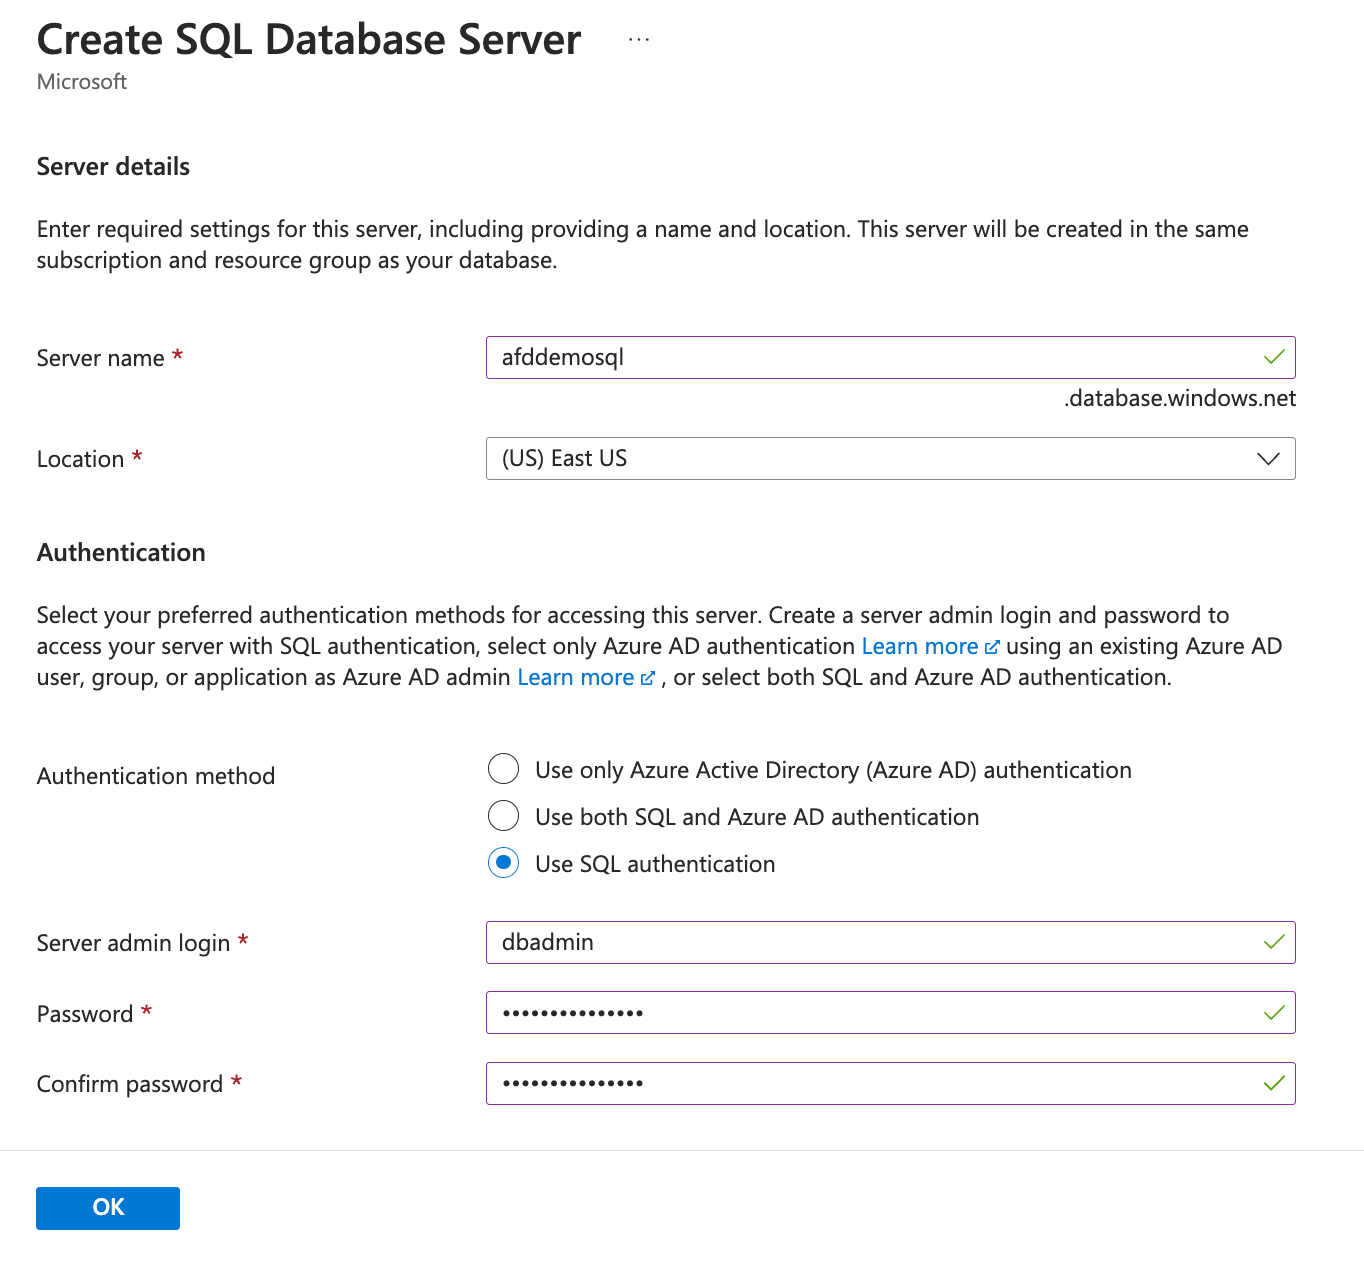
Under the Database details, for the Server option, click Create a new and use the following information and click Ok once you fill the information:
- Server name: Enter a globally unique name, adfdemosql in this case.
- Location: Select East US from the list
- Authentication method: Choose Use SQL authentication from the options
- Server admin login: Enter dbadmin
- Password/Confirm password: Enter a strong password of your choice
You will be taken back to the Create SQL database window.
-
Scroll down on the Basics tab and use the following information. Click Next: Networking once done:
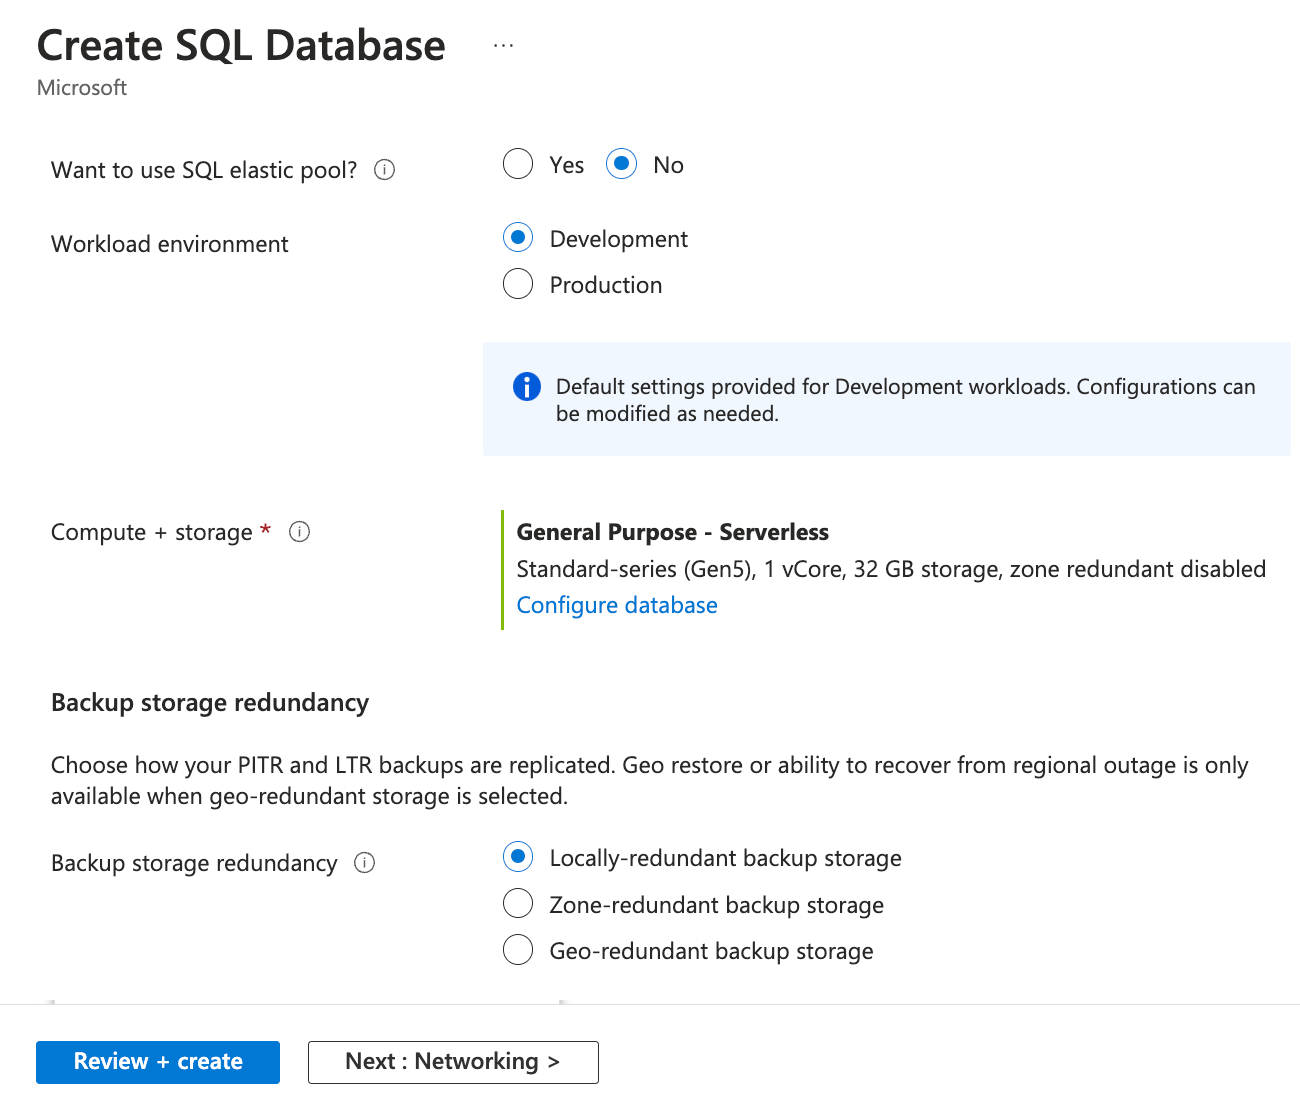
- Want to use SQL elastic pool: Select No
- Workload environment: Select Development
- Backup storage redundancy: Select Locally-redundant backup storage
Elastic pools in Azure DBs implement a cost-effective solution suitable for unpredictable usage demands. These elastic pools can configure multiple SQL databases with resource pooling. Therefore, you have the flexibility to build a high-end database server, and your databases can leverage that based on their workload requirements. These elastic pools enable you to optimize costs for several databases without compromising performance.
Under the Backup storage redundancy section you have the following replication options. You can choose one of the following storage redundancies for backups based on your workload requirement in the production environment:
- Locally redundant storage (LRS): Copies your backups synchronously three times within a single physical location in the primary region. LRS is the least expensive storage option, but we don't recommend it for applications that require resiliency to regional outages or a guarantee of high data durability.
- Zone-redundant storage (ZRS): Copies your backups synchronously across three Azure availability zones in the primary region.
- Geo-redundant storage (GRS): Copies your backups synchronously three times within a single physical location in the primary region by using LRS. Then it copies your data asynchronously three times to a single physical location in the paired secondary region.
- On the Networking tab, toggle Add current client IP address to Yes under Firewall rules and click Next: Review + create:
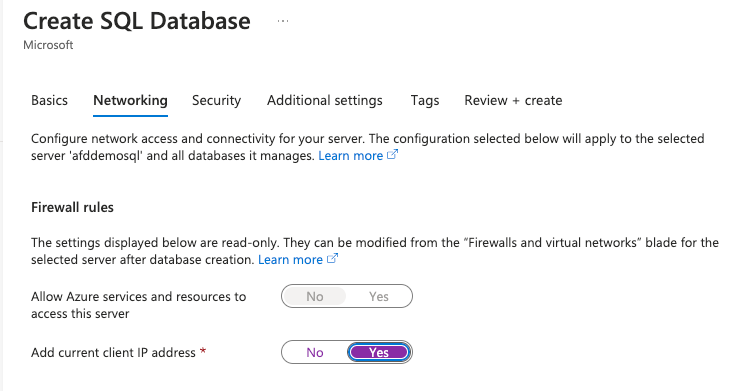 The SQL database access is disabled for external access by default. If you need to interact with the database resource outside the Azure network, you will need to enable this access to whitelist your IP address. For secure communication, you must use private endpoints to access the SQL database resources. However, the private endpoint is not covered as part of this article.
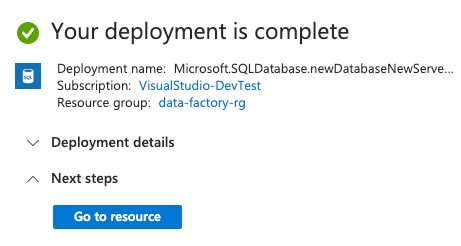
 - Review all the details and click Create to begin the resource deployment:
 Note: Wait for the deployment to complete as it may take upto 10 minutes to finish.
 - Click on Go to resource button once the deployment finishes:
- On the Overview tab of SQL database, click Configure under Configure access:
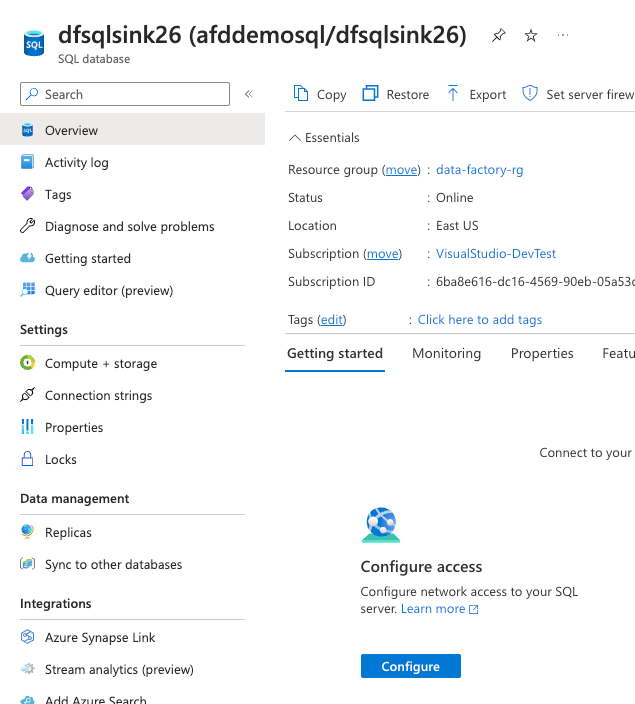
- Check the box for Allow Azure services and resources to access this server and click Save:
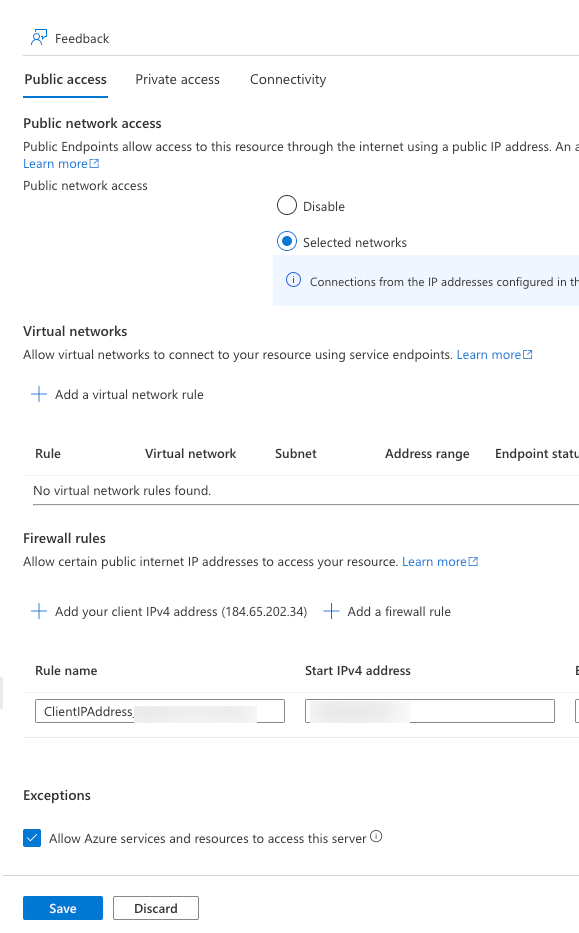
This ensure the Azure Data Factory service can access the SQL server resource since it’s on the Azure backbone network and the trust is established between Azure resouces.
Create a Sink SQL Table for Azure Data Factory pipeline.
-
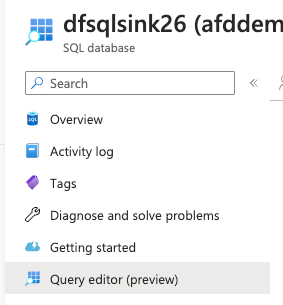
While on the Overview tab of the SQL database, click Query editor (preview) from the left blade menu:
-
Use the SQL server authentication column to login to SQL server with the credential that you configured during deployment and click OK button.

-
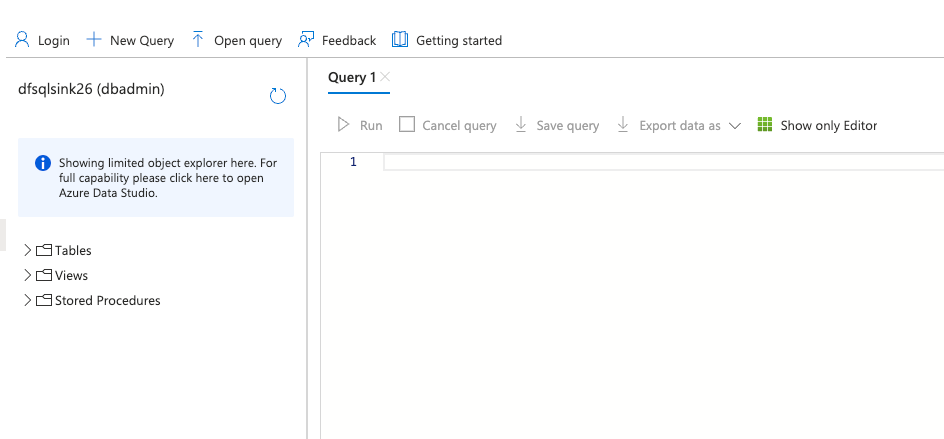
Once logged in, a Query editor window will open:
-
Enter the following script in the query editor and click Run.
CREATE TABLE dbo.emp
(
FirstName varchar(50),
LastName varchar(50)
)
GO
CREATE CLUSTERED INDEX IX_emp_ID ON dbo.emp (FirstName);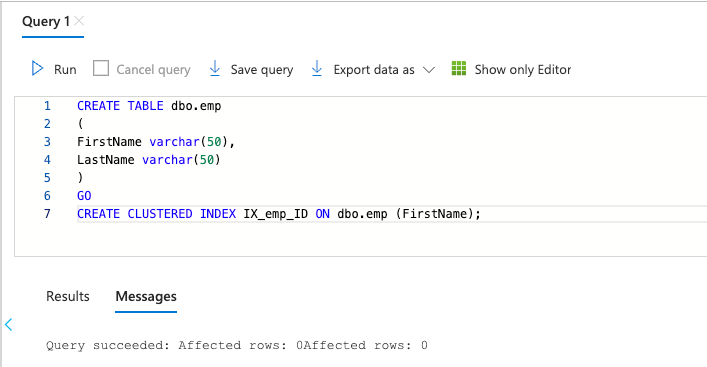
-
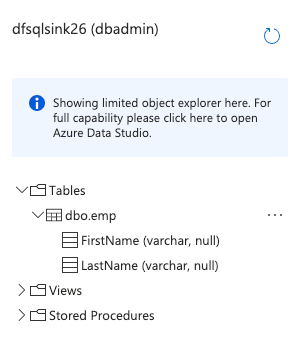
From the left panel, expand the Tables folder and observe the dbo.emp table:
Working with Data Pipeline in Azure Data Factory
Once you have planned out your data pipeline, it's time to create and configure it in Azure Data Factory. This involves setting up the necessary connections to your data sources and destinations, as well as defining any transformations or processing that needs to occur. You can use the drag-and-drop interface in Azure Data Factory to easily create and configure your pipeline components, or you can use code if you prefer. Once your pipeline is configured, you can test it to ensure that it is working as expected and make any necessary adjustments before deploying it to production.
Configuring the Linked Services in Azure Data Factory (ADF)
-
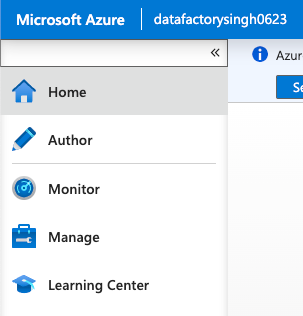
Navigate to your Azure Data Factory instance from the resources and click Launch studio:
 If you are using incognito browser, ensure the cookies are enabled or browse without an incognito mode.
 -
Expand the left many and click Author:
-
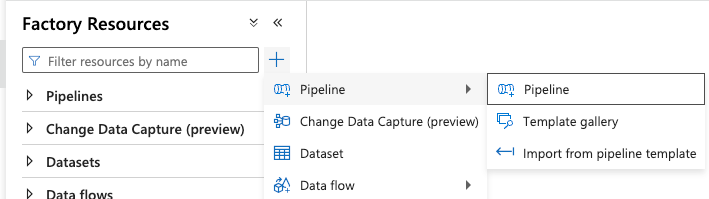
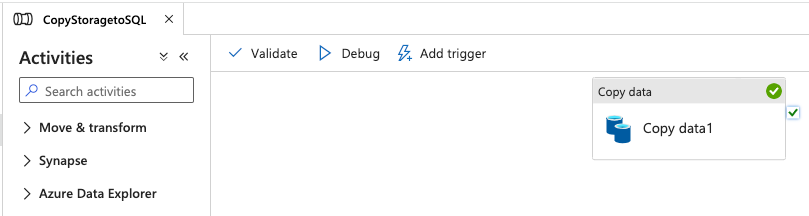
Click + icon followed by Pipeline and click Pipeline option:
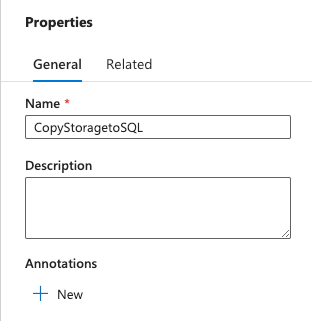
 A pipeline window will open with a blank pipeline. A properties tab will appear on the right-side of the window as well to give a name to the pipeline.
 -
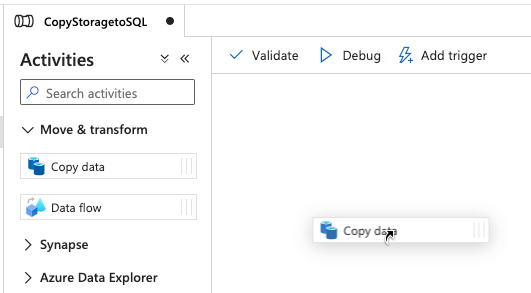
Type CopyStoragetoSQL in the Name section of the Properties window:
-
From the Activities panel, expand the Move & transform section and drag the Copy data into the middle of the screen in the canvas:
 A tab on the bottom of the screen will appear. You will make changes to the Copy data activity using this section.
 -
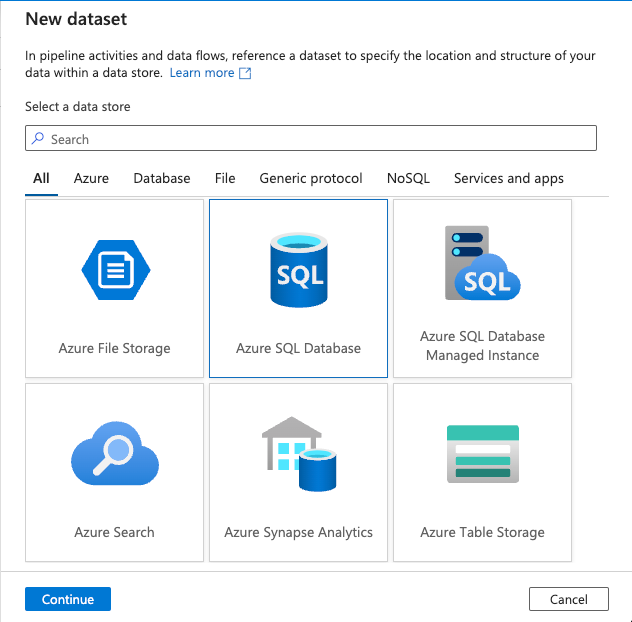
Click Source tab from the bottom of the screen and click + New to create a source:
 A New dataset popup will appear.
 -
From the list of the data store, select Azure Blob Storage and click Continue:

-
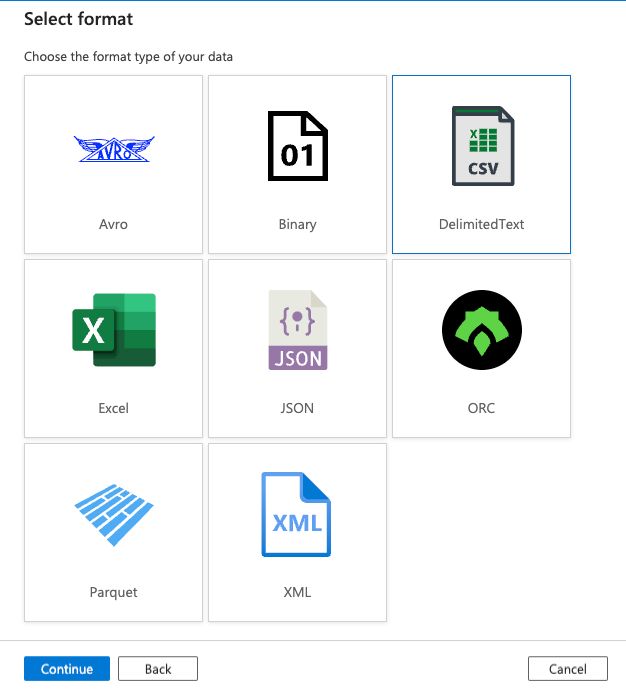
Select DelemitedText on the Select format window and click Continue:
-
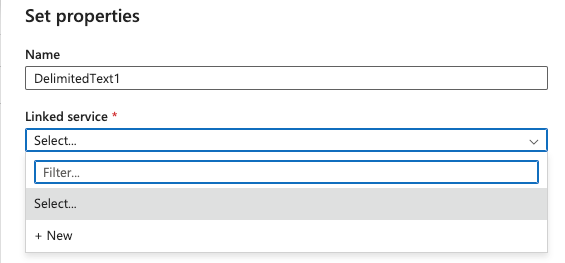
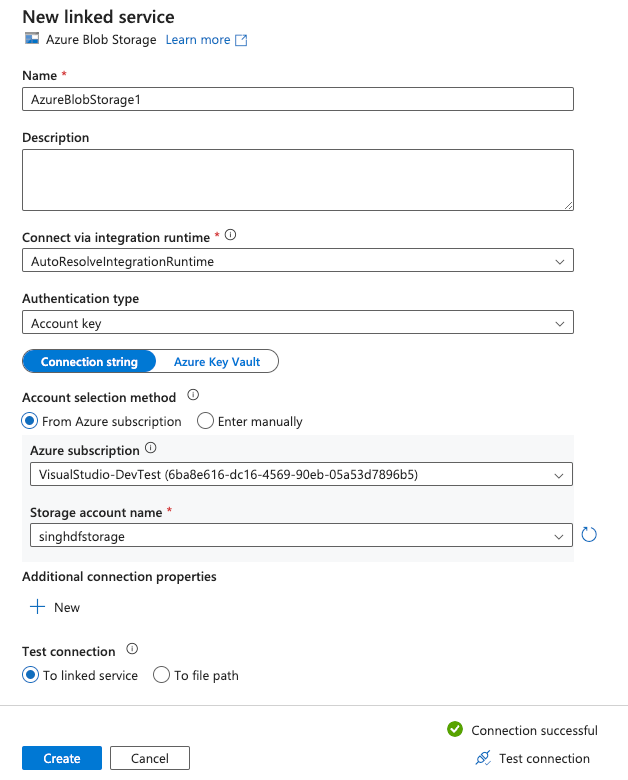
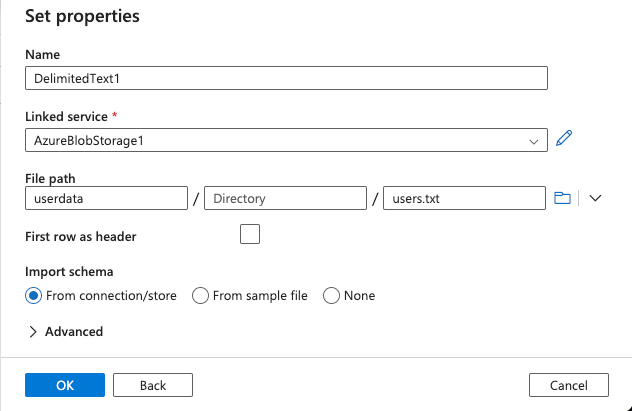
On the Set Properties page, click on the dropdown for Linkedin service and click + New:
-
On the New linked service dialog box, select the subscription under Azure subscription option where the storage account is created and select the storage account in Storage account name:

-
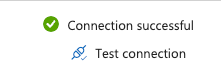
Click the Test connection text that appears on the bottom right and ensure Connection successful message appears confirming the authentication took place:
-
Finally, click the Create button to create your new connection:
-
On the Set Properties window, under File path, click the dropdown arrow and click From root:

-
Click through userdata folder on the first page. Select users.txt file and click OK:
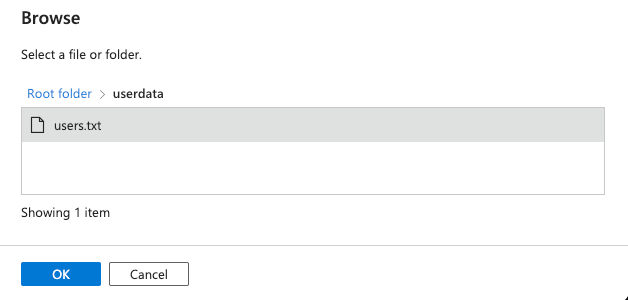
-
The File path will be updated to match the location of the source file. Click OK on the page to save the source settings:
-
Click Sink tab in the Copy data activity and click on new + New button:

-
Select Azure SQL Database in the New dataset pane and click on Continue button:
-
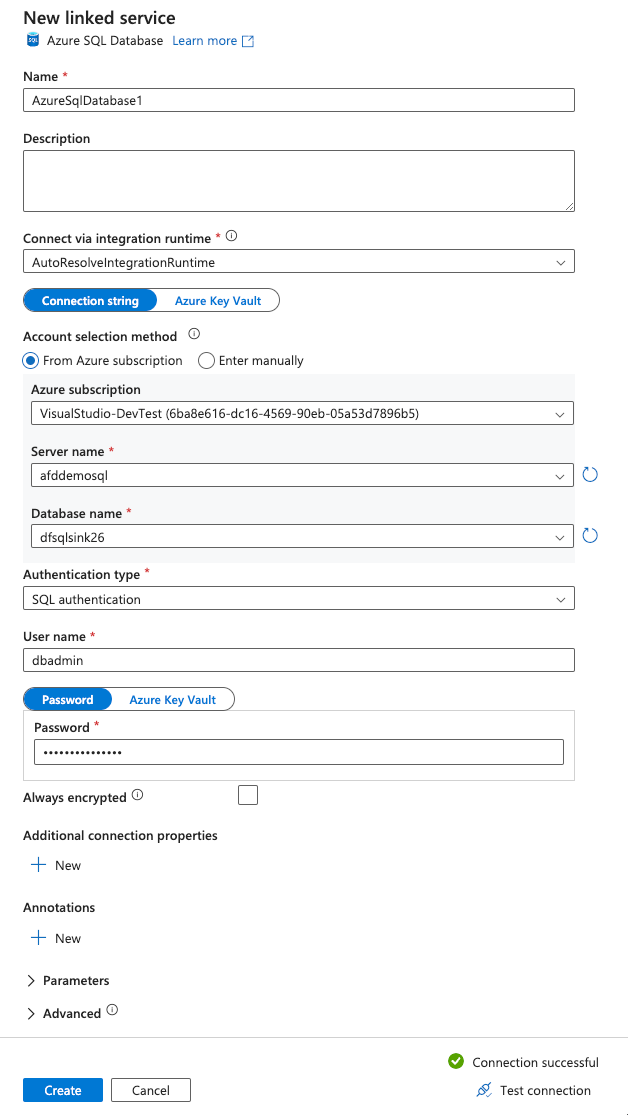
Choose the following settings for the New linked service window for the sink settings and click Test connection:
- Azure subscription: Choose the subcription that stores your SQL database resource.
- Server name: Choose the SQL server created earlier.
- Database name: Choose the database created earlier.
- Authentication type: Choose SQL authentication
- User name: Enter dbadmin
- Password: Type the password for the database configured earlier
-
Click the dropdown for Table name and select dbo.emp from the list:
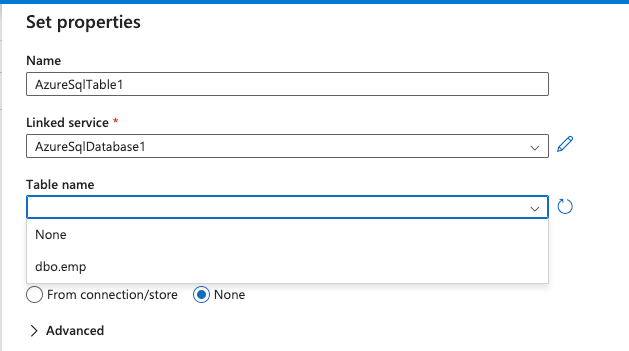
-
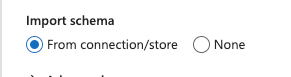
Ensure the Import schema is updated to From connection/store:
-
Click the OK button to save the settings.
-
While on the Sink tab, click Upsert for the Write behavior and select FirstName from the dropdown for the Key columns:
 The Upsert setting in the ADF sink settings ensure the inserted data is not duplicate. The Key column controls the data matching and check for any existing record that matches the FirstName entity.
 -
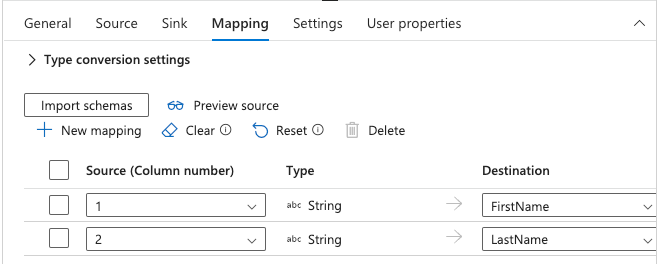
Click on Mappings tab and click Import schemas to define the column mappings between the source and destination:
-
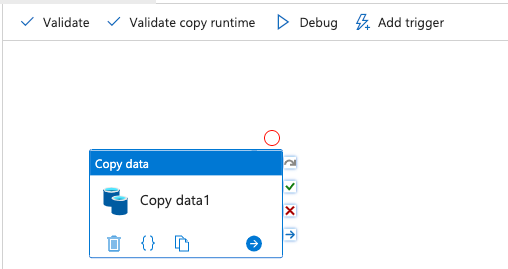
Click the Debug icon from the top menu bar to test the pipeline:
 An output window will appear on the bottom of the screen and the pipeline will be queued to run.
 -
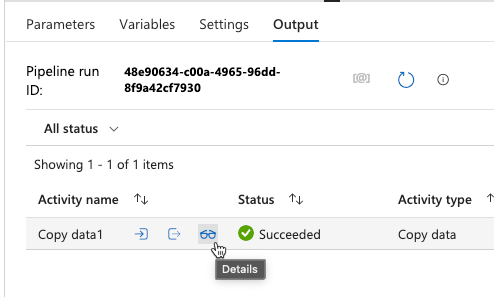
Click on the Details icon to debug the pipeline run:
-
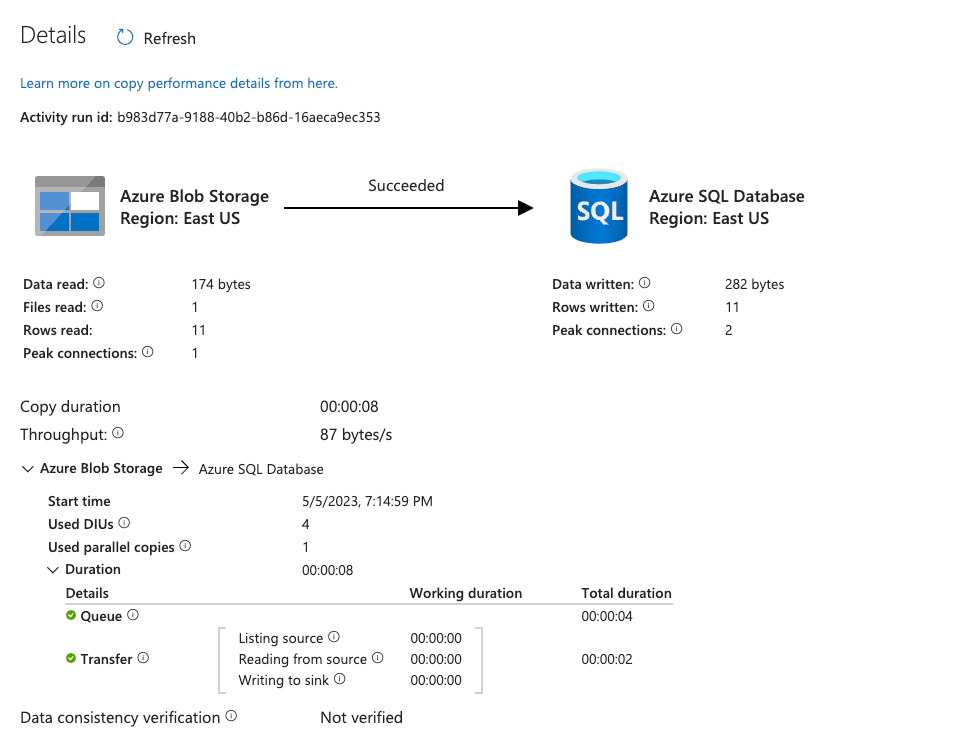
Observe the data transferred from Azure Blob Storage to Azure SQL Database:
-
Close the Details popup by pressing the X icon on the top right:
-
Click Publish all from the top menu and click Publish on the popup that appears:

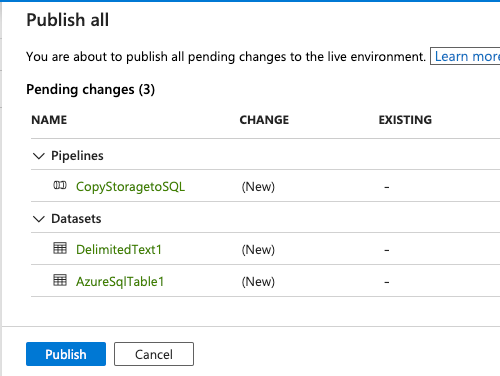 The pipeline will save and publish for scheduled triggers.
Configuring Trigger for the Data Pipeline in ADF
-
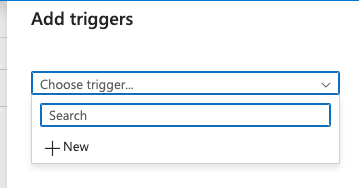
While on the pipeline page, click Add trigger button to create a scheduled trigger:
-
Click New/Edit to create a new trigger:

-
On the Add triggers popup, click + New after selecting the dropdown:
-
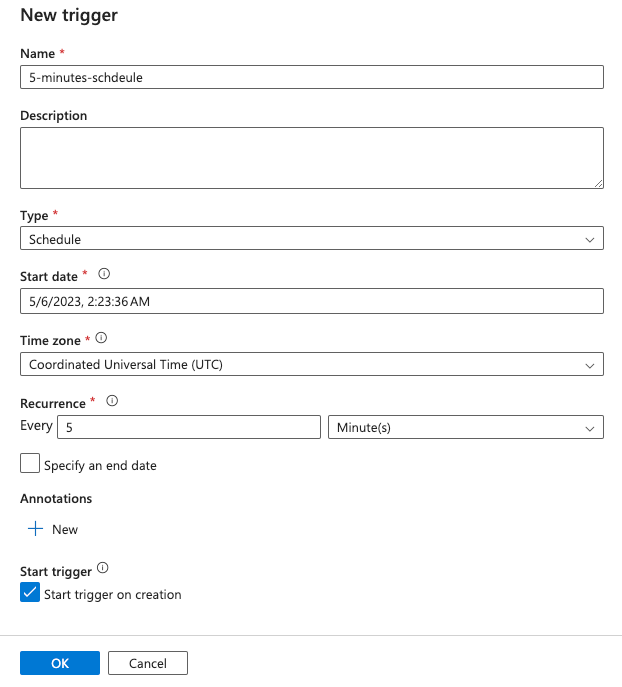
On the New trigger window, configure the following trigger settings and click OK:
- Name: Enter 5-minutes-schedule
- Type: Select Scheduled
- Start time: Specify the date and time when you want the data pipeline to start running.
- End time: Set an optional end time to define when the data pipeline should stop running.
- Time zone: Select the time zone in which the trigger should operate.
- Recurrence: Choose 5 minutes to configure the pipeline to run every 5 minutes. You can choose the frequency based on the your requirements.
-
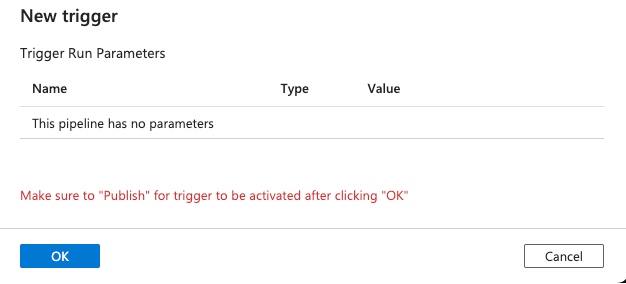
Ignore the warning on the Parameters and click OK:
-
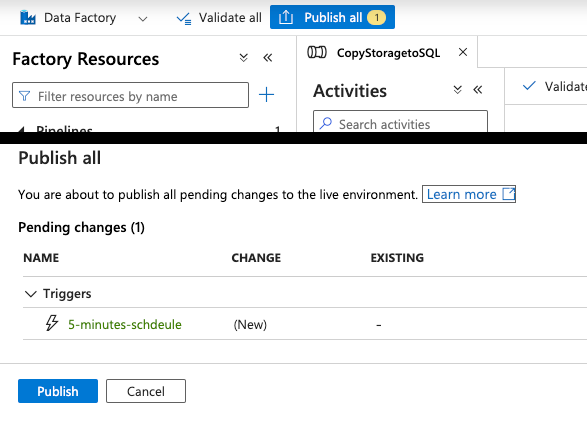
In order to activate the pipeline trigger, click Publish all and Publish on the popup window that appears:
Note: If you wish to monitor the pipeline and triggers, consider waiting for the first pipeline trigger run to take place.
Monitor the Data Transfer
Monitoring and troubleshooting your data pipeline is an important step in ensuring its reliability and effectiveness. Azure Data Factory provides several tools for monitoring your pipeline, including built-in logging and metrics, as well as integration with Azure Monitor for more advanced monitoring and alerting. You can also use Azure Data Factory's built-in debugging tools to troubleshoot any issues that arise during pipeline execution. By regularly monitoring and troubleshooting your data pipeline, you can ensure that it is running smoothly and delivering the data you need when you need it.
-
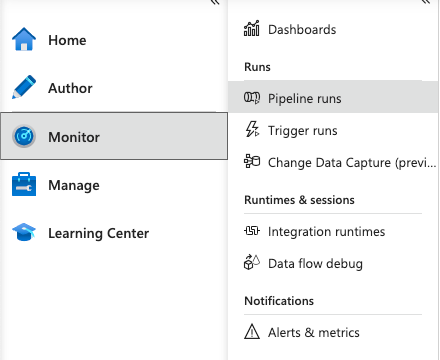
Navigate to the Monitor tab from the left menu items and click Pipeline runs:
-
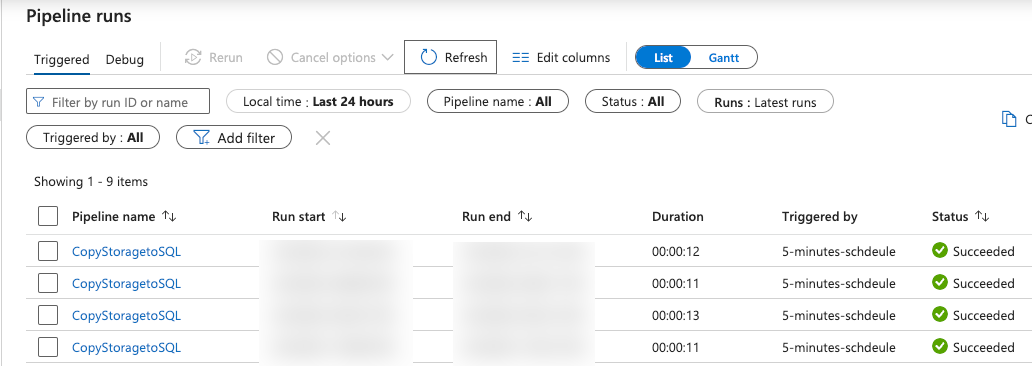
Under the Triggered tab, observe the pipeline runs in the past 24 hours:
-
Use the Monitor tab to track the progress of data transfer and ensure its successful completion.
-
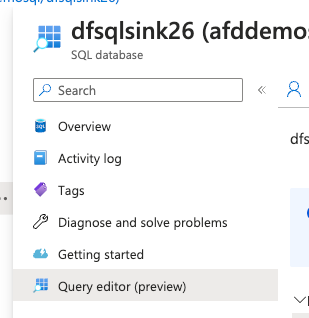
To validate the pipeline runs, navigate to the SQL Database and click on Query editor (preview) in left-hand side of pane:
-
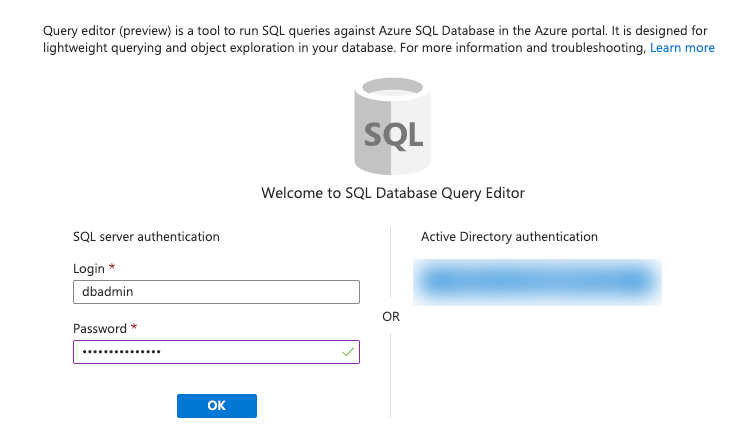
Use the SQL server credential to login:
-
Now enter the following script query in Query editor and click Run:
SELECT * FROM [dbo].[emp]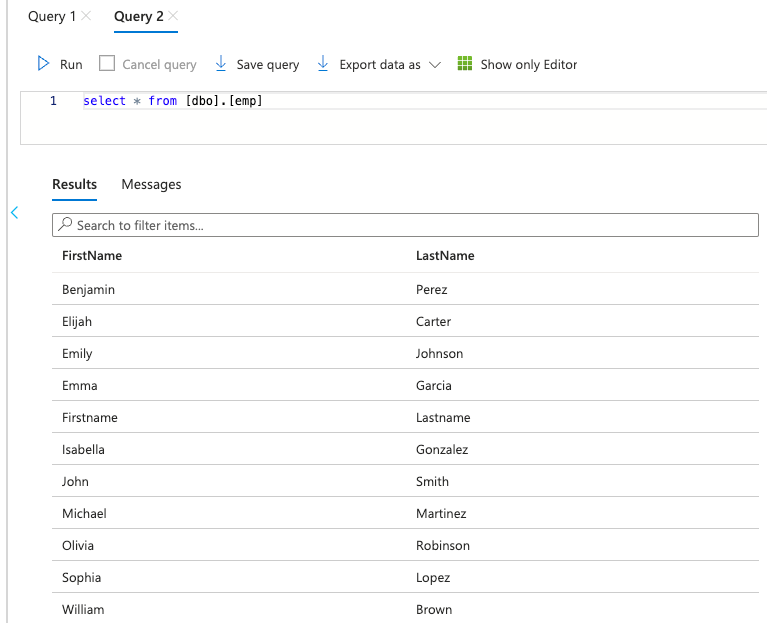
Note: Don’t forget to delete the resources once you are done. You don’t want to leave them around as the cost may add up based on the tier you used for SQL server as well as the pipeline run frequency.
Conclusion
You learnt the step-by-step process of deploying an Azure Storage Account & Azure SQL Database for an Azure Data Factory pipeline. Remember to configure the trigger to schedule the pipeline execution and monitor the data transfer process for any potential errors or issues. With Azure SQL Database and Azure Data Factory, you can efficiently manage and integrate your data, enabling valuable insights and analytics for your business.