


As a Software Engineer, DevOps Engineer, or even a beginner in Tech space, you must have probably come across the term – Continous Integration and Continuous Delivery. It plays a vital role in the Agile software development process.
The lifecycle of an Agile development process is continuous and evolving. With each iteration, you plan, design, develop, test, and deliver pieces of your software. With Azure DevOps, you have an all-in-one solution that simplifies the entire process. This article explores a step-by-step guide to building your pipeline with Azure DevOps Pipeline.
Introduction to CI/CD and Azure DevOps
Continuous Integration and Continuous Delivery (CI/CD) is the methodology or approach that encompasses both continuous integration and continuous deployment practices involved in the software development life cycle.
Continuous Integration (CI) is the practice of frequently merging changes on a developer’s code to a shared codebase or repository. During CI, the piece of code is automatically compiled and tested. This helps identify integration issues quickly and ensures the code is functional, reliable, and stable before deployment.
Continuous Delivery (CD), on the other hand, is the practice of automatically deploying code into a production environment whenever changes pass integration and acceptance tests. This helps ensure delivery speed and efficiency.
You can also read some aspects of CI-CD in this blog.
Continuous Deployment for Azure App Service: GitHub and Azure Repos
What is CI/CD Pipeline
As already established, CI/CD mitigates all the hassles of integrating and delivering new features to an existing software application. Over the years, we have seen software applications like Facebook evolve by constantly adding new features like; the tagging of people in photos, video calling, groups, and lots more.
This set of automated processes and tools that enable developers to modify existing applications, create additional modules, build new versions, perform unit testing and analyze bottlenecks and possible points of failures, and eventually deploy or redeploy to production is known as CI/CD Pipeline.
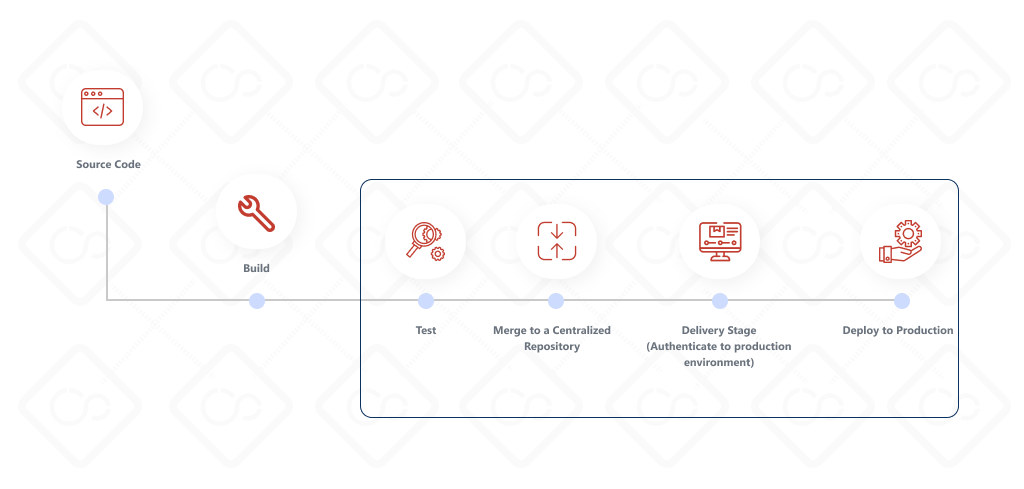
While CI/CD is the process or methodology, CI/CD Pipeline is a toolchain of automated processes. In other words, CICD Pipeline is the specific implementation of a CI/CD methodology. A Pipeline is divided into stages, with each stage configured to perform a set of tasks. These stages are:
- Source Code or Version Control
- Build
- Test
- Deploy
Overview of Azure DevOps
There are various tools for implementing CI/CD, such as Jenkins, CircleCi, Travis CI, Azure DevOps, AWS CodePipeline, and Spinnaker. This article will focus on building CI/CD with Azure DevOps. Alternatively, if you are preparing for the Azure DevOps Certification exam, you must check out this Study Guide for Azure DevOps AZ-400.
Azure DevOps is a cloud-based service from Microsoft that provides a complete set of tools for application development. It offers a unified platform that integrates various capabilities, including source code management, continuous integration/continuous deployment (CI/CD), project management, testing, and collaboration capacities. It is platform-independent and also allows integration with other tools, as well as none Microsoft environments.
Key Component of Azure:
- Azure Boards: This is a project management board for planning and process tracking and offers features like customizable Kanban boards and work-item tracking
- Azure Repo: This is a version control system for source code management. It supports both centralized version control (TFVC) and distributed version control (Git), allowing developers to collaborate on code, track changes, and manage branches effectively.
- Azure Pipeline: This is the CI/CD hub. It allows you to create, build and release pipelines and integrates with source code from different platforms such as Github, Azure Repos, Bitbucket, and even On-premises Git Server.
- Azure Test Plans: It facilitates the testing of applications by providing a comprehensive testing framework
- Azure Artifacts: This feature helps manage and host artifacts such as NuGet, npm, and Maven packages. It enables teams to create, publish, and share packages, ensuring the consistency and reliability of dependencies throughout the development process.
Benefits of using Azure DevOps for CI/CD
Here are reasons why you should consider Azure DevOps for your next project
- Platform Independent: It allows deployment to other platforms (Windows, Linux, or Mac) and also other cloud providers
- Integration and Extensibility: Azure DevOps integrates well with other Microsoft products, such as Azure cloud services, Visual Studio IDE, and Microsoft Teams. It also supports integration with third-party tools, enabling teams to leverage their preferred development tools, frameworks, and services.
- Azure DevOps supports a wide range of programming languages and frameworks, including .NET, Java, JavaScript (Node.js), C/C++, Ruby, Swift, Go, TypeScript, PHP, and Python.
- It accommodates teams and projects of all sizes and complexity and supports seamless scalability.
- It supports other development methodologies (Agile, Scrum, or custom processes ), allowing your team to work with their style.
- Provide beginner-friendly and intuitive features. This includes pre-built templates for common development scenarios.
Understanding the Azure DevOps Pipeline
This is the CI/CD feature that enables teams to automate the building, testing, and deployment of applications across various platforms and environments. It supports building and deploying applications on different cloud platforms, on-premises servers, or hybrid environments. To enhance comprehension, we will establish a straightforward pipeline that automates the building and deployment process of a basic Flask application to Azure App Service.
Prerequisites
Before continuing reading, please ensure that you have the following tools and service access to follow the hands-on implementation.
- Visual Studio Code or any editor of your choice
- Github account (Signup for free )
- Azure Account ( Get the free $200 on sign-up)
- Sign up using the same Azure account on Azure DevOps
Overview of Azure Pipeline
- Navigate to dev.azure.com, and you will be taken to the screen you see below:
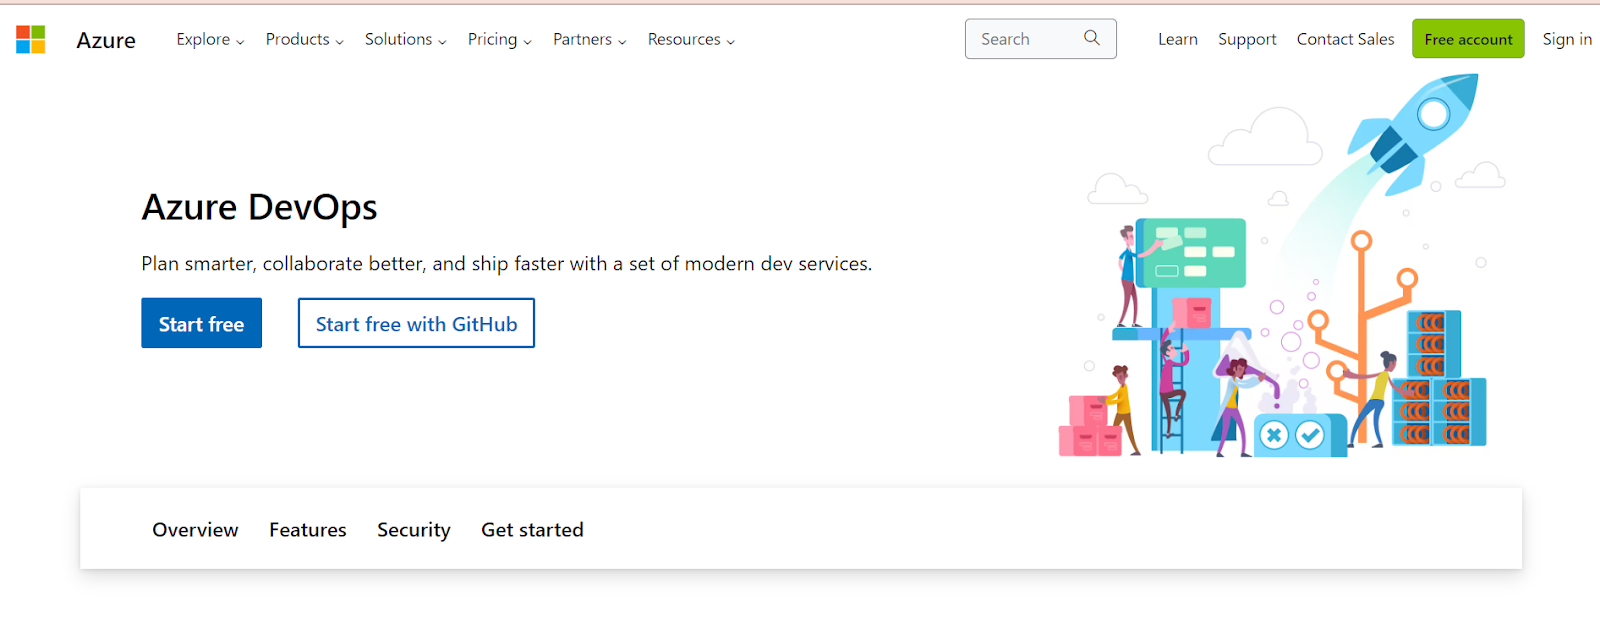
- Click on the Start Free with Github button. If you log in for the first time, you will be redirected to sign up. You should sign up with the same email used for the GitHub account.
- Click New Organization to create an organization if this is the first time; otherwise, use an existing Organisation.
- On the New Organization dialogue box, enter a unique name for your organization and choose the region where you would like your project to be hosted, and Click Continue.
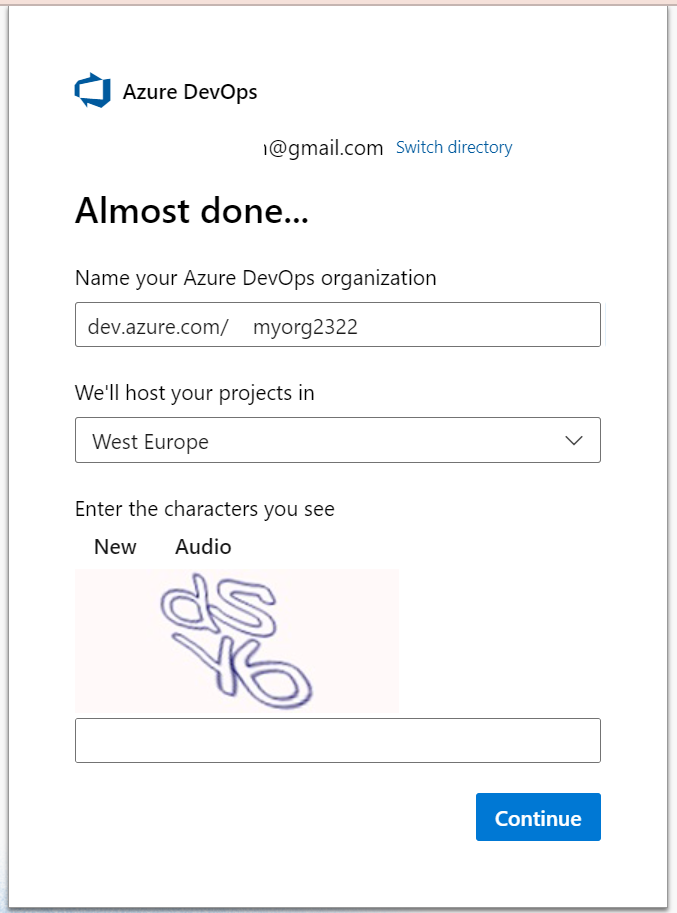
- On successful organization creation, to confirm you are with an organization, your URL will look as such – dev.azure.com/<your organization name>.
- For a new organization, your next view is the enter details to create a new project, as shown below.
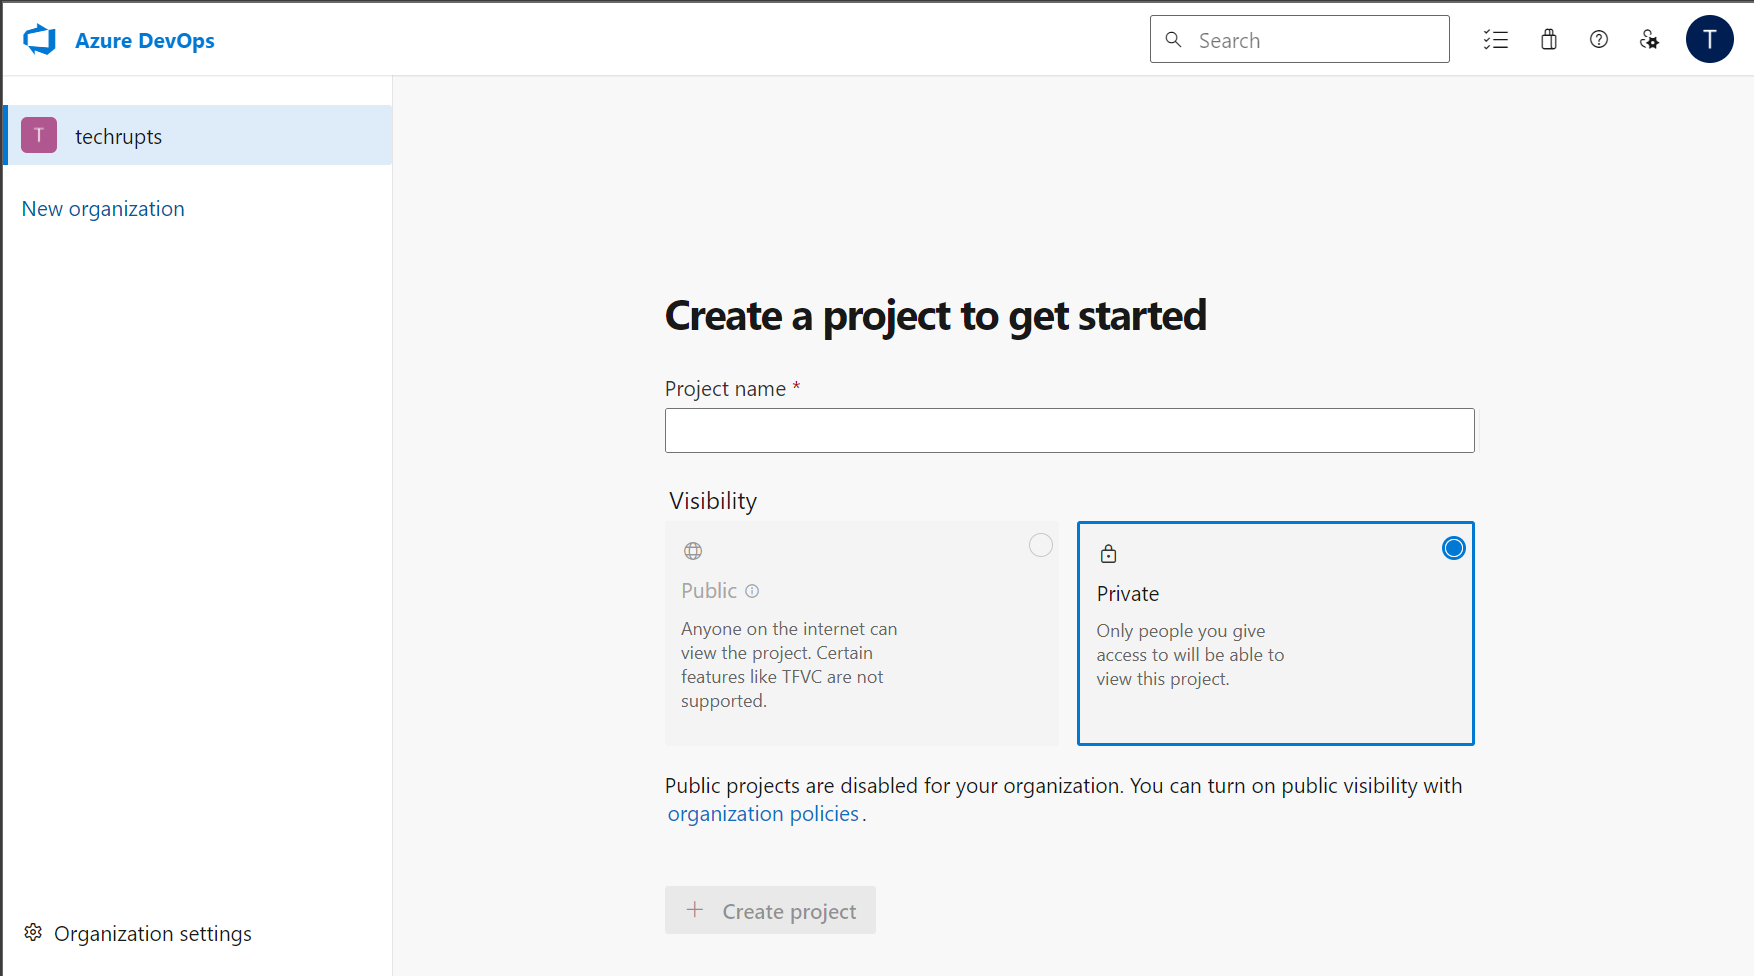
- Alternatively, Click on New Project Button to Create a Project.
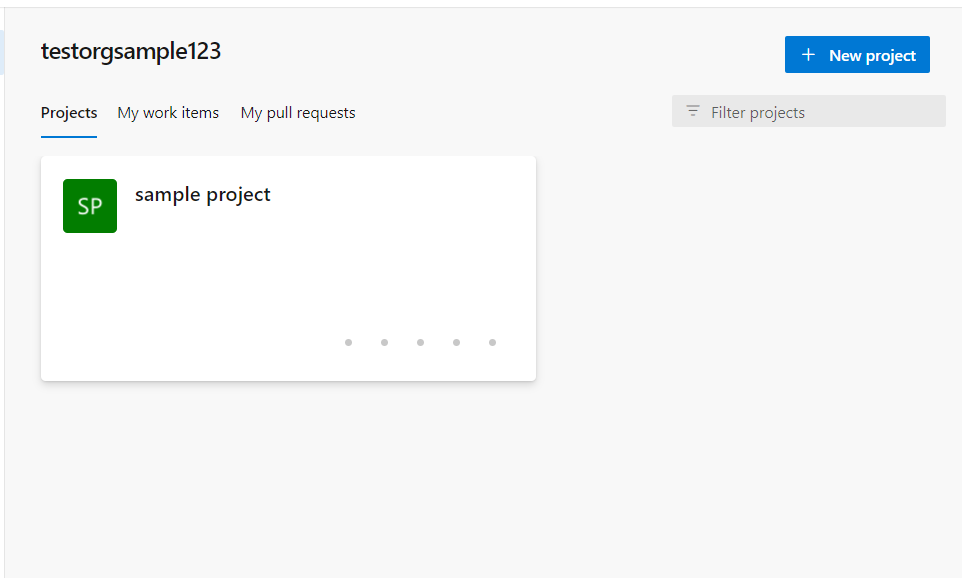
- Enter details for your project and click on Create:

- The screen below shows a new project dashboard. Navigate to Pipelines located at the left navigation:

The pipeline tab consists of 6 sub-groups. This subgroup provides a comprehensive framework for managing and automating the development, testing, and deployment throughout the software delivery lifecycle.
- Pipelines – Pipelines is core component that defines and manages the workflow of building, testing, and deploying applications. They consist of a series of stages, jobs, and tasks. Pipelines can be configured using YAML, the visual designer, and pre-built templates.
- Environments – this is where you configure your target resource ( Kubernetes cluster or a Virtual machine) and deployment environment (development, staging, or productions).
- Releases – A release defines the pipeline, artifacts, and environments associated with deploying an application. It provides a way to manage and track the release process, including approvals, deployment gates, and release history.
- Library- This is a repository where you can store and manage reusable resources and variables. It allows you to securely store and share credentials, connection strings, or other sensitive information used in your pipelines and releases.
- Task Groups – centrally manage common build and deployment steps for your applications. It enables the creation of reusable sets of tasks that can be shared across multiple pipelines. They allow you to encapsulate a sequence of tasks into a single entity, making it easier to manage and maintain consistent tasks across different pipelines.
- Deployment Groups – represent a collection of target machines or virtual machines (VMs) where an application or software needs to be deployed.
Setting up your first CI/CD pipeline in Azure DevOps
This article will be centred on building a simple web app, using GitHub as a shared repository and Azure App Service to host our App. We will explore Azure Pipelines for CI/CD. Our primary aim is to have our project on our PC such that each commit to GitHub triggers our pipeline to build and deploy to Azure App Service.
Note: Basic knowledge of Git is recommended
Set up the App Service Web App
- Open portal.azure.com on your browser, log in to Azure and Search for Web App.
- Use the information below to create your web app instance along with an app service plan:
- Subscription – Select Subscription
- Resource group – Enter resource Group or use the default,
- Name – Choose a Unique Name
- Publish – Choose Code
- Operating system – Linux
- Run Stack – Python
- Pricing Plan – Free F1
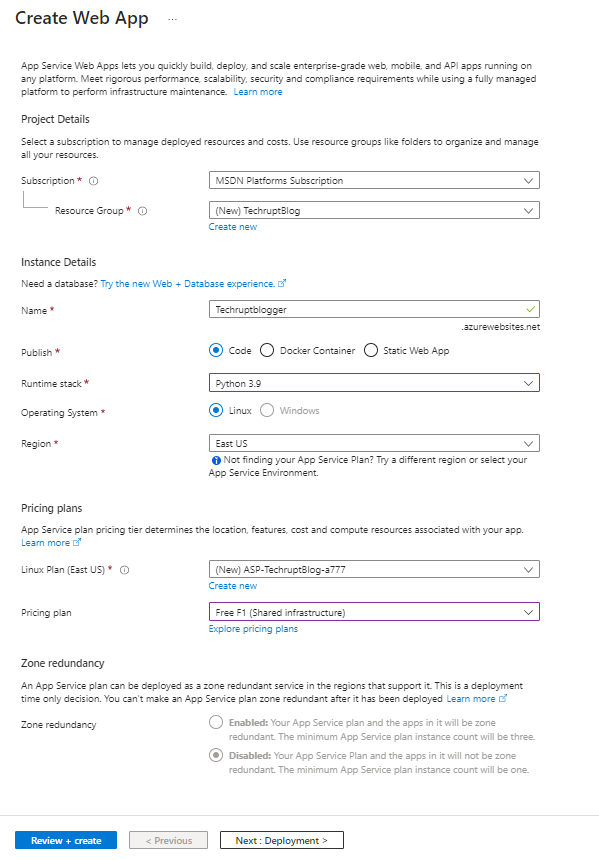
Click on Review and Create and finish through the deployment. To learn more about App Service, visit Official Documentation.
Option A: Set Up a GitHub Repository for your project
We will connect the Azure DevOps platform to use the Github repo in this section. Step 2B will use Azure Repo, which is a repository within Azure DevOps.
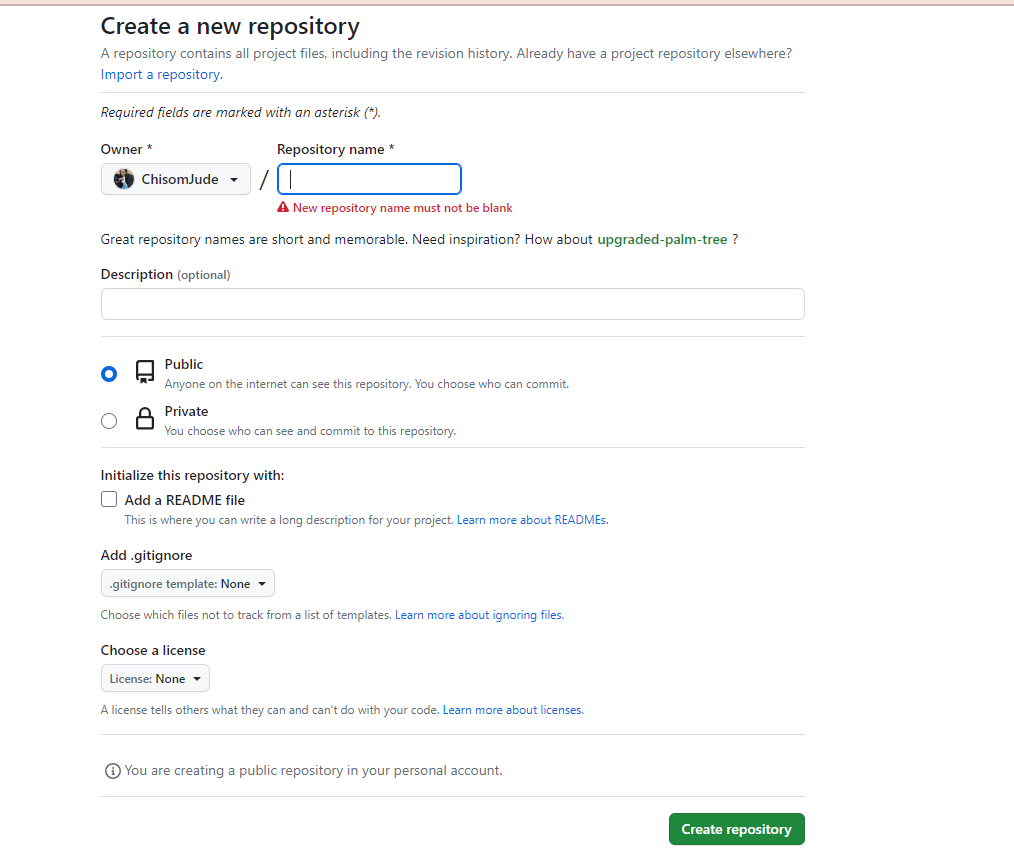
- Login to github.com/new and create an empty repository for your project. Enter a Name for the repository and click Create Repository.
- On your PC, create a project folder, and open the folder with VSCode. You can do this directly from the command prompt, as shown below.
- Open Command Prompt and enter the following script.
#create a folder called Projects
C:\\Users\\USER\\Desktop>mkdir projects

#navigate into the projects folder
C:\\Users\\USER\\Desktop>cd projects

#Open the project folder with VScode
C:\\Users\\USER\\Desktop\\project> code .- Clone this Simple Python Flask App to the project folder creates on your PC using the following command in your terminal:
git clone <https://github.com/microsoft/python-sample-vscode-flask-tutorial.git>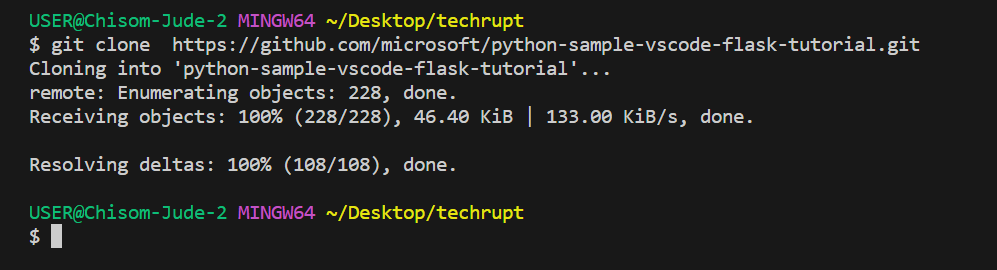
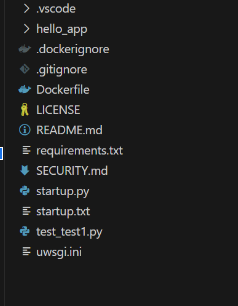
- Your source should look like this if you cloned the same project.
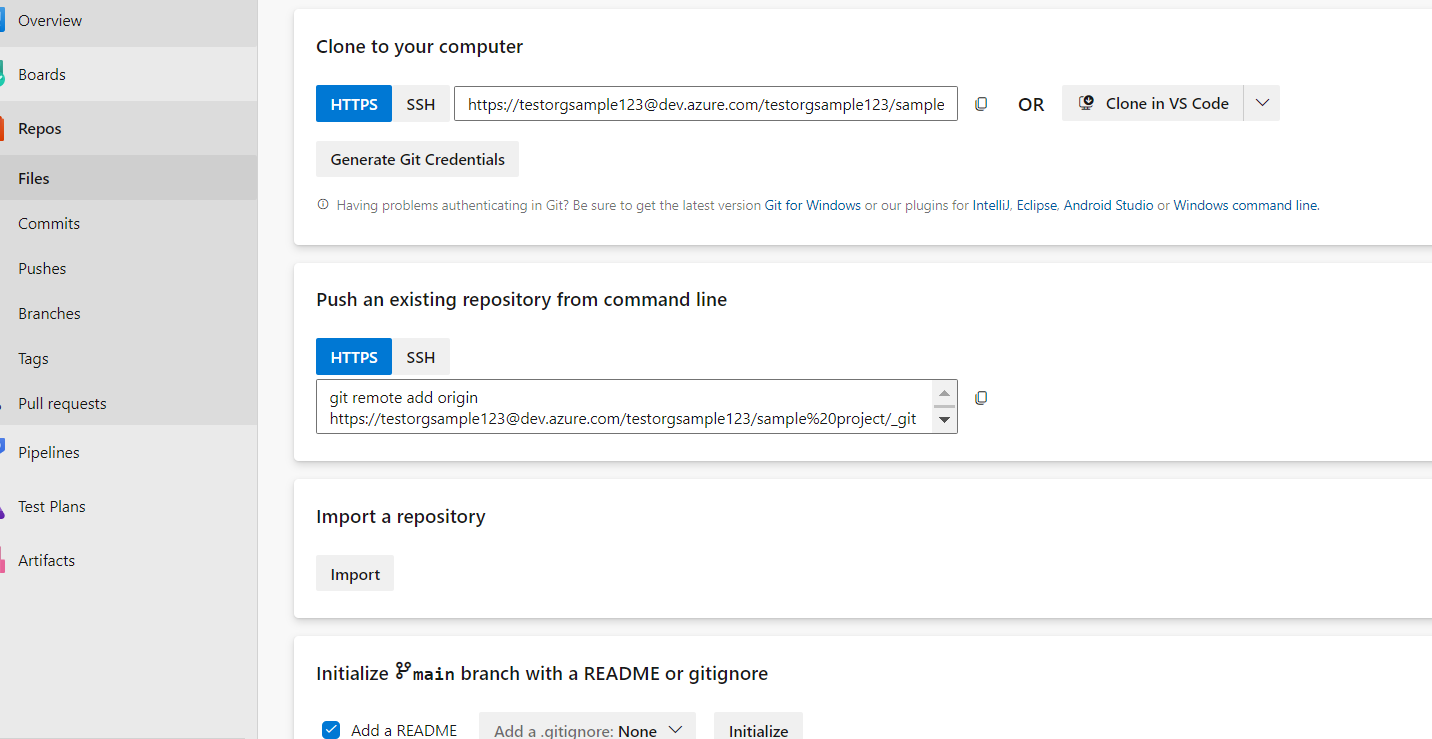
- On Github, follow the first step instruction to push this project on your PC to the new repository created. Once completed, the repository will be populated with the same project file on your local. All changes committed to this repo will be reflected in your GitHub account.
cd <python-sample-vscode-flask-tutorial or the name of projectfile>
git remote remove origin
git remote add origin <https://github.com/><username>/<new-repo-url>.git
git branch -M master
git push -u origin master
Option B: Set Up Azure Repo for your project
Instead of Github, we can also step our project using Azure Repo. This also provides standard version control features to manage and track changes in your source code.
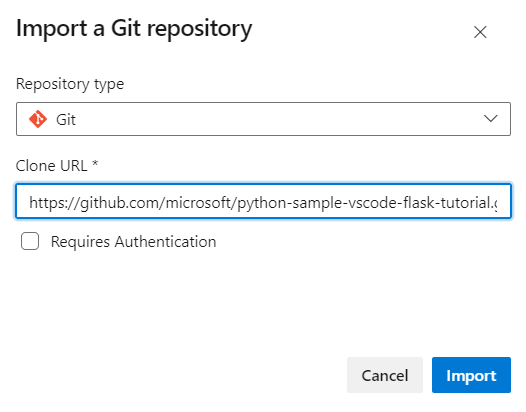
- Navigate to dev.azure.com, click on Repos, select Files and click Import:
- Enter the Sample Project repository link in the dialogue box and click Import. This clones the project file to Azure Repos as your project file.
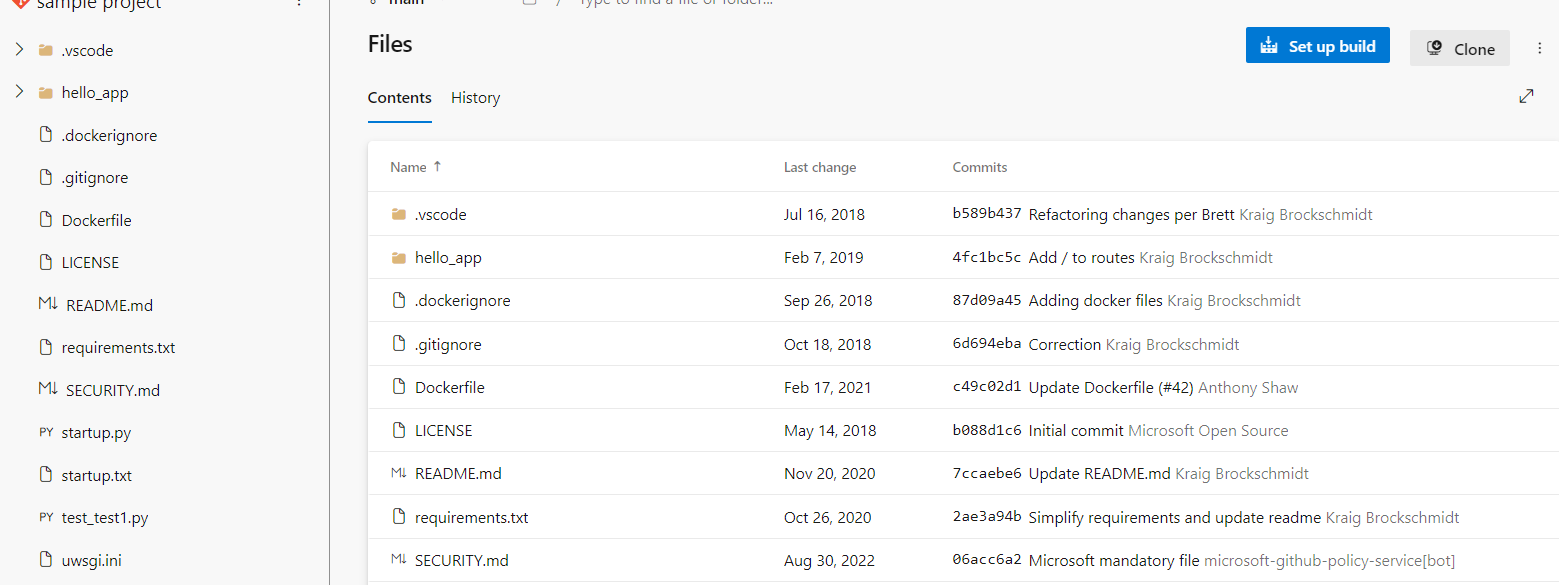
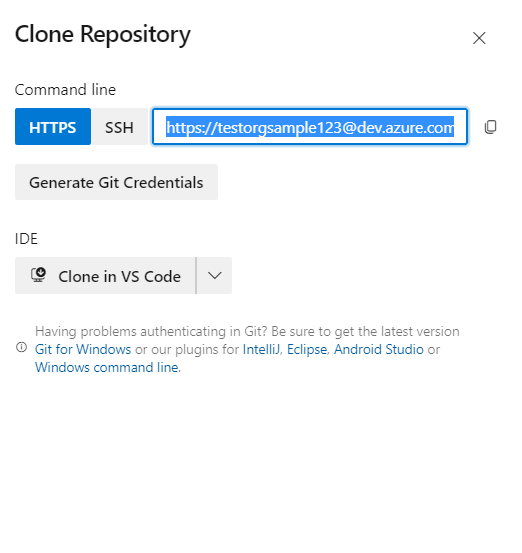
- Once the import finishes, you will clone this repo to your PC using the VSCode editor by clicking on the Clone button:
- On the Clone Repository dialogue box, click the Clone in VSCode button:
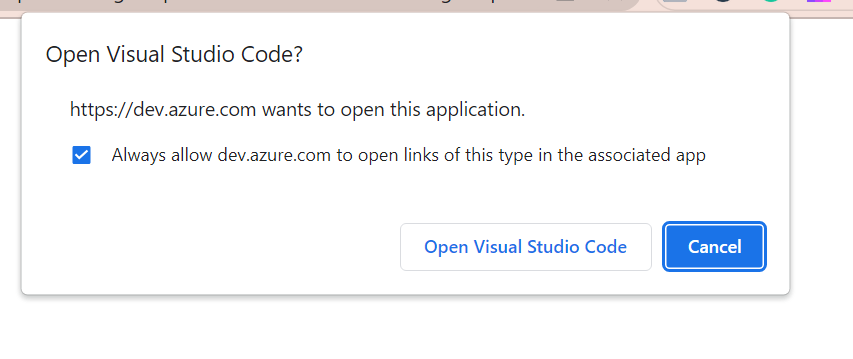
- This will prompt you to Open the Visual Studio Code application on your PC. Allow the Prompts and Select a folder from your file explorer opened to open the VS Code:
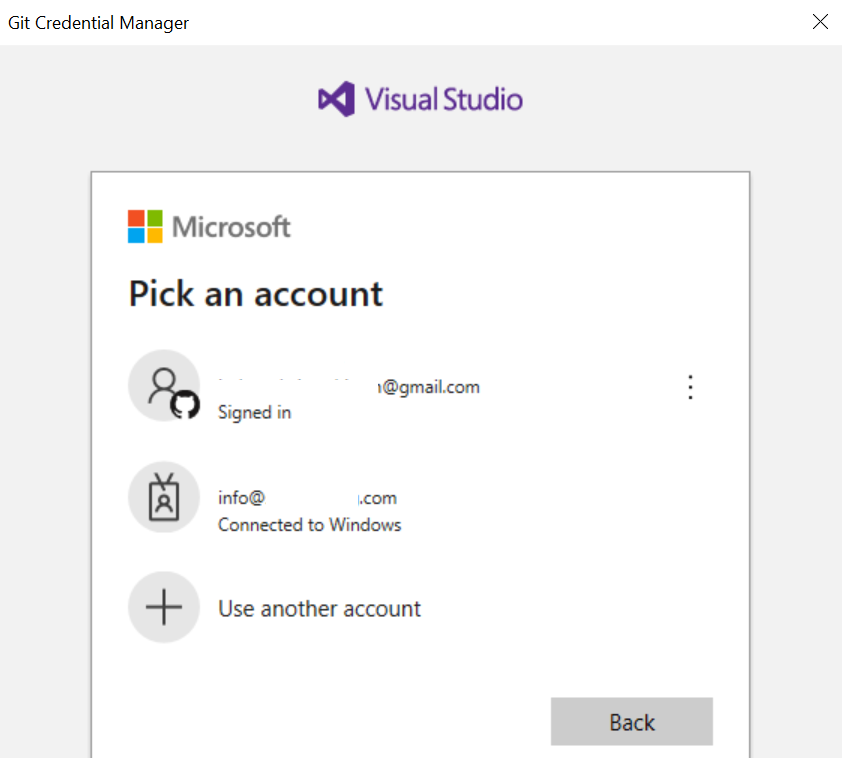
- If you are prompted to authenticate to Git Credential Manager and sign in using the account used for Azure DevOps platform access:
- Once authenticated, your sample project clone will be open in VS Code, just as it is in Step 2A above. Changes and commits on this project will be reflected in your Azure Repo.
Setting up an Azure DevOps Service Connection
Before creating your first pipeline, you must create a service connection to Azure. Creating a service connection provides a secure way to establish a connection between your pipeline and external services, in this case, Azure Subscription.
By adding a service connection, your pipeline can securely authenticate and authorize itself to access these external services during the pipeline execution. This allows the pipeline to interact with resources in Azure or other connected services, retrieve artifacts, deploy applications, and perform other operations as required.
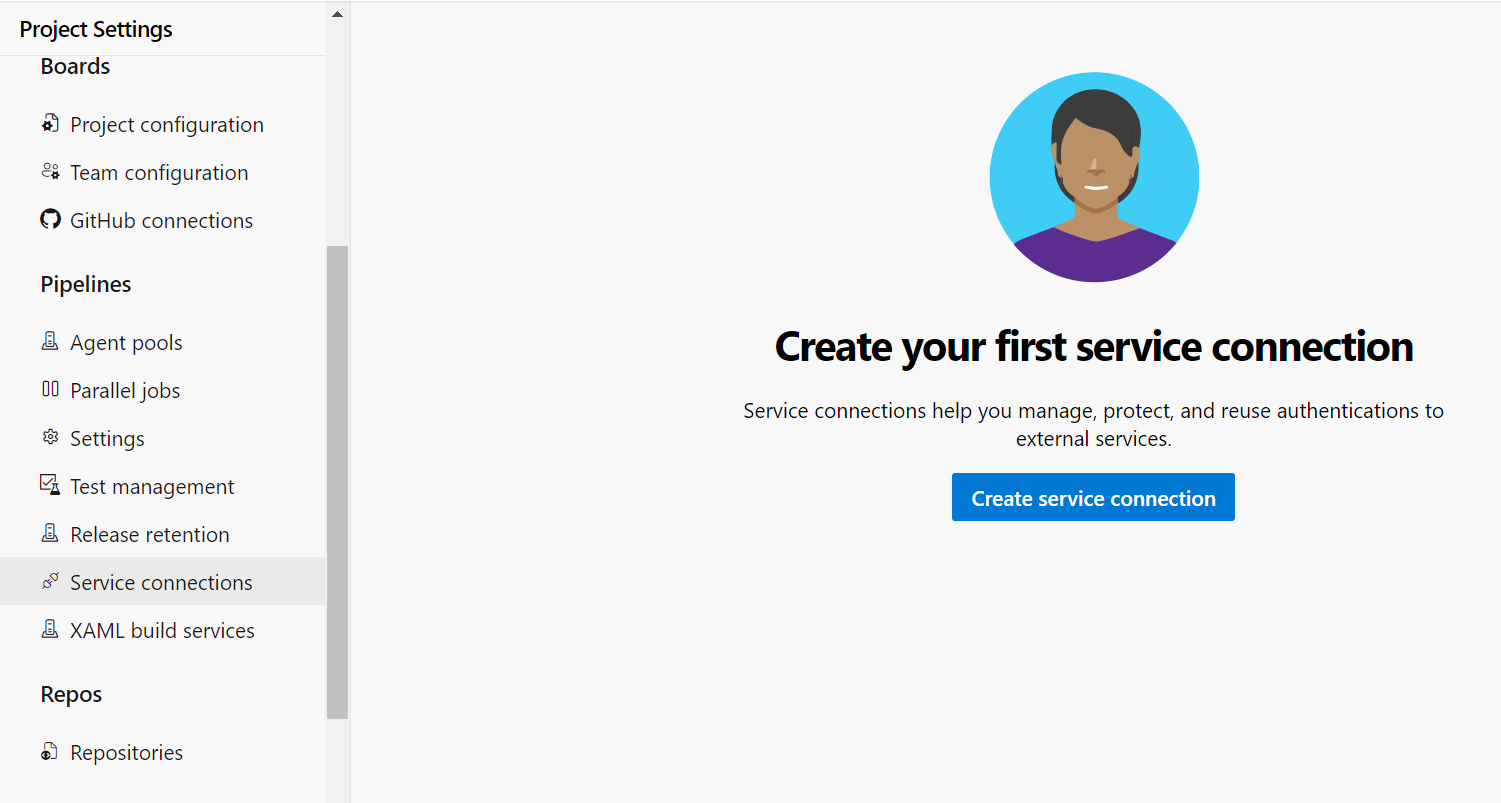
- Click On the Project Setting on the far left bottom inside your DevOps project:

- Navigate to the Pipelines session and click on the Service Connection. Click Create service connection to add a new connection:
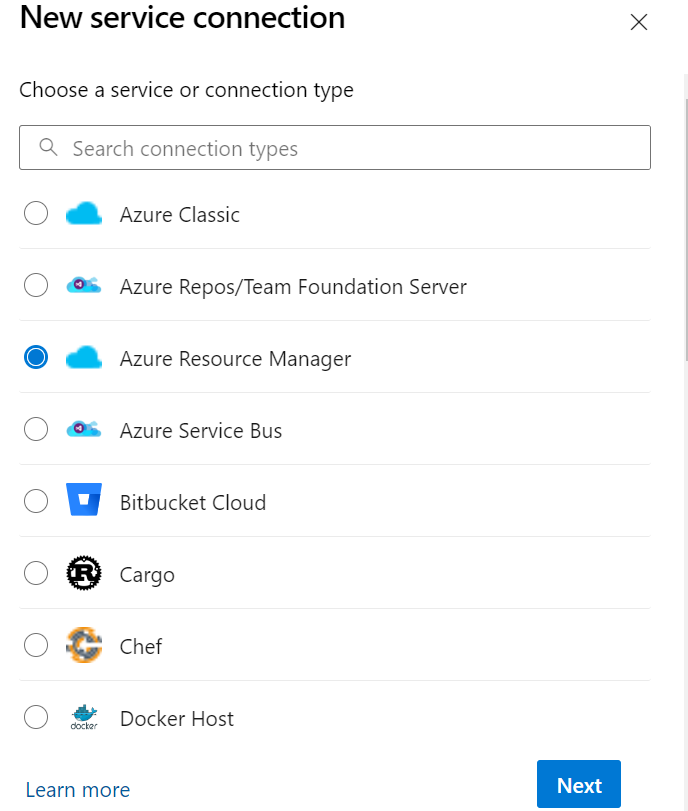
- On the New Service Connection window, select the Azure Resource Manager and click Next:
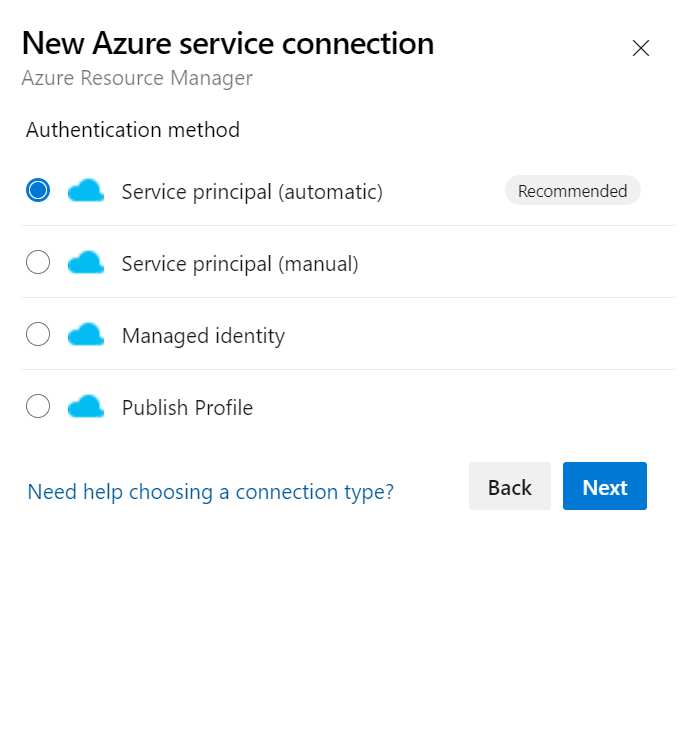
- Select Service principal (Automatic) and click Next:
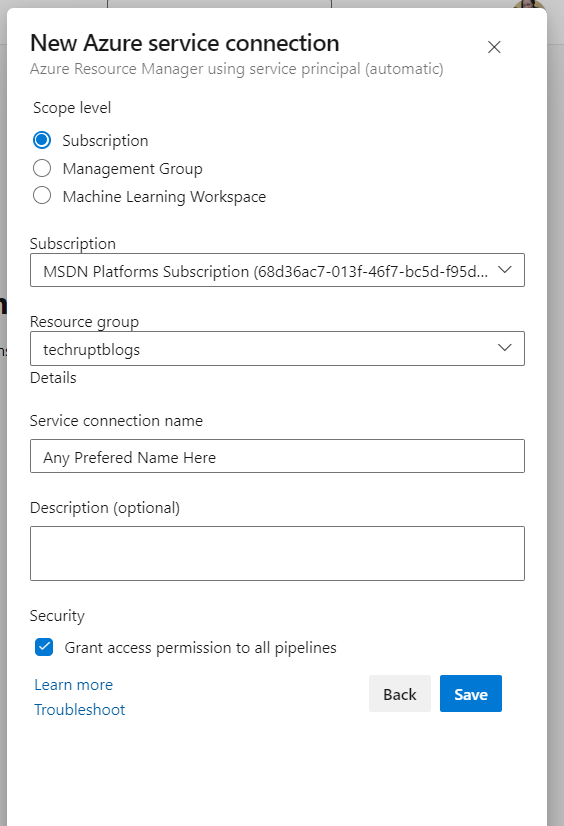
- On your next window, fill in the connection information and click Save:- Subscription: Choose the subscription of your choice. You may be redirected to authenticate to Azure; ensure to authenticate so Azure DevOps can access your Azure resource needed on the next screen.
– Resource group: Choose the resource group created earlier for the web app instance.
– Service connection name: Enter any preferred name for the Service Connection name
– Security: Check the box for Grant Access Permission to all pipelines
- Once the connection is created, it will appear under the Service connections window:

Creating an Azure DevOps Pipeline
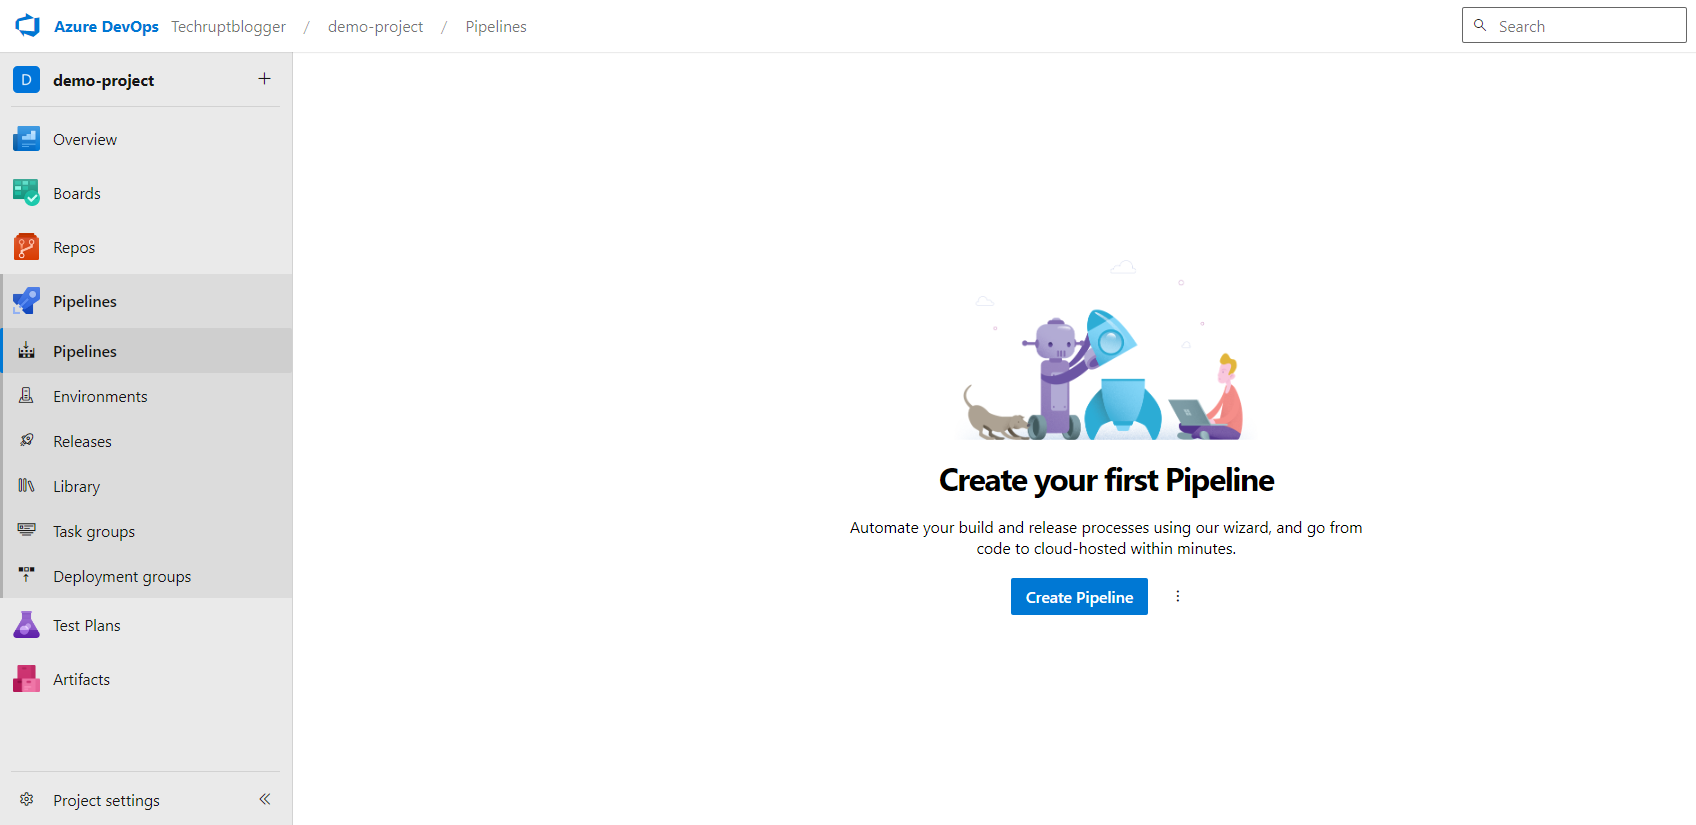
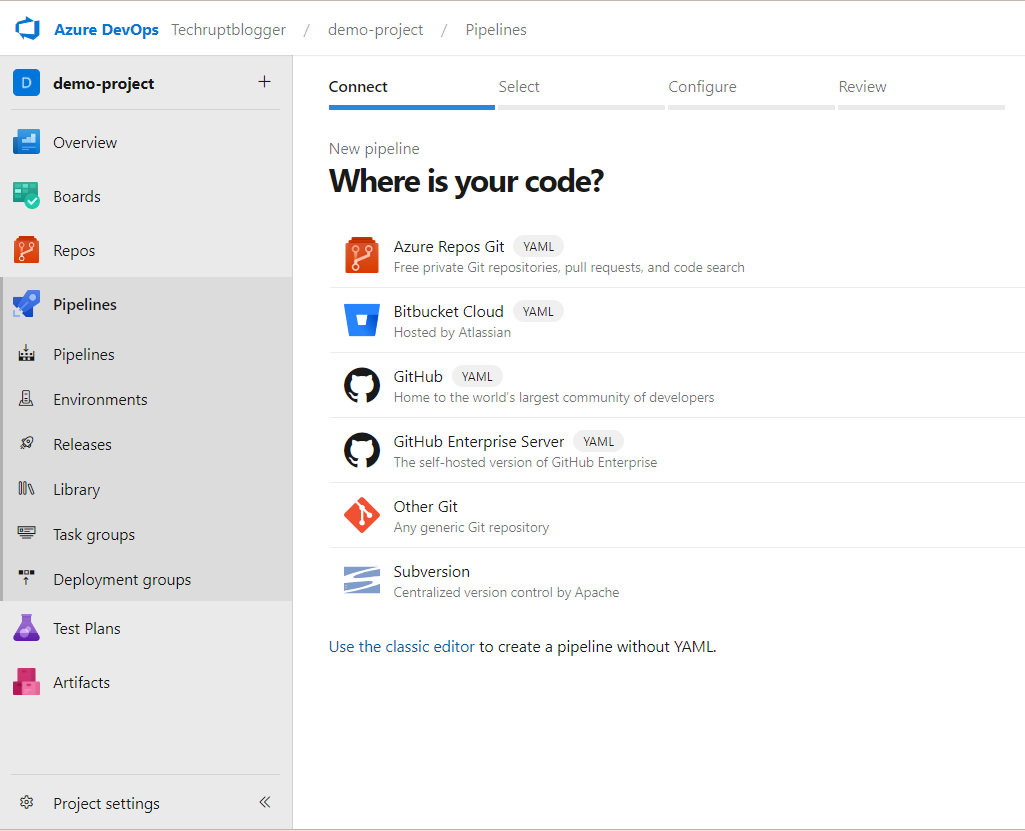
- Navigate to your project dashboard, and click on Pipelines followed by Create Pipeline:
- On the Where is your code? window, select either GitHub (Option A) or Azure Repo Git (Option B). Either Option takes you to the same page to select your Repo:
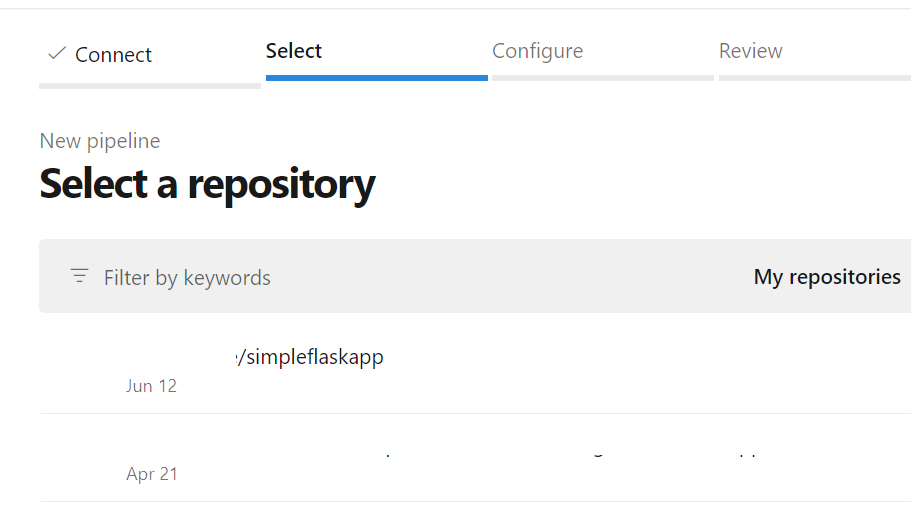
- On the Select the Project Repository page, choose the simpleflaskapp repo:
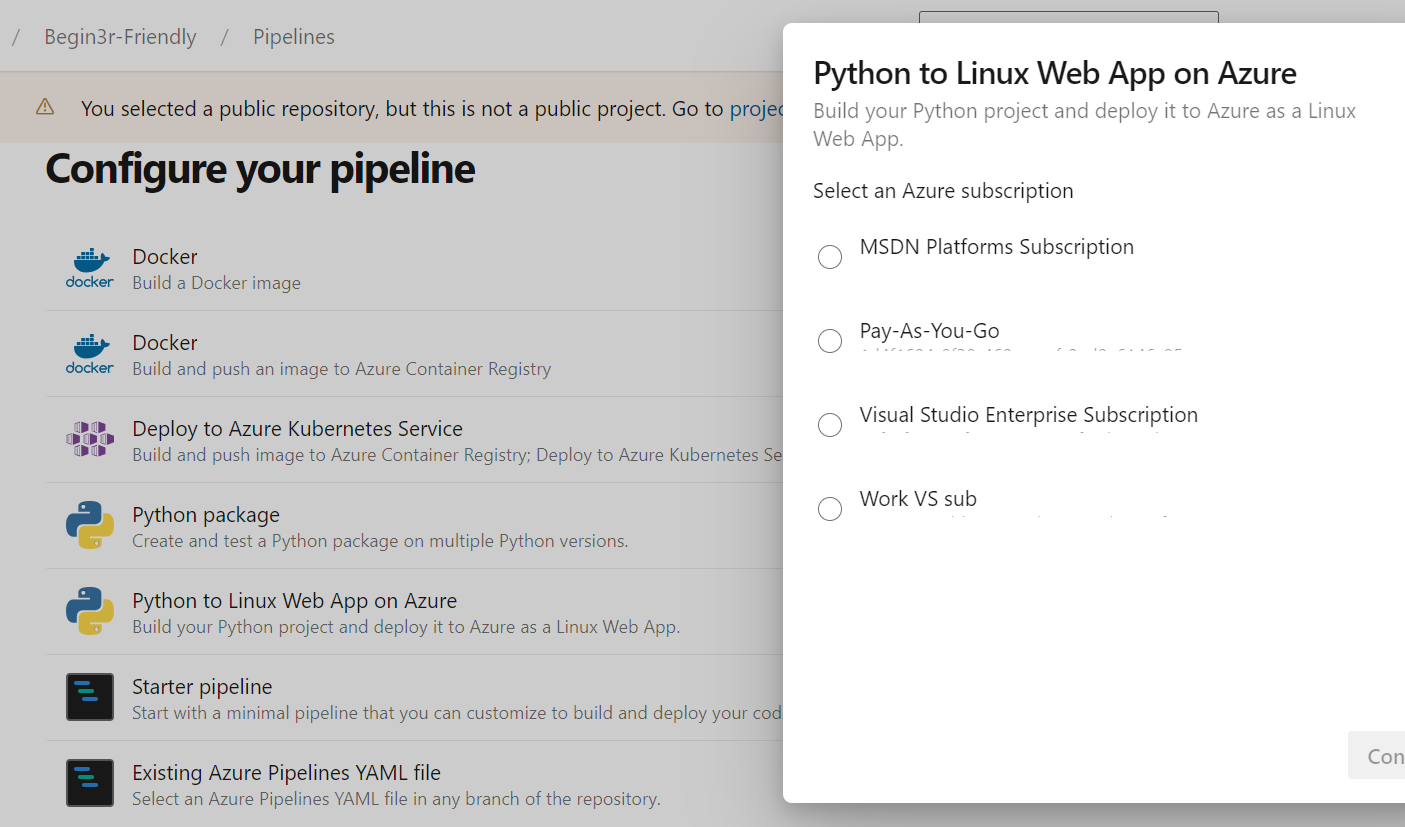
- On the Configure your pipeline page, select Python to Linux Web App on Azure. This uses the Azure Pipeline template to deploy your source code to Linux App Service. Select Azure Subscription configured for the service connection and click Continue:
- You may be redirected to authenticate to Azure, enter your Azure account credential, and continue.
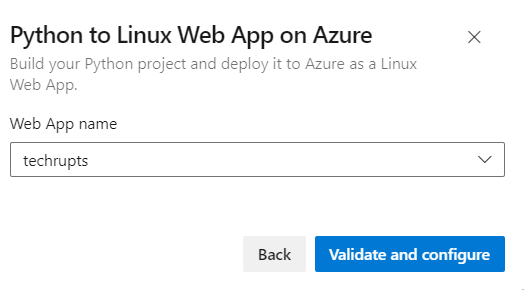
- On the next screen, select your Web App created in Step 1 and click on Validate and configure:
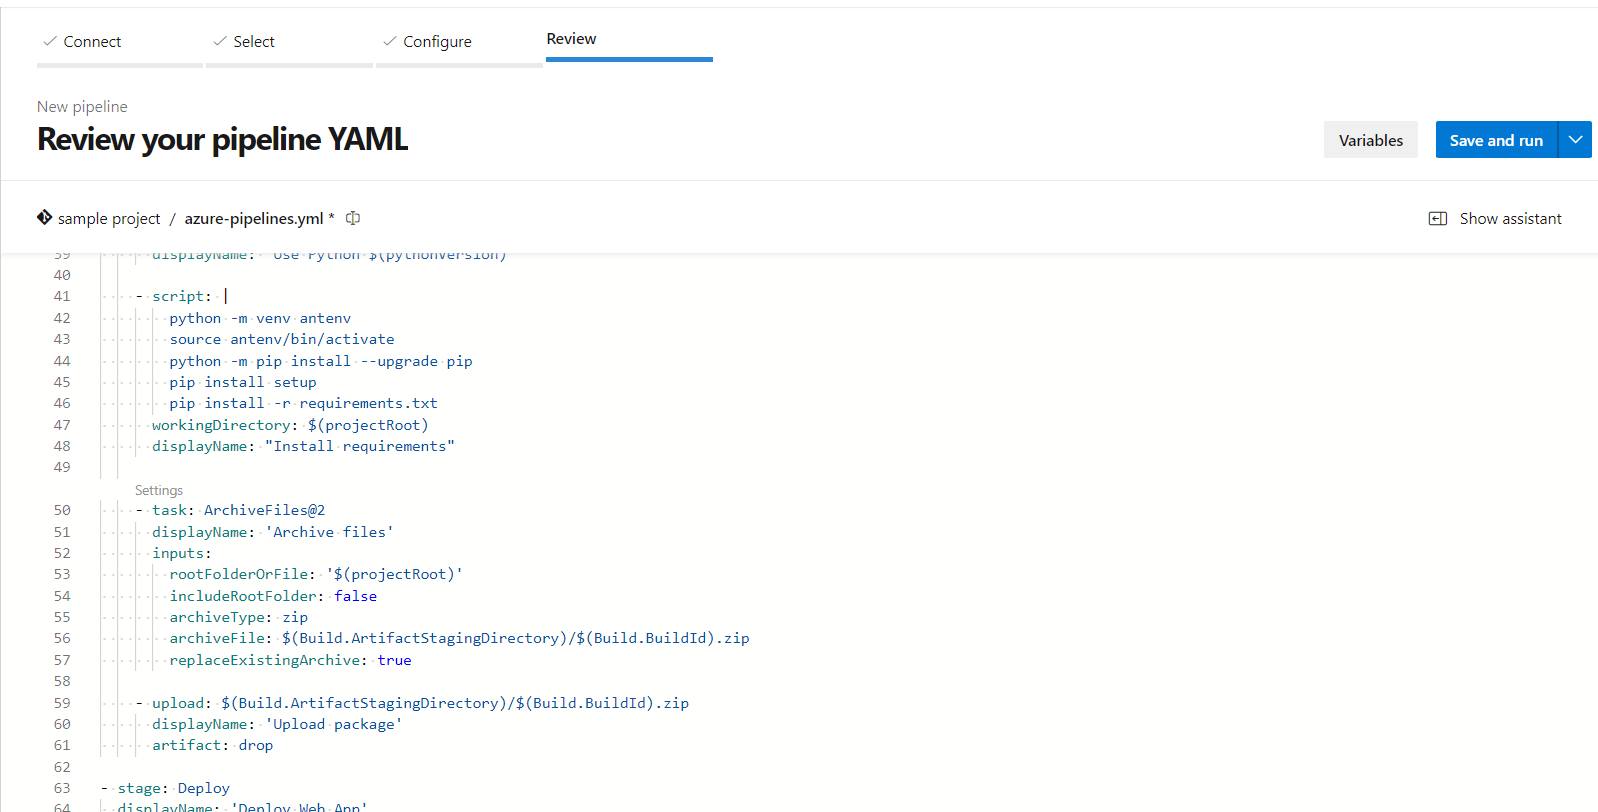
- Azure Pipelines automatically opens the default template for the Python to Linux app deployment. However, this can be customized to suit your needs. Proceed with the Save and Run button for now:
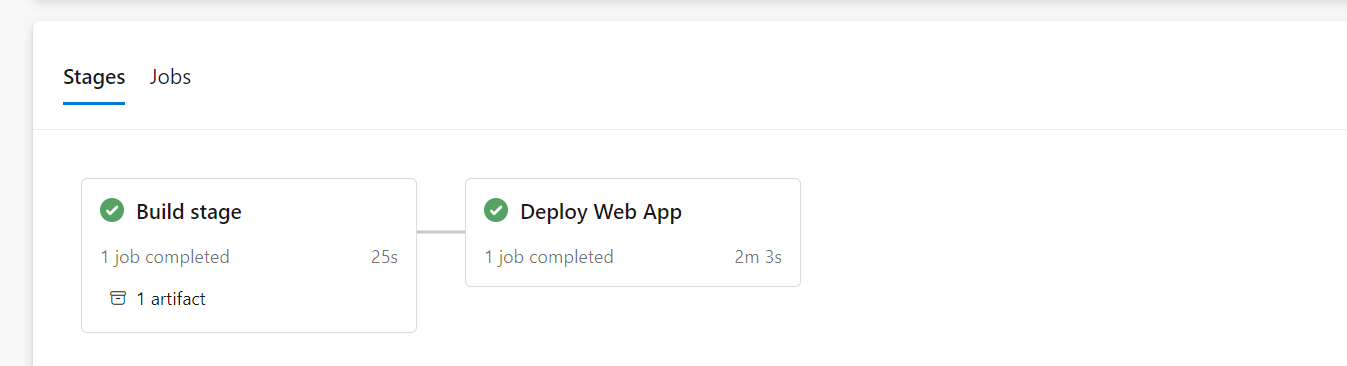
- This last step automatically runs your pipeline and deploys to App Service. On completion, jobs will be checked green, as shown below.
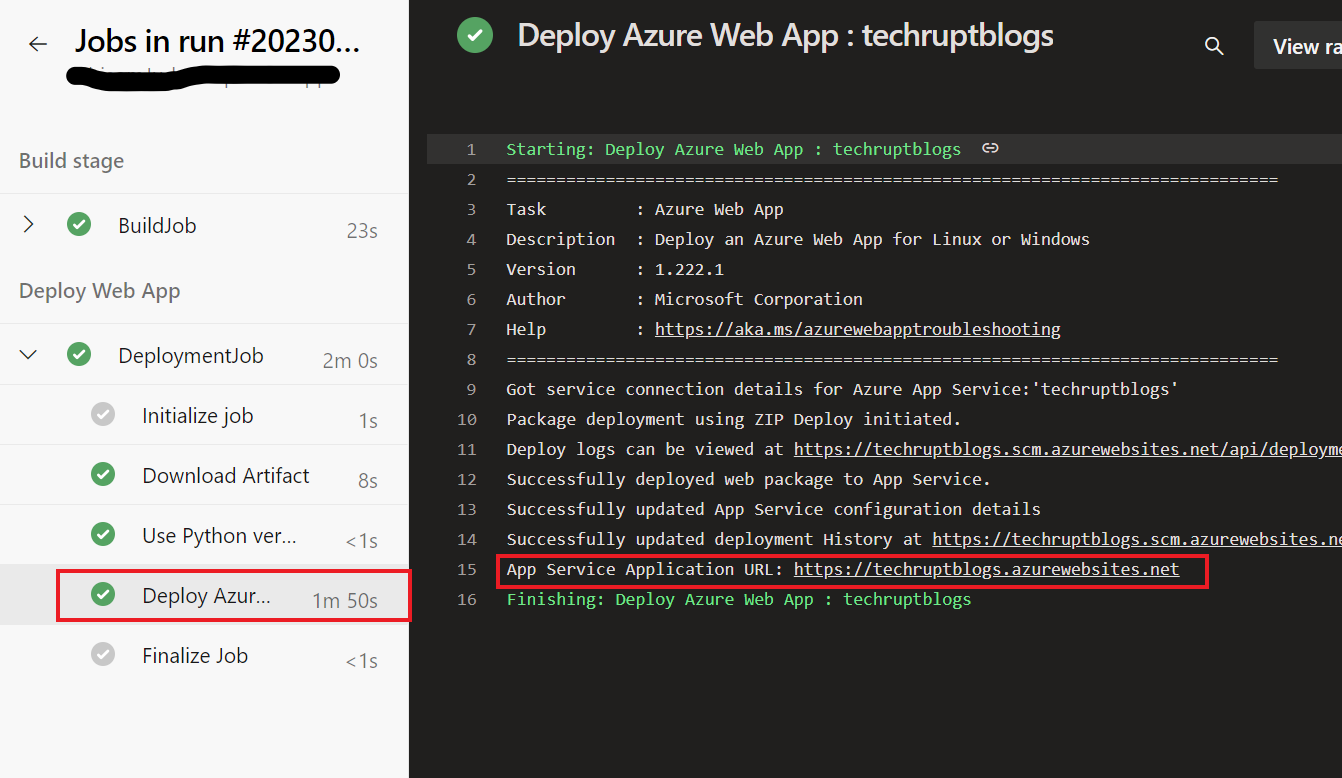
- Open the deploy job and get your web app link your link will look like <webappname>.azurewebsites.net.
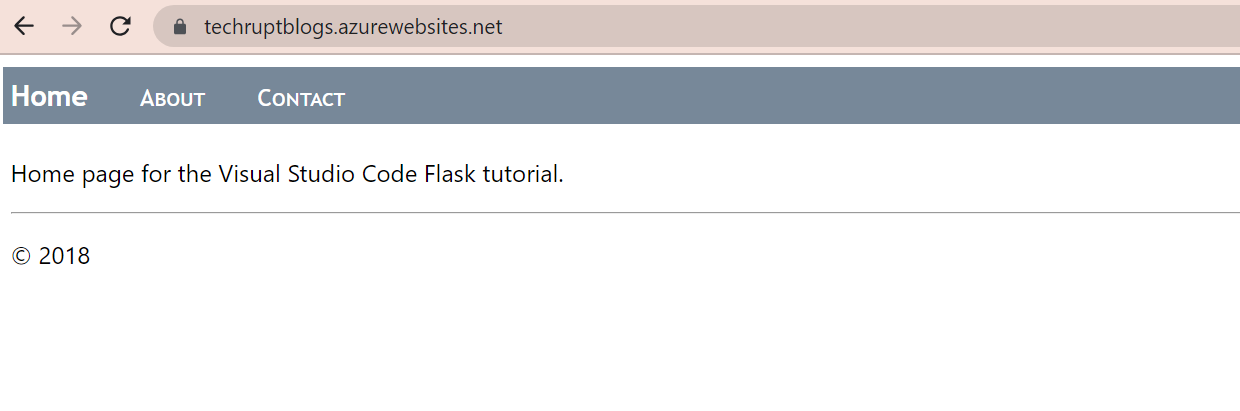
- Open the URL in the browser, and your web app should look like this
Validating DevOps Pipeline Auto-Build and Deploy
Currently, when changes are made on your project folder on VS Code and pushed to GitHub or Azure Repo, this will trigger a build on the pipeline.
Since you have configured the pipeline to build and deploy to Azure Webapp, the same changes will reflect on Azure Webapp once the build is complete.
- Navigate to the Hello_App folder within the repository folder inside VS Code, and click on the home.html file.
- Enter – Home Page for Azure DevOps pipeline overview and save the changes.
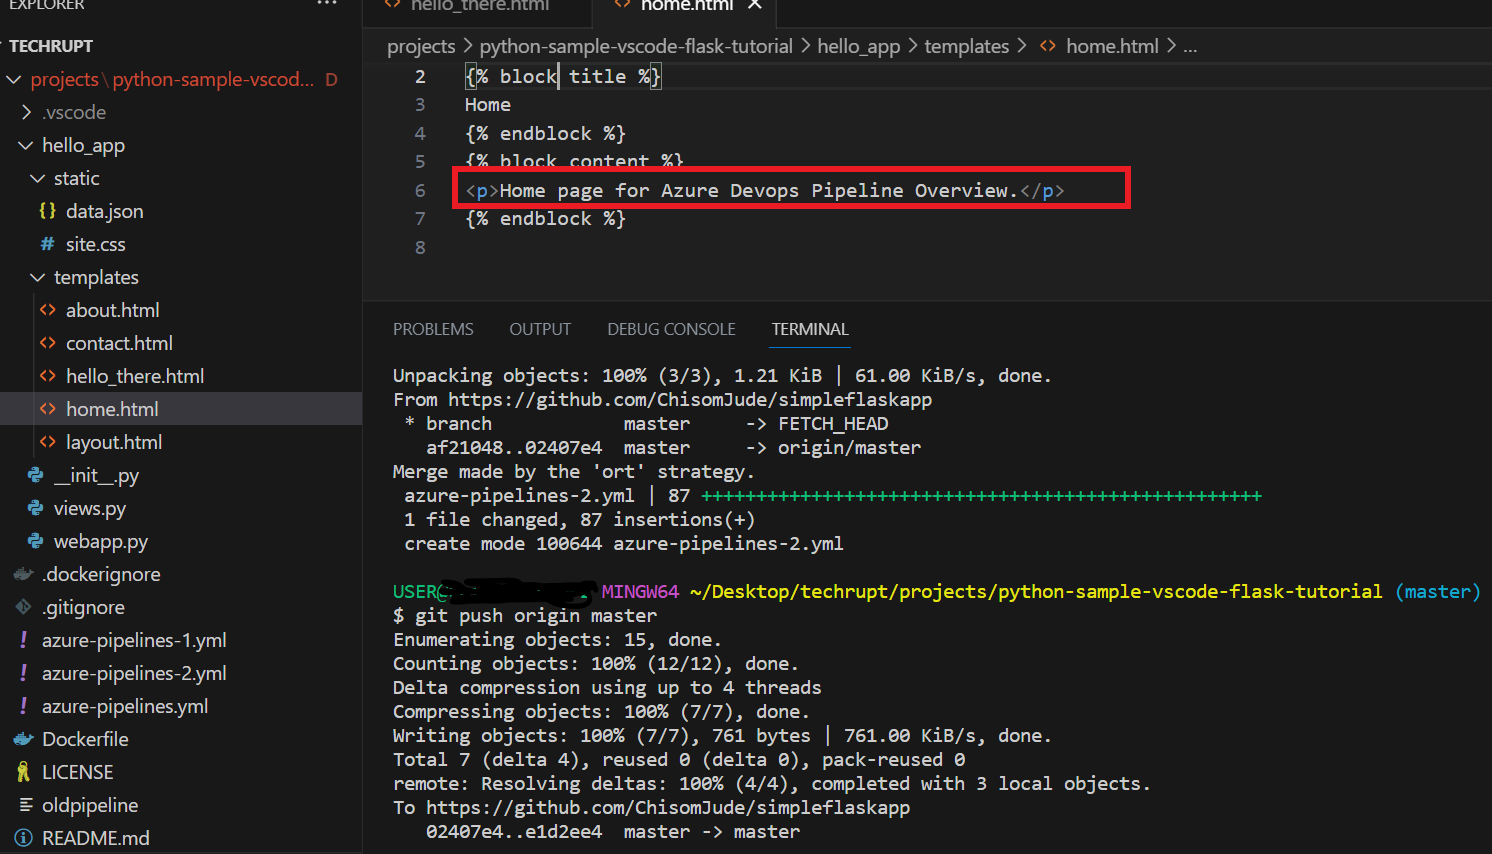
- Open the Terminal and commit changes using the commands below:
git add .
git commit  -m “Home File Changes”
git pull origin master
git push -u <project nickname> master
This commit pushed to GitHub or Azure DevOps will trigger the pipeline to build and deploy this change to the website.
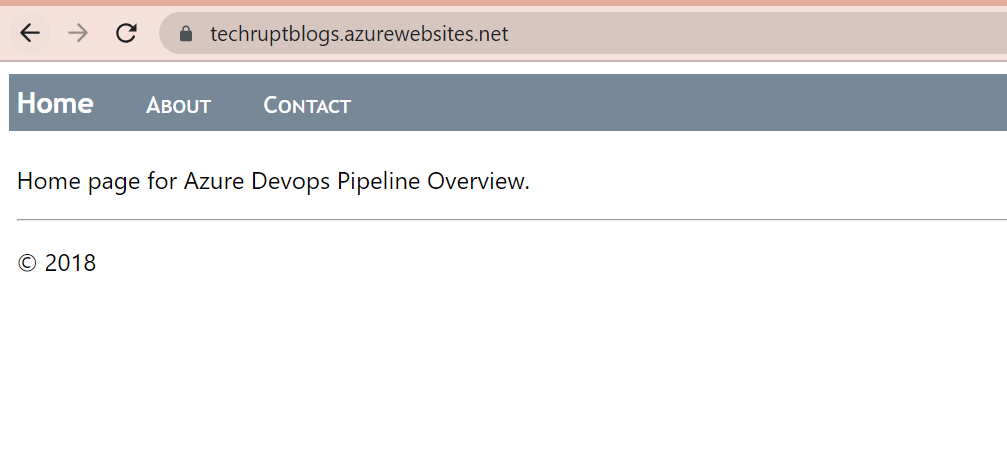
- View the website again and validate the changes.
Conclusions
With Azure DevOps, you set up CI/CD pipeline that automates builds and releases to Azure App service. You could also seamlessly make changes from your PC, commit and push the code, which will automatically trigger the pipeline along with building and redeploying the application.
By adopting Azure DevOps for building CI/CD pipelines, organizations can enhance their software development practice. Azure DevOps provides a comprehensive set of tools and services, including source control, continuous integration, and continuous delivery, along with seamless integration with various platforms and technologies.


