Getting Started with Azure CLI
Azure CLI provided by Microsoft is a cross-platform command-line tool for managing Azure resources and automating cloud resource deployment. The tool enables you to query, create and manage the cloud resources using the terminal.
In this article, you'll see how to authenticate using various methods and get familiar with some of the common Azure CLI commands for regular use like getting help and finding example commands in Azure CLI modules.
Prerequisites
This is the second article in the series of Azure CLI. If you haven't installed the CLI tools yet, check out the first post in the series:
How to Install Azure CLI: A Complete Guide
Before you go into the article, you should be familiar with the basic concept of
Authenticate to Azure CLI
There are several ways to authenticate to the Azure environment using Azure CLI. Once logged in, the CLI allows you to query and interact with the cloud resources. Cloud Shell is the easiest way to use Azure CLI without logging in using CLI but the Azure Portal. However, while doing complex scripting, it's most likely that you need to authenticate to the cloud using your device or development environment.
In the following few sections, you will see multiple ways that you can use to log in to the Azure environment using Azure CLI. We'll be covering CLI usage in the section after authentication for the sake of being logged into your account before you use any queries.
Authenticate using a Browser
While working on Windows or macOS devices, it's convenient to log in to the terminal session without having to type in the username password again if you are already logged in to Azure Portal on a browser session.
Follow the instruction below to log in to Azure using Azure CLI:
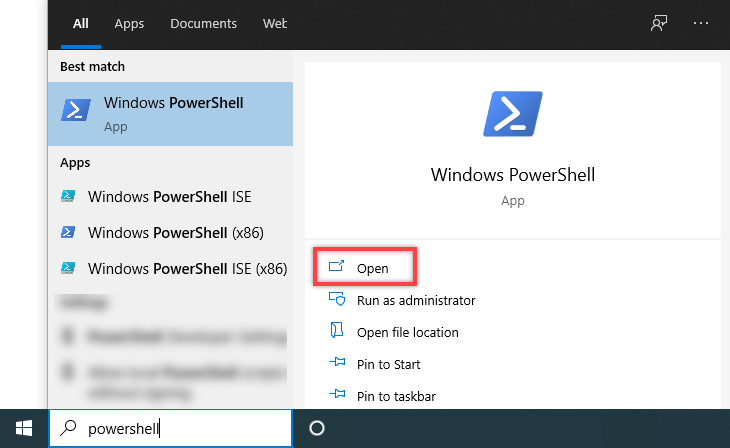
- Navigate to the Start menu on Windows and launch PowerShell or search for Terminal on macOS:
- Run the following command to initiate the login session:
az login
In this command, the login module for Azure CLI is used to interact with the Azure Environment. The command launches an authenticated session to the Azure portal for ongoing resource management. You don't need to sign in for each action as the session is stored as an authentication refresh token locally.
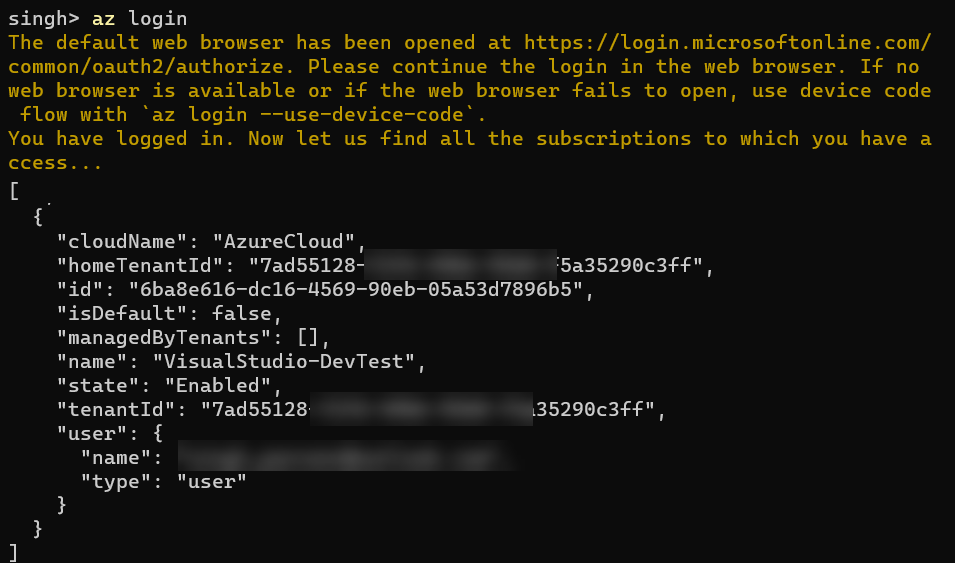
- The terminal will show the following text, displaying the further actions on the authentication process through the default browser:
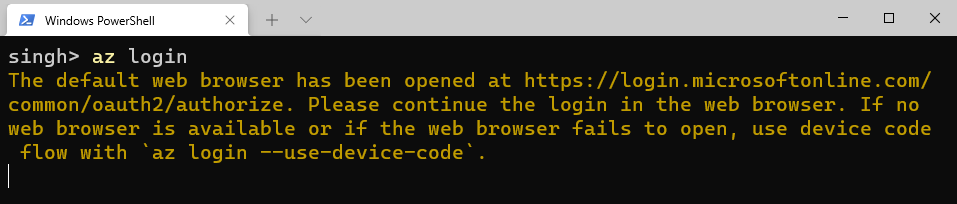
Ignore the warning for the device code on the last line for now. We'll be covering that in the next section.
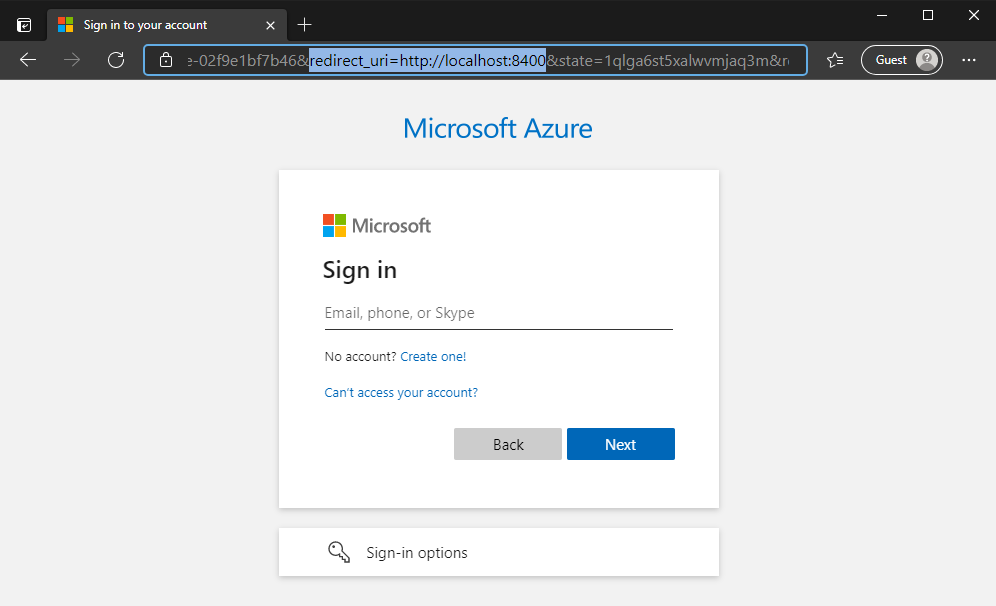
- Follow the instruction on your browser to login to the Azure Account:
- Once the authentication is successful, you will see the confirmation on the browser:

- At this point, you can close the browser and return to the terminal. The output on the terminal will show the list of subscriptions you have access to in your account:
Authenticate using a Device Code
There might be a case when you are using an SSH or WSL system that doesn't have any GUI interaction or direct access to launch a browser or want to authenticate without letting Azure CLI launch the browser session.
Follow the steps below to authenticate to your Azure account using a device code that can authenticate your CLI session from either same or any device logged in to Azure:
- Launch your terminal and type the following command:
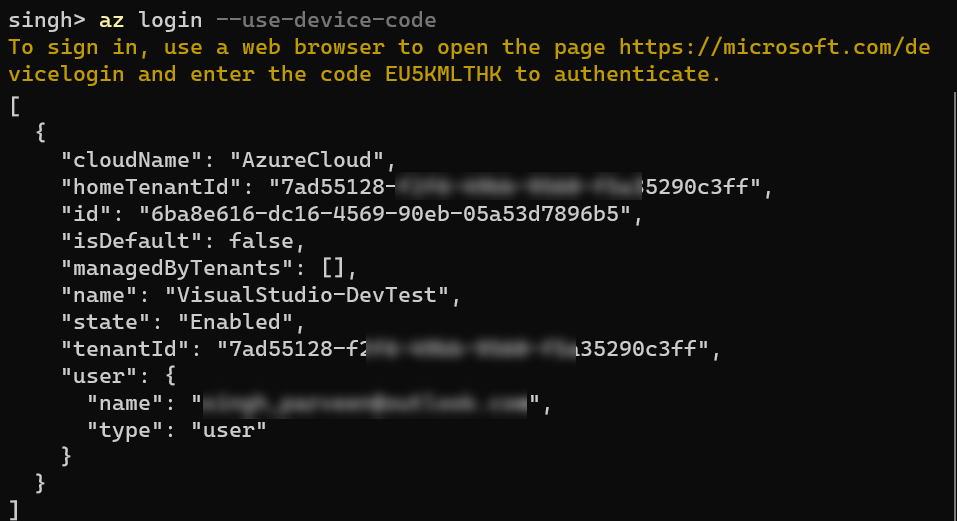
az login --use-device-code
Using the --use-device-code flag tells the CLI to authenticate with the code and lets you decide the device of login and the account.
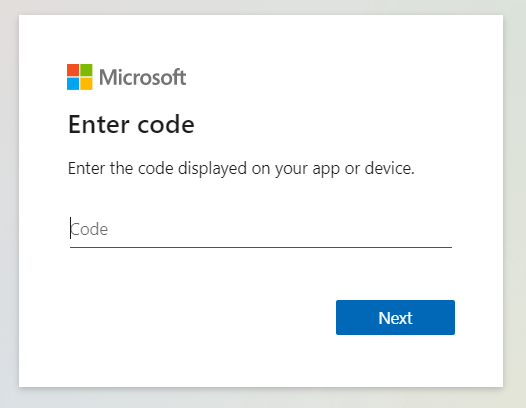
- Navigate to the URL https://aka.ms/devicelogin or https://microsoft.com/devicelogin as shown on the terminal screen:

- You'll be prompted to enter the device code. Use the device code that looks like EU5KMLTHK in this case, from your command line output and paste here:
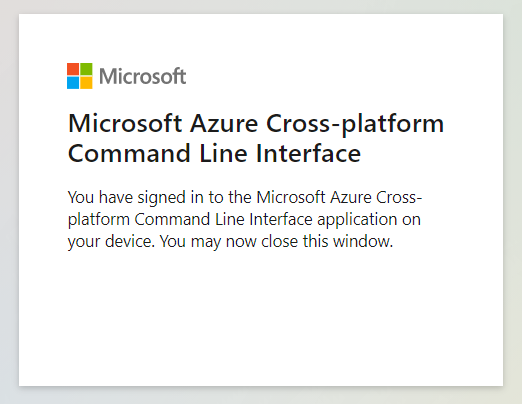
- Once confirmed, you'll see the output displaying a success message:
- Navigate back to your terminal and review the output that displays your login session information along with tenant and subscription information:
Authenticate using Username and Password
If opening a browser to authenticate or copy-pasting the device code is not feasible for your case, or if it's too much hassle, you can use the username and password directly for your Azure account to log in.
It's worth mentioning that this is not a recommended method since it's the least secure method of all other login forms. I'd recommend using other methods over this where possible unless this is the last option to resort to for you.
Follow the steps below to login to Azure CLI using username and password:
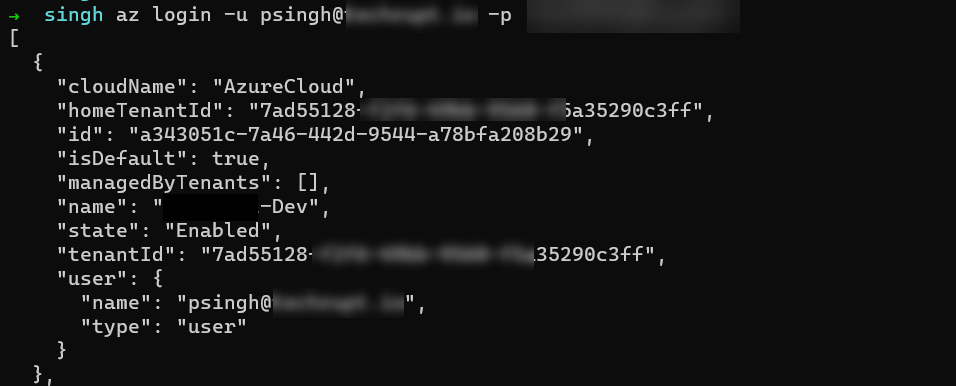
- Run the following command in your terminal:
az login -u `<username>` -p `<password>`
Replace the username and password with your Azure account email and password before pressing Enter.
- The command will authenticate you directly and displays the subscription access for your account:
The accounts with MFA or Two-factor authentication may not be able to log in using this method. Consider using device code, or the Service Principal method explained below to login instead.
Authenticate using a Service Principal
Service Principals are service accounts that are not real user account; however, they can have permissions or roles just like user accounts. Service principals have a time-bound secret as a password to log in, which is valid for six months or more and needs to be renewed once expired.
The method of service principal login is super helpful when running scripts in the background on a schedule where you don't want someone to go and put the device code whenever the script needs to execute.
I won't cover the service principal creation process in this article. However, you can check this article section on creating a service principal from the Azure portal.
Use the following steps to log in to Azure CLI using Service Principal:
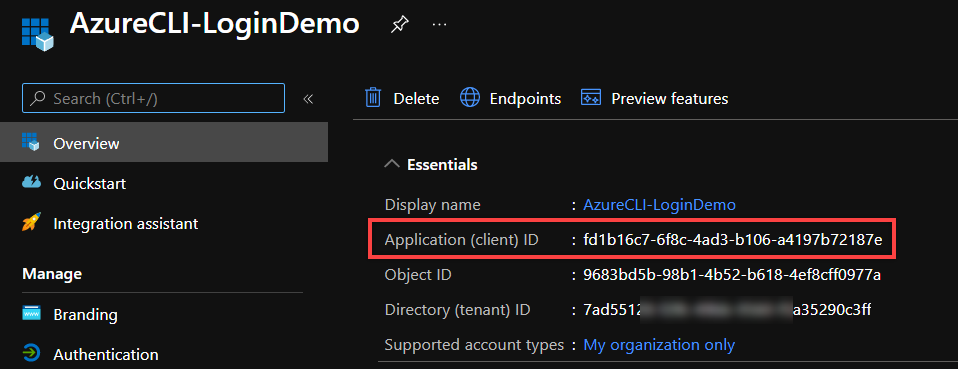
Before your login, you need three pieces of information for your login session.
- Service principal Application (client) ID
- Azure Tenant Name (Tenant Domain)
- Service principal secret (create one)
You can find the Application ID on the Overview section of the page of your service principal when you create it for the first time:
 The name of the tenant can be your FQDN that email accounts use in your tenant. If you don't have any custom domains configured, consider using the Microsoft provided
 .onmicrosoft.com domain.
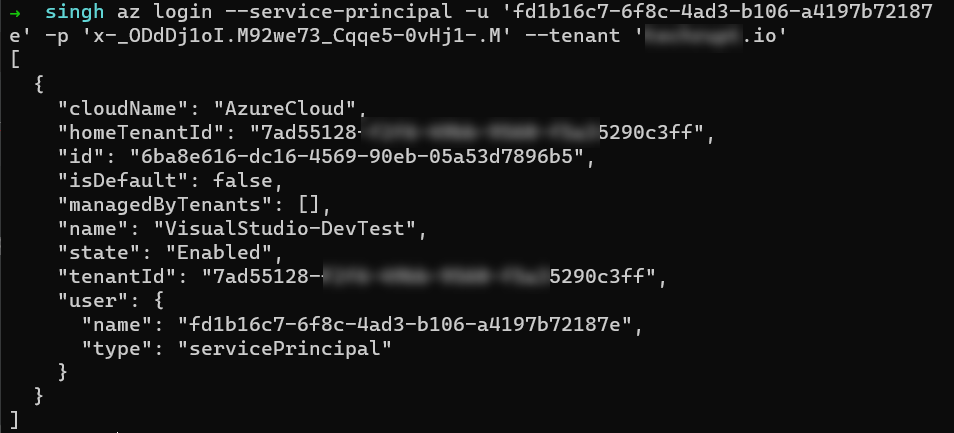
- Run the following command in your terminal:
az login --service-principal -u `<applicationID>` -p `<secret>` --tenant `<tenant domain>`
Update the applicationID, secret, and tenant domain with the relevant information to access your Azure tenant.
- The results will confirm the successful login to your Azure account:
Working with Azure CLI Commands
Azure CLI has three main components: (a) Group, (b) Subgroup, and (c) Commands. Let's explore these more in-depth.
Each CLI command starts with az initially. The az is then followed by either a group or a subgroup or command.
Group
A Group is referred to as the base command of az. So, for example, if you refer to a virtual machine, the base command, in that case, would be az VM. So, in simple words, the CLI commands are organized as groups.
Subgroup
A subgroup is a second layer under the group which comes into effect when a resource has more than one type or service. A subgroup may have further subgroups creating another level of hierarchy.
For example, there is SQL Server in Azure and also a SQL database. Similarly, Azure offers web applications as PaaS offerings. If you were to modify a website configuration, it'd be a subgroup under az webapp that would allow you to interact with the configuration part of the resource.
Commands
The commands are the final action that you take on the cloud resource. The commands vary based on the resource you interact with. Refer to the commands available for a virtual machine resource that shows the possibility of action you can take on VM resource.
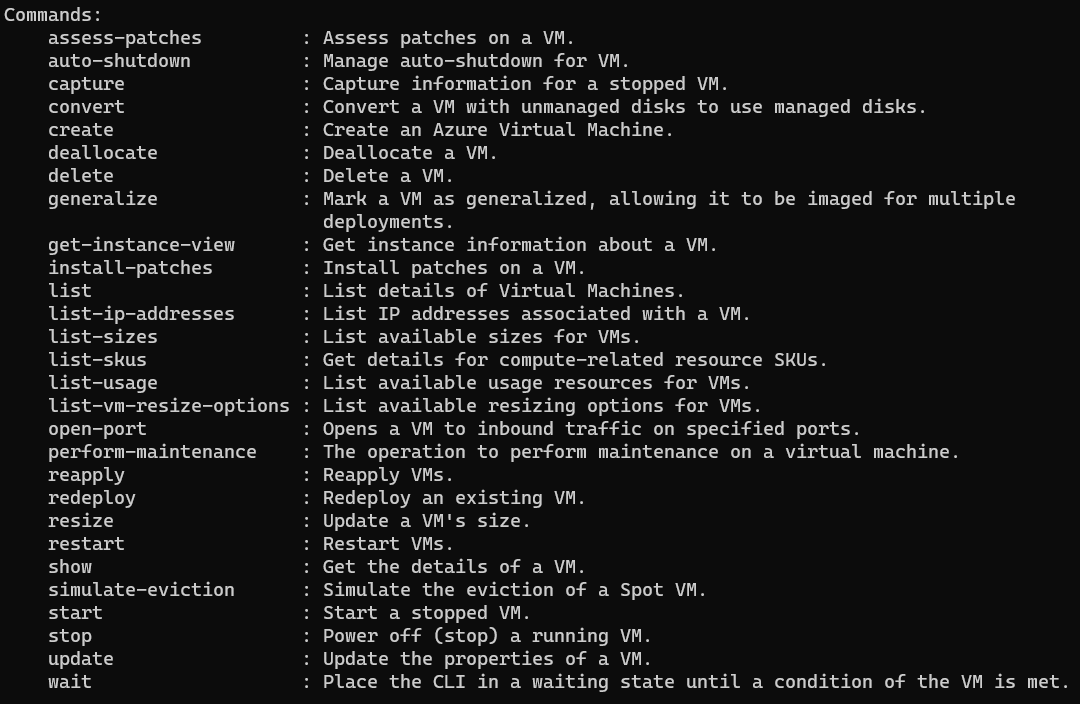 We'll cover how to see this information in the next sections.
Common Set of Resources
In Azure, while working on day-to-day tasks, you might come across one of these core services at some point. In addition, these offerings are some of the most popular services offered by Azure. So it's worth getting familiar with these resources.
- Resource Group (az group)
- Virtual Machines (az vm)
- Storage Account (az storage)
- Key Vault (az keyvault)
- Web Applications (az webapp)
- SQL Databases (az sql server)
- CosmosDB (az cosmosdb)
Using Azure CLI Help with az help
If you've worked with any other programming or scripting frameworks, this may come off naturally to you. If not, that's fine either. Almost all the frameworks or CLI tools come with a help command that gives you insights into using the tool and learning about basic usage examples.
While working with Azure CLI, the most helpful command is --help (help flag) while using any CLI command. This help flag displays the relevant information to either a group or a subgroup. In addition, it presents you with all the possible actions you can take to interact with any given resources.
For example, we'll look at Virtual Machine resources in Azure.
- Run the following command inside your terminal. You don't need to be logged in to run this command.
az vm --help
- The output will look like this:
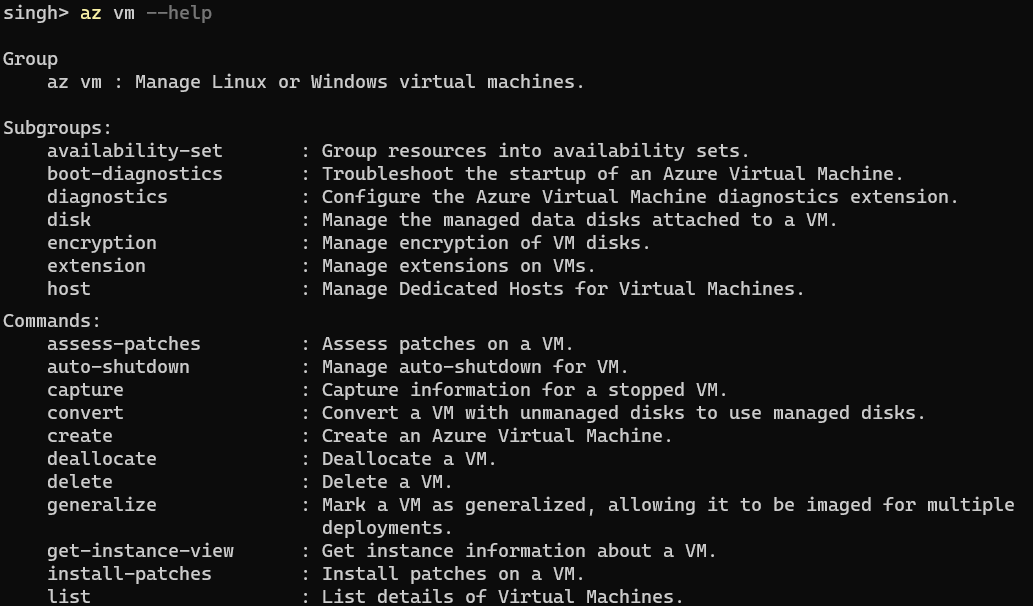
The first thing to note here is the distribution of the output in Group, Subgroups, and Commands that we discussed earlier. Running the az vm with a help flag displays the possible action you can take on the VM resource overall.
- Let's take a look at subgroup command now. We'll be using the
extensionsubgroup in this example. Run the following command in your terminal:
az vm extension --help
- The output will look like this:
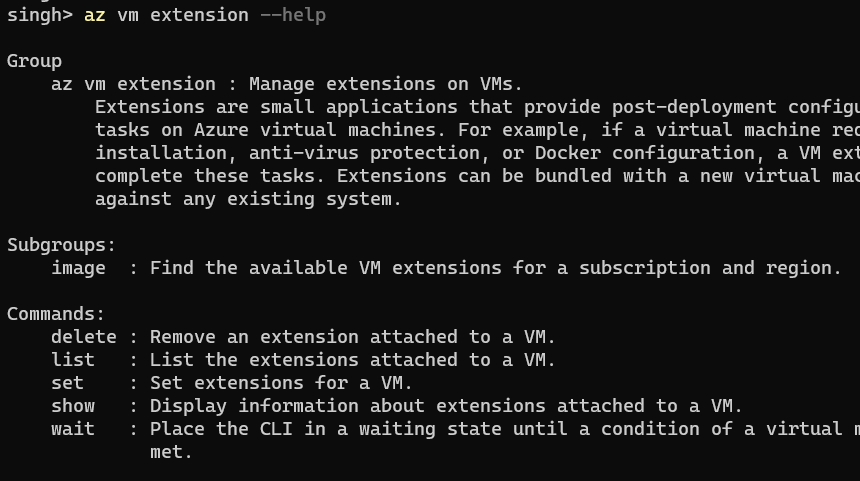
It's worth mentioning that the subgroup itself has a further subgroup image that will display a distinct set of commands from the current query. The commands section shows all the possible actions you can take on the VM extensions at this point. We'll cover how to query at a later time.
- Run the following query to check all the possible actions on the
listcommand:
az vm extension list --help
- The results will look like this:
 While getting the help for the commands, you will see an
 Argument and Global Arguments section that gives you the optional and required parameters to pass on while running the command.
For example, under the Arguments sections, you need to pass on the resource group's information and the VM name to interact with the resource to list all the extensions.
Feel free to play with other services and adding a help flag at the end to see the results for those commands.
Using Azure CLI Find Module
While working with a rich set of groups, subgroups, and commands, it's easier to get distracted and lose track of where to look for the information. Therefore, the Azure CLI offers another command that gives you the exact information on using any command with a set of examples.
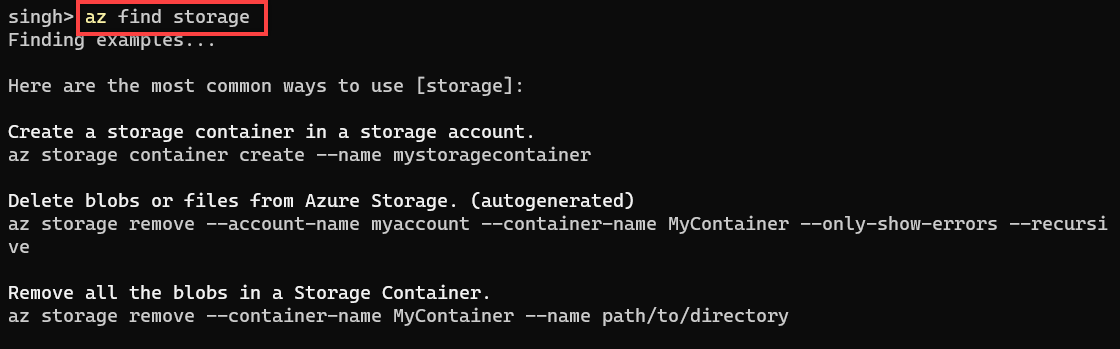
The az find command displays a list of examples commands that you can run for any given service. Follow the steps below to explore Azure storage resource.
- Run the following command in your terminal;
az find storage
- The output displays the common way in which you can use the storage resources:
 It's worth mentioning that almost every query to Azure resource will need a specific name and resource group name, excluding the queries against all the resources such as the
 az storage account list.
Using Azure CLI Query Module
The output of the Azure CLI command can get very lengthy based on the number of resources you query. That's why there's a better way to filter and display the necessary information only while working with CLI commands.
Follow the steps below to understand the different types of queries available on azure resources. It is recommended to deploy some resources inside your subscription to query against; otherwise, you'll be working with empty results.
- Run the following command to query all the resources in Azure:
az resource list
- The output displays the list of resources as an array of JSON objects. In my case, the output looks like this:
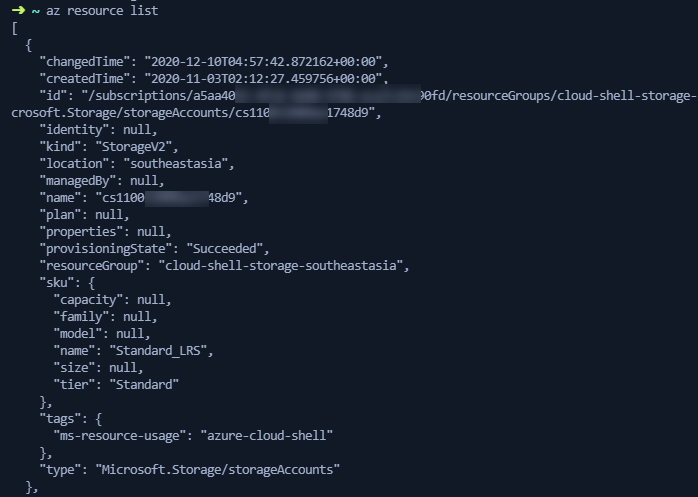
- The resource displayed in the output is a storage account used for Cloud Shell. Run the following command to query and filter the resources in the location
southeastasia:
az resource list --query "[?location=='southeastasia']"
- The output again displays the same resource. However, the result is now much less than the number of entries earlier since you specified the location to query from in this case.
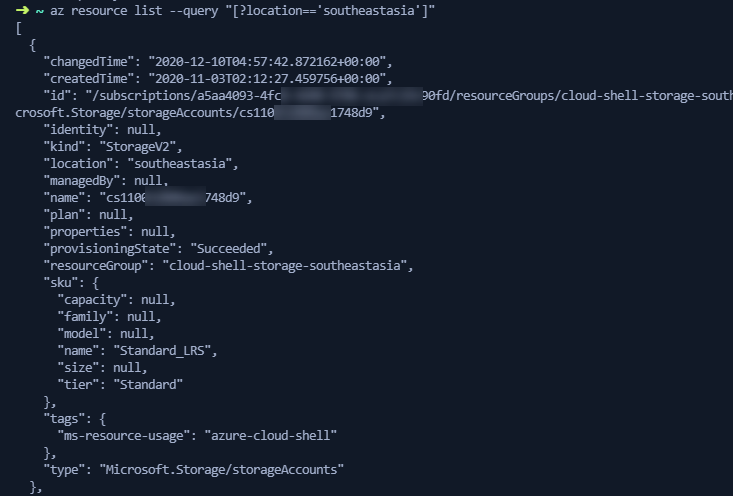 The query pattern (
[?attribute==value]) executes a JMESPath Query on the result of commands. JMESPath is a query language for JSON with the ability to select and modify the data for displaying simpler output results.
- You can also display a limited set of output fields to clear the chaos in the output. Run the following output to display the
name,resource groupandlocationfields of all the resources in the given location:
az resource list --query "[?location=='southeastasia'].{Name:name, Location:location, ResourceGroup: resourceGroup}"
- The output of the query is shown below in this case:
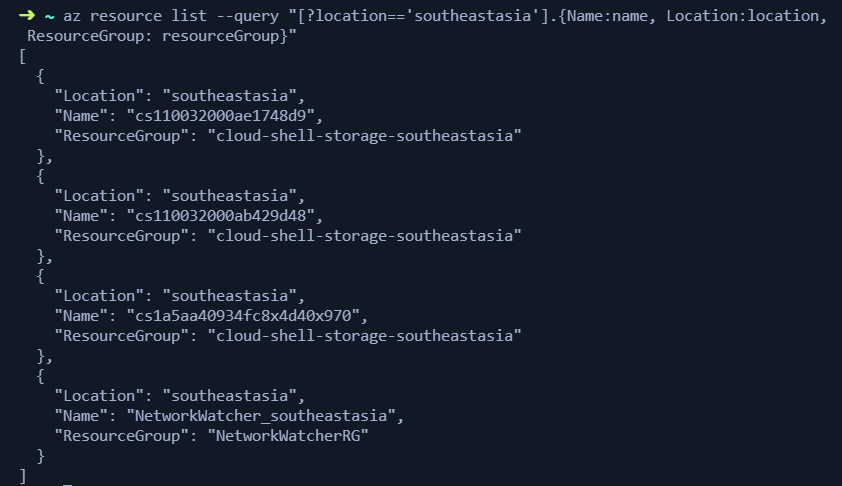 The output displays an array of JSON objects with the specific fields queried in the original command. You can use
. (dot) with {...} to define the list of keys from the JSON object output. You can learn more about CLI Query here.
Working with Azure CLI Output Options
The result of Azure CLI is displayed in JSON format by convention. However, the CLI does support a variety of output formats that might be useful based on your use case. Below is a list of output that Azure CLI supports today:
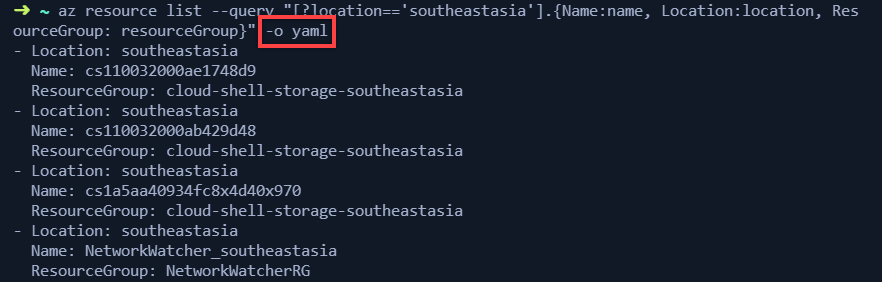
The output format for the queries is defined by passing an output --output or -o flag at the end of the query.
- Run the following command in your terminal to display the results from the previous command but with an output flag for table view:
az resource list --query "[?location=='southeastasia'].{Name:name, Location:location, ResourceGroup: resourceGroup}" -o table

The output display the data in a table format with the headings and data in rows.
- Similarly, the following command displays the data as yaml output:
az resource list --query "[?location=='southeastasia'].{Name:name, Location:location, ResourceGroup: resourceGroup}" -o yaml
Setting up Azure CLI Default Configuration
While working with the CLI tool, you are always searching for consistency and ensuring your workspace stays the same any time you use, including any preferences you decide to configure. Luckily, Azure CLI allows you to configure logging, data collection, and default arguments for your terminal session using the az configure command.
Configure Azure CLI Logging and Data Collection
Following the instructions below to configure your terminal for Azure CLI basic logging and data collection permissions:
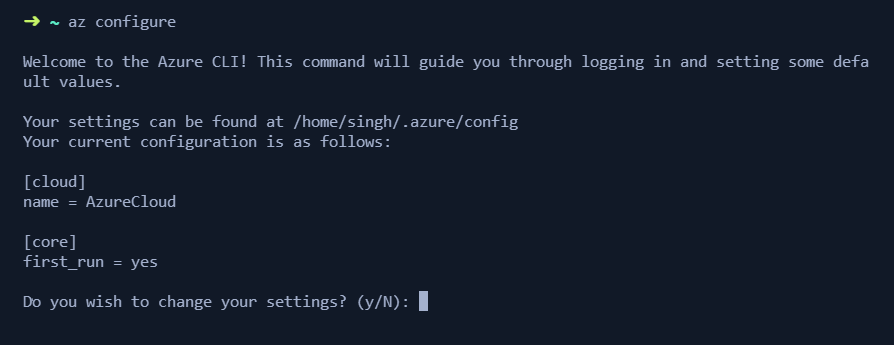
- Run the following command inside your terminal and enter y to confirm the action:
az configure
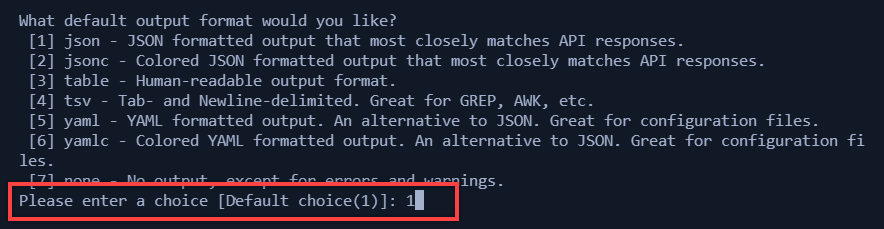
- The default output for the CLI result is JSON. You can pick your desired output format that will be set to default for your session:
- Set the optional logging for your terminal session:

- Finally, choose to enable data collection for Azure CLI usage, if desired:

- Leave the last prompt for cache TTL as default and press Enter.
Configure CLI Default Configurations with az configure
While setting the configuration is pretty straightforward, you can also define your environment information for the terminal session and Azure CLI. Just as a reminder, you can always use the --help parameter to discover all the options for the az configure command.
The CLI configuration allows you to predefine some of the commonly used environment settings for Azure resources, including the following:
- Resource Group (group): The default resource group to use for all commands
- Location (location): The default location to use for all commands
- Web (webapp): The default App Service resource name to use
- VM (vm): The default VM name to use
- VMSS (vmss): The default VM Scale Set name to use
- ACR (acr): The default container registry name to use
The configuration command takes one argument --defaults along with a key=value pair separated by space. You can set the default using the following command:
az configure --defaults location="canadacentral" VM="Lab-VM"
You can find the full list of configuration values and environment variables on Microsoft Docs page.
Conclusion
You have configured your Azure CLI configuration and worked with various commands available to see how you can interact with Azure resources. In the next article, we'll go through creating your first Azure resource using Azure CLI.
Reference
Check out the previous post in the Azure CLI series: