Easy Auth for Azure App Service
This is the eighth article 🎉 in the "Getting Started with Azure App Service" Series where I publish in-depth tutorial and walkthrough on using Azure App Service and best practices every week. In the last article, we discussed why you should use Azure App Service.
Authentication and Authorization for Web Application have always been a big challenge for developers and administrators as it not only requires you to develop and support the authentication but also ensures that you keep it secure from any active threats. Building the service from scratch often requires a deep understanding of federation, encryption, JSON web tokens (JWT), permission handling, and so on. An insecure authentication mechanism can fall you prey to attacks like SQL Injection, Password Spraying, Lockout policy and the list goes on...
Fortunately, App Service is here to help simplify the authentication and authorization for your web application. App Service offers all the mentioned features so that you can spend more time and energy on providing business value to your customer and worry less about handling authentication. Sounds promising?
In this article, I'll be walking you through the process of enabling Authentication using Azure AD which will secure your web app and handle the authentication process with zero code update. Let's get right into it.
Prerequisite
If you decide to follow along the article, make sure you have the following prerequisites in place already:
- Azure Portal access with active subscription
- Azure App Service running a web app.
- Global Admin or necessary permission to create app registration in Azure AD Tenant.
Getting Up to Speed with App Service
If you are new to Azure App Service, I'd recommend going through the other series article to get familiar with the resource and learn how to deploy your first App Service resource. For this article, I'll assume that you are already familiar with app service and understand the basic usage of the resource. Use the article below to create your app service if you don't have one already.
Continuous Deployment for Azure App Service: GitHub and Azure Repos
Make sure your App Service is running at least B1 (Dev/Test) or higher in the Production plans to support HTTPS traffic and authentication redirects.
How Does This Work?
Sign In → As the user sign in to the application, app registration handles the incoming request and delegate the federated access to App Service. By default, the endpoint for the auth page is /.auth/login/{provider} which is visible under the app registration properties that handle the authentication.
Post-authentication → As the user authenticates to the login page, the provider redirects the client to a callback URL /.auth/login/{provider}/callback that confirms the access and allows or deny the user based on the rules set up in tenant.
Establish Session → As the user is authenticated, the app service adds the authenticated cookie to the response and grant the permission to use for the application access.
Serve authenticated content → Once the user is authenticated, the subsequent requests are handled by the browser for the authentication of the client.
Check out the overview of Authentication and Authorization for web app here:
Authentication and authorization - Azure App Service
Setting up Authentication for Application
The first or the only step toward setting up the authentication is to turn on the service from the app service menu. Azure allows you to use Google, Facebook, Twitter, and Personal Microsoft Account as an authentication server however, I'll be using Azure AD Authentication as an example for this article. Follow the steps below to set up the authentication for your application.
- Navigate to your App Service resource and click "Authentication/ Authorization"
- Turn the Authentication "ON" and use "Azure Active Directory" as the authentication provider.
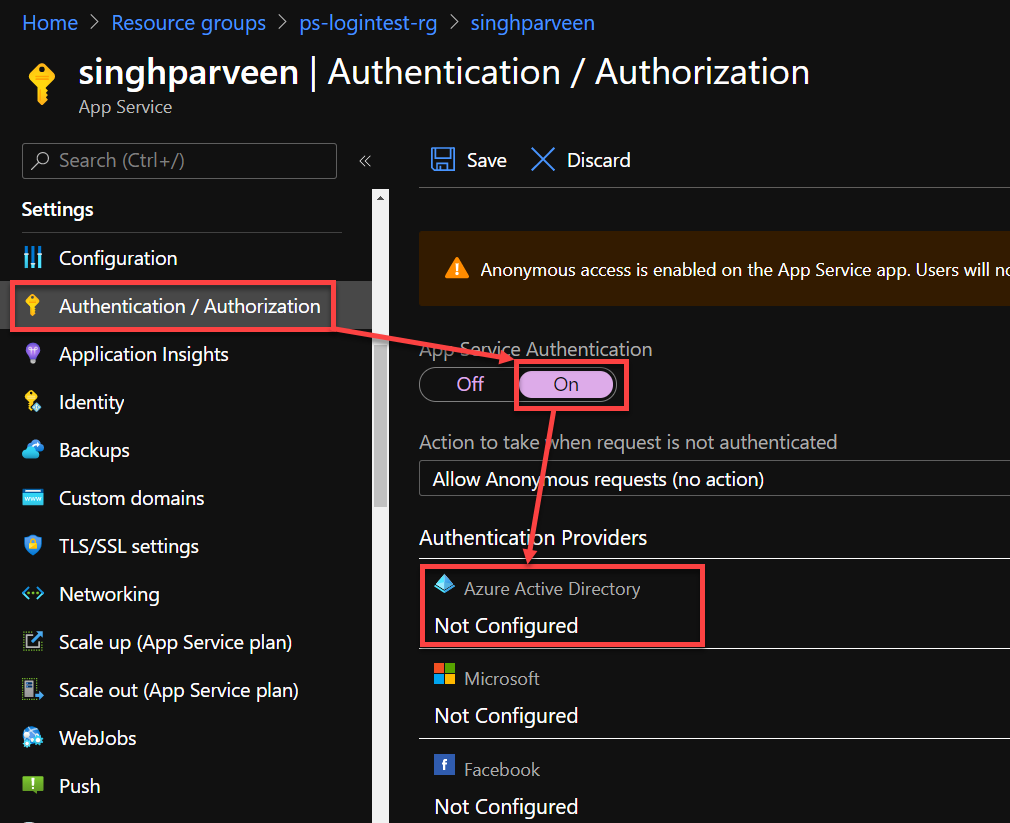
Enabling Authentication - 01
- Under the Management Mode use the "Express" setting as you can create a new app registration if it doesn't exist already.
- Choose "Create New AD App" so that provider can create a new app for authentication.
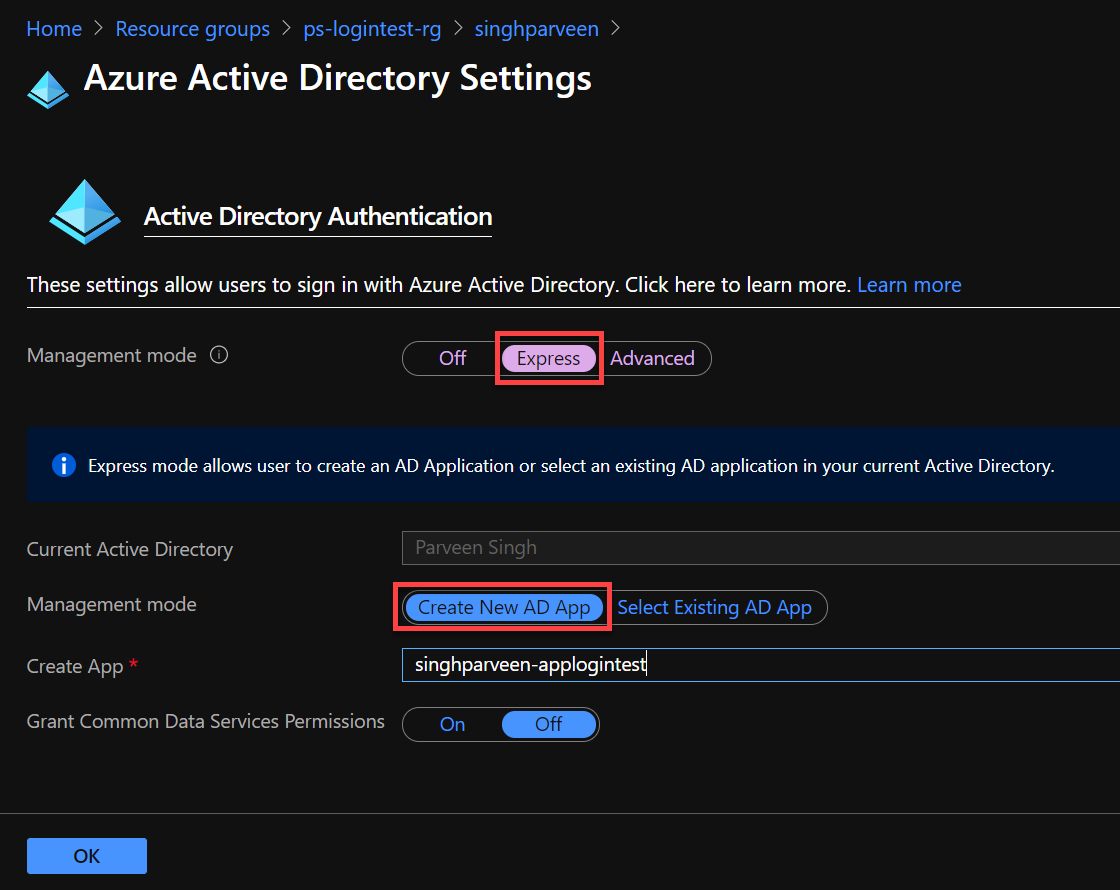
Express Settings for Azure AD Authentication
- Click "OK" when done.
- Once on the Authentication page, makes sure you update the "Action to take when the request is not authenticated" to use Azure Active Directory and click "Save".
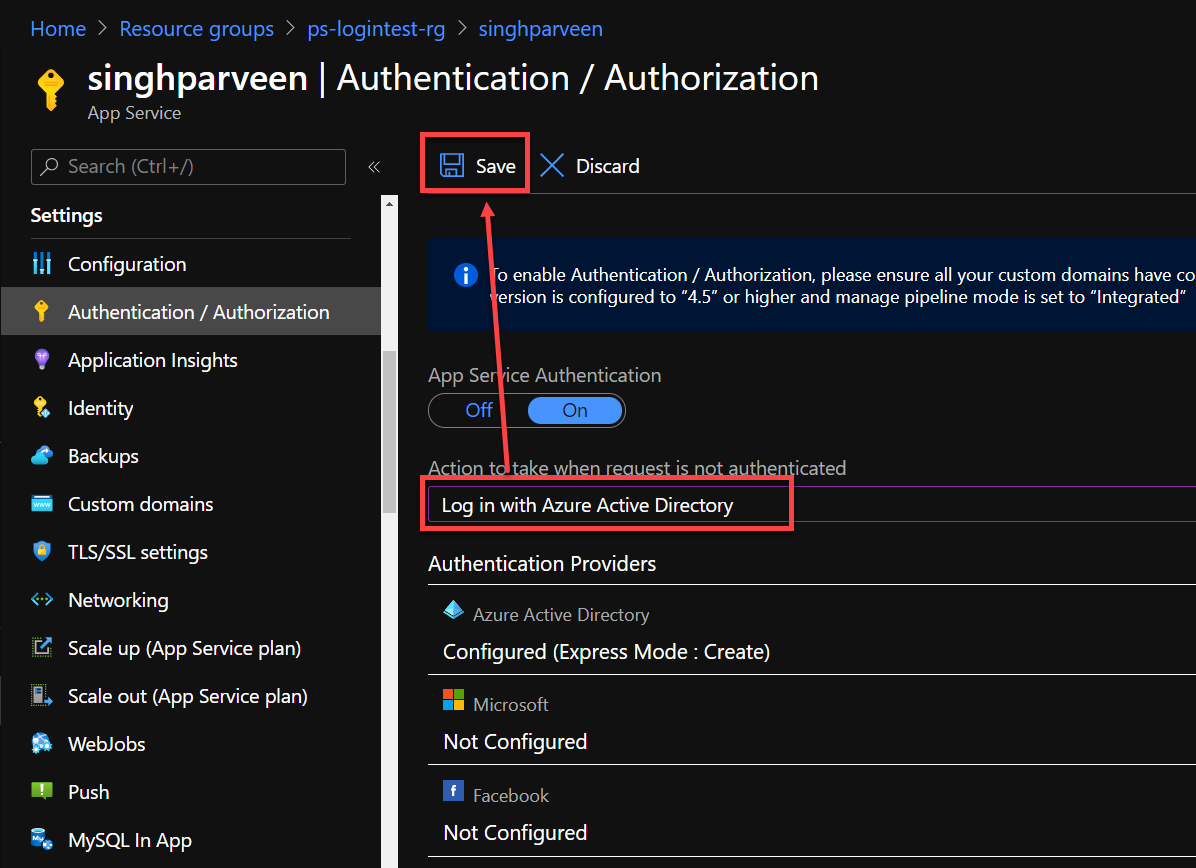
Saving the Authentication Setup Changes
Setting the Azure AD authentication here will require authentication to website as a whole.
Just like that, you configured the Azure AD Authentication for your application without making any changes to your application at all. Let's move to the next step and verify the change now.
If you are looking to handle the authentication for particular pages or sections of the website, make sure you update your codebase to use the authentication provider URL and redirect the traffic to the authentication server as mentioned below.
<a href="/.auth/login/{provider}?post_login_redirect_url=/Home/Index">Log in</a>
I'll cover the authentication server changes inside the codebase in future articles. We'll stick with default Azure AD access, for now, to simplify the process and understand the high-level picture of the authentication setup. In the meantime, you can check out this article for more information:
Advanced usage of AuthN/AuthZ - Azure App Service
Testing App Authentication
Once you turn on the authentication for your application, it's time to access the URL and confirm the prompt for the login. Follow the steps below to confirm the login process and also address the error related to users that don't have access to the application at this point.
- Navigate to the overview page of your app service and access the URL in a new tab.
- As you access the website, you should be prompted to log in to your Azure account. Once authenticated, you should be able to consent the permission for your organization if you are using a Global Admin account so that other users inside the tenant don't get any permission issue.
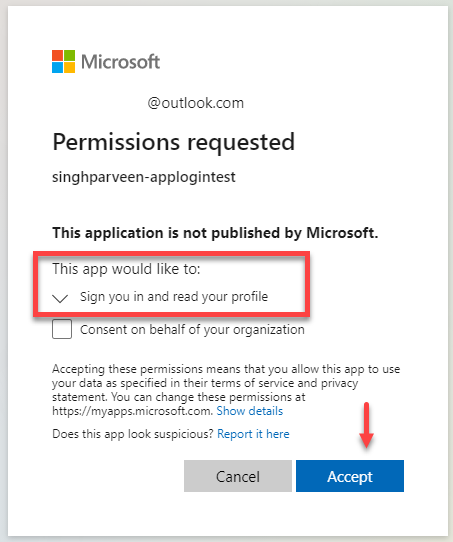
Consent Page for App Registration
- It's worth taking note that if you use a different account to login, you won't be able to access the application. I'm using an external account from a different tenant and it presents me an error saying "user account does not exist in tenant". Let's handle that in the next steps.
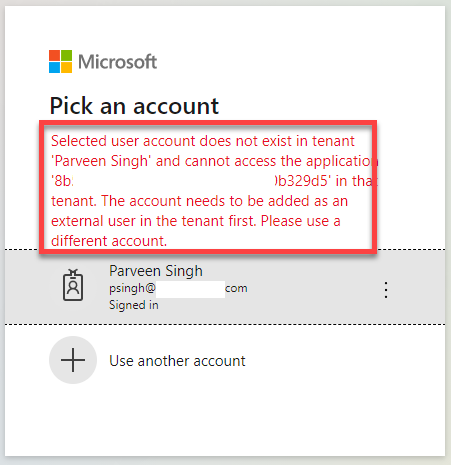
Error on users with no access to the app service
- To allow other users to log in to this application, you need to add those users to your app registration so that they can authenticate to the Active Directory and access the web app resource. Follow the steps in the next section to see how you can add users to access the application.
Managing Permission to the Application
Follow the steps below to resolve the permission issue for non-authenticated users who don't have access to the web app.
- Navigate to your Azure Portal and search for "App Registration".
- Click on the app registration that you create during authentication provider setup.

App Registration for Authentication
- As you can see under the "Authentication" tab that app registration uses your web app name with some additional parameters to handle the authentication at the backend for you.
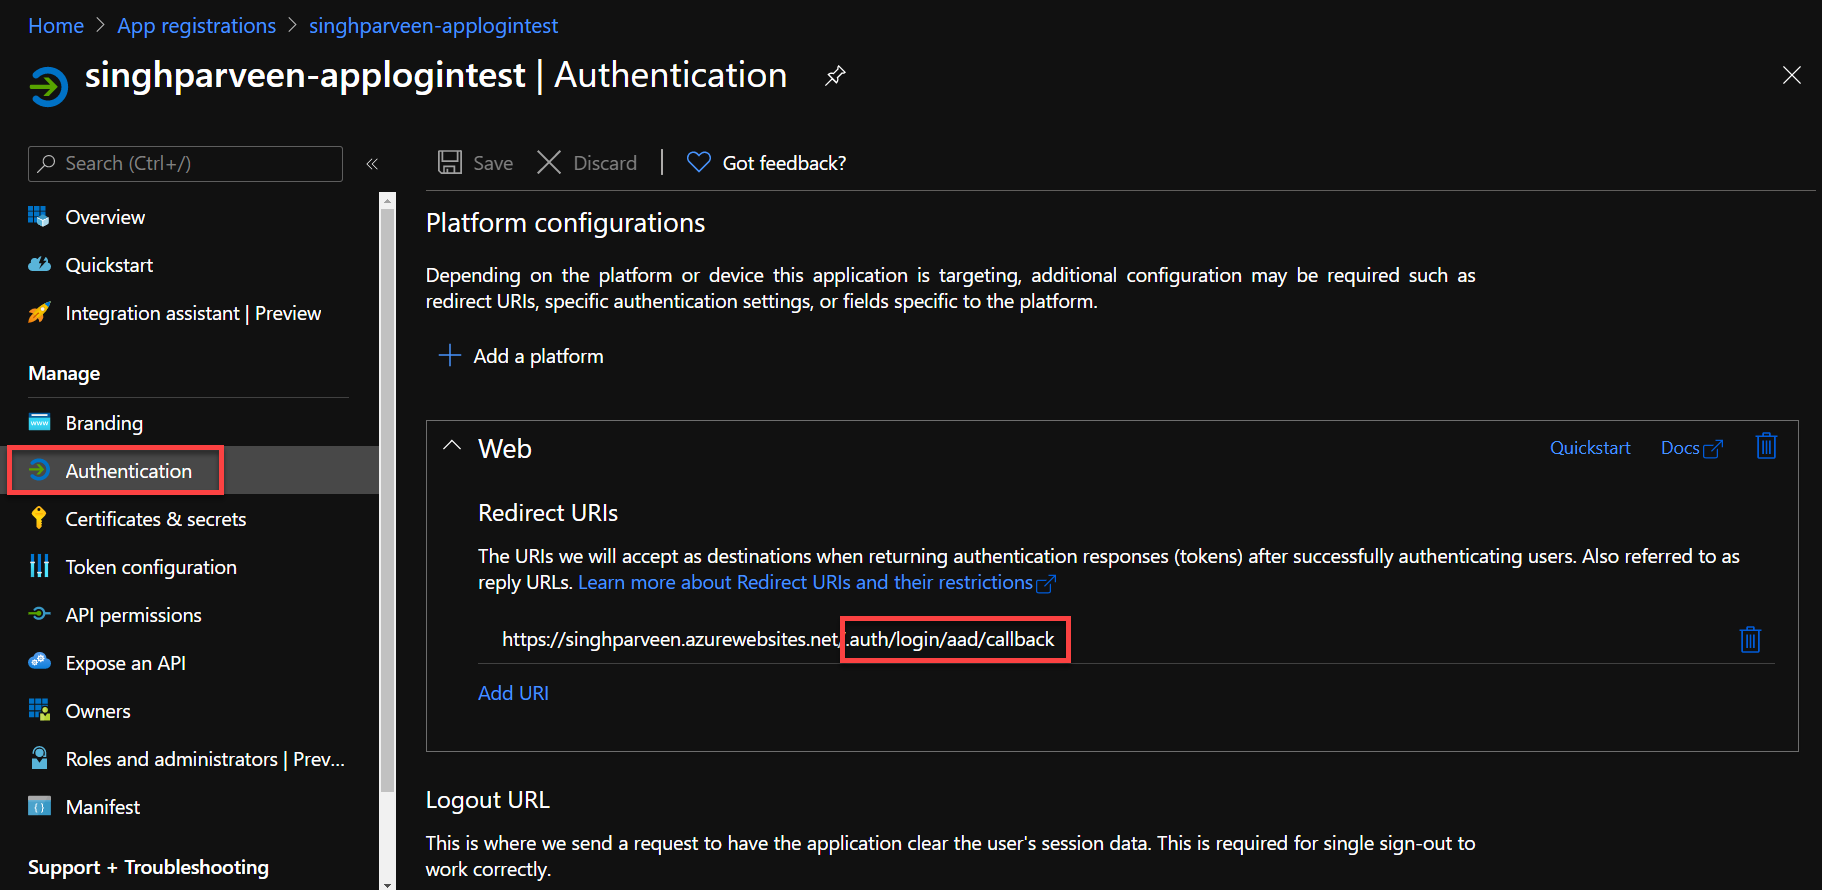
Authentication URL Configuration
- Under the "Overview" tab, click on the "Managed Application in local directory" which takes you to the application that handles the permission for tenant users.
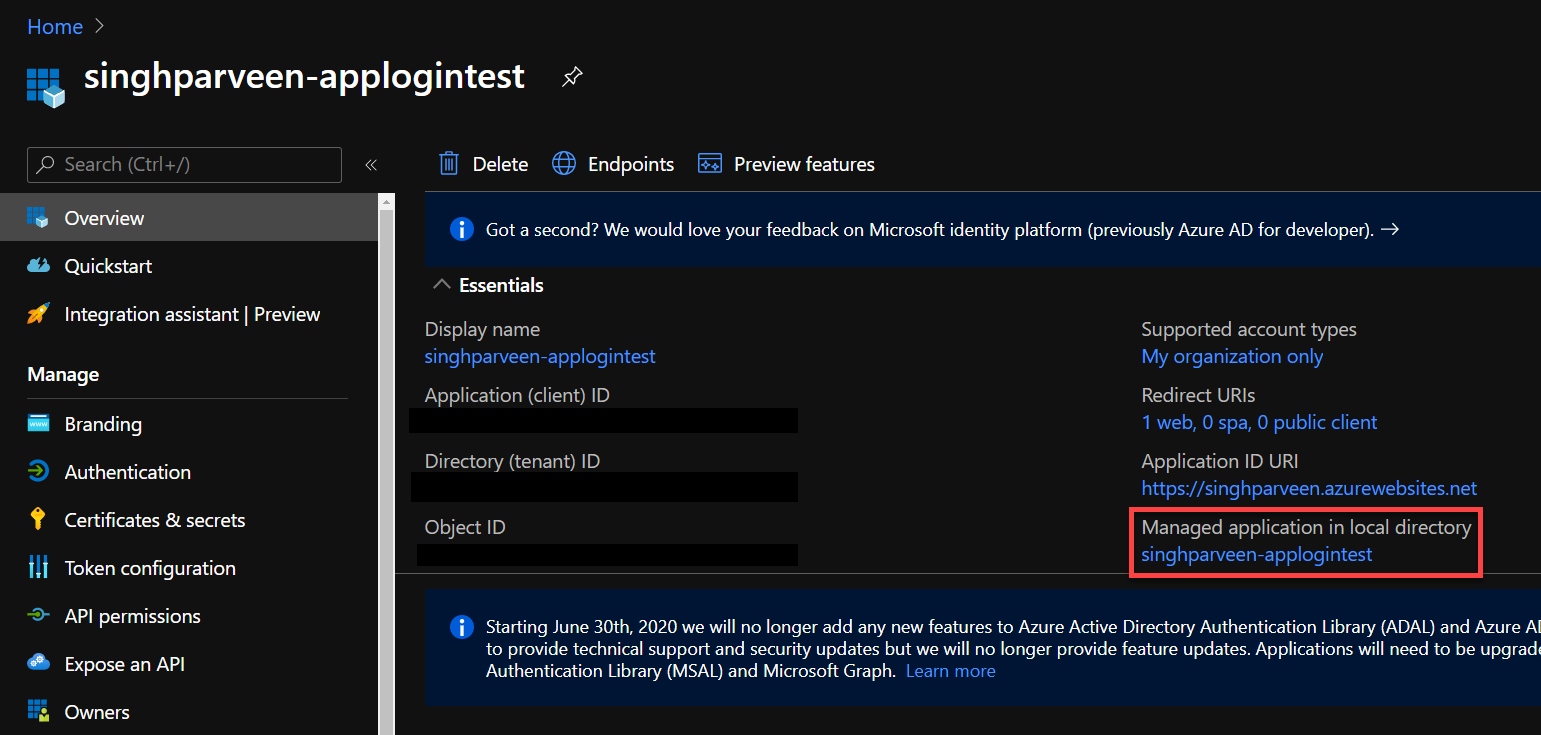
Navigate to Enterprise Application that handles the permissions
- Navigate to "Users and Groups" once under the enterprise application that opens with the previous link.
- Add new users or preferably a security group with member users that you'd like to grant permission for your web application.
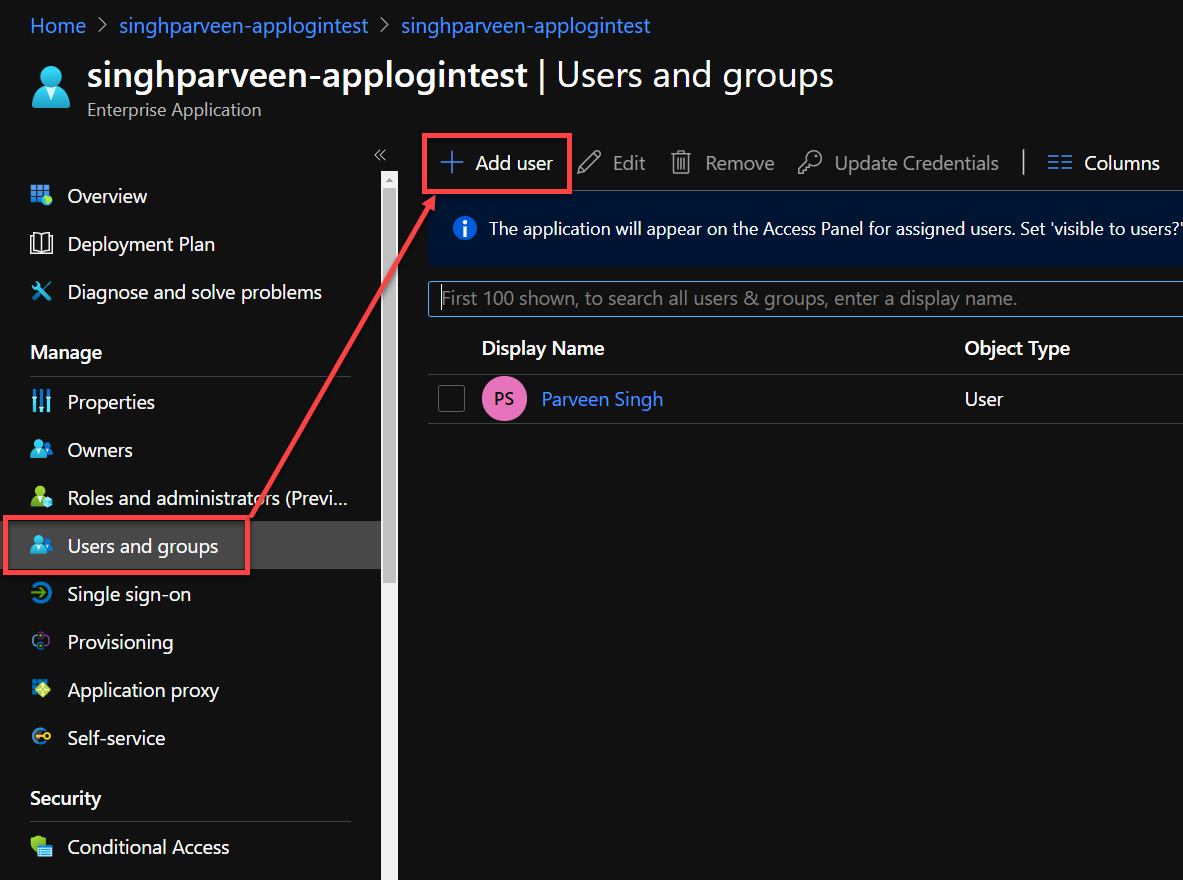
Adding users/security groups for permission
More on permission at this link below:
Restrict Azure AD app to a set of users - Microsoft identity platform
Conclusion
I hope this article helped you set up authentication for your app service web app with these simple steps and no changes to your codebase. This feature definitely works like a charm if you want to take off the authentication piece from your codebase and let Azure handle that for you either with Azure AD or third-party authentication services like Twitter, Facebook, and Google.
As always, feel free to leave a comment below or react out to me on Twitter if you have any questions.
Reference
- Authorization and Authentication for Azure App Service
- Configure App Service to use Azure AD Authentication
- Configure App Service with other Third-Party Authentication Services
- Restrict Access to your Application
If it's your first time here, please check out other articles in the series:
Part 1: Up and Running with Azure App Service
Part 2: Continuous Deployment for Azure App Service
Part 3: Using Deployment Slots with Azure App Service
Part 4: Setup Custom Domain for Azure App Service
Part 5: Deploying Next.JS App on Azure App Service
Part 6: Next.JS App with Cosmos DB on Azure App Service
Part 7: Why Should You Use Azure App Service?
Part 8: Easy Auth for Azure App Service
Part 9: How To Clone An Azure Web App?