

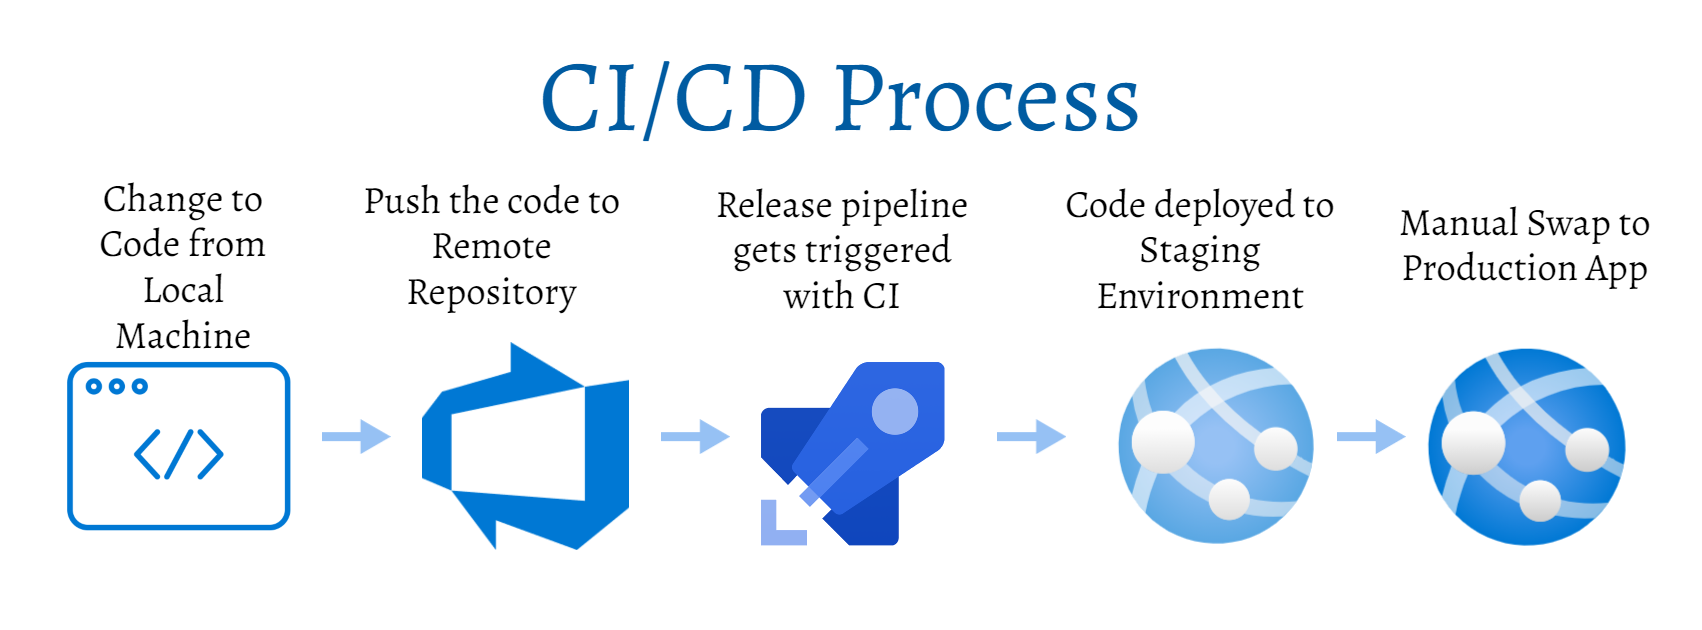
This is the third article in the Getting Started with Azure App Service Series where I publish in-depth tutorial and walkthrough on using Azure App Service and best practices every week. Last week, we talked about how you can use CI-CD in App Service to enable DevOps capabilities for your web services.
Deployment slots are live applications running with their unique hostname, however, connected to a particular app service plan. Slots can reduce the overall downtime of web services by auto-swap capabilities and full integration in pipeline workflow to test and validate code changes before pushing them to production.
Suppose you have a production application at prod.example.com and you wish to test some changes in the same environment as your production application but not actually deploy the site. That’s where deployment slots come and make it a seamless experience to deploy your site to a slot, call it ‘staging’ and your application would be running on a similar environment at different URL, prod-staging.example.com. You can test your application thoroughly before pushing it to production.
In this article, I’ll be covering the basics of deployment slots and a guide on how to use them for tests and validating the code before it goes live. I’ll be using a sample node js webserver to demonstrate how you can configure the slots and use them in the real world in a few simple steps.
Overview of App Service Slots
Since the slot creates a new app service under the same app service plan, any settings that you modify for a particular slot won’t migrate to the production slot on swaps. You need to consider the changes that might occur to your application after swapping the slots. For instance, if your application uses a sandbox version of database connection in staging, make sure your code handles that scenario using app service connection strings so that it updates as the code runs in the production environment.
Below are some of the settings that are swapped along with the codebase:
- General settings, such as framework version, 32/64-bit, web sockets
- App settings (can be configured to stick to a slot)
- Connection strings (can be configured to stick to a slot)
- Handler mappings
- Public certificates
- WebJobs content
You should also consider the settings that are dedicated to a particular app service instance and never transferred on a swap. Below is a list of settings from official Microsoft docs website:
- Publishing endpoints
- Custom domain names
- Non-public certificates and TLS/SSL settings
- Scale settings
- WebJobs schedulers
- IP restrictions
- Always On
- Diagnostic settings
- Cross-origin resource sharing (CORS)
App Service Plan Consideration
Choosing the right app service plan is one of the key decisions while working with app service. You don’t want to end up buying more capacity and resources than necessary. To use slots for your application, you can choose any of the following plans which include Custom Domain/SSL and Slots as well which should serve your purpose even if you are running any production workloads in real-world scenarios.
- Plan S1: A Series compute with 1.75GB Memory, ~82.23 CAD/Month (Estimated)
- Plan P1V2: Dv2 Series compute, 3.5 GB Memory, ~103.72 CAD/Month (Estimated)
You also have a lot more options in the app service plan if you need more memory or dedicated CPUs.
Why should you use Deployment Slots?
Deployment Slots is one of the robust features available in App Service resource that enables you to run production like workload and test your code on every change before pushing the code into production. It’s even more powerful when combined with CI-CD Pipeline performing the deployment, approval workflow, and automated swaps for the application slot. Below are some of the key benefits of using deployment slots.
- You can validate app changes in a staging deployment slot before swapping it with the production slot.
- Deployment slots eliminate the downtime caused by some IIS applications that need to warm up before it’s fully functional. The auto-swap feature gives you the capability to swap the slots automatically if the validations aren’t needed.
- You can always revert your application to your “last known good site” in case of any issue after code changes.
Prerequisite
If you wish to test and follow the steps in this tutorial, make sure you fulfill the following requirements:
- VS Code Editor (optional): You need access to an editor, VS Code or any other editor of your choice to add/modify code for slot swap testing. This can be performed directly from Azure Repo or GitHub portal as well.
- Azure DevOps or GitHub Repo: You need to store a sample app code for your app service. Clone/Fork my GitHub repo if you wish to use this as an example to test.
I’ll be referencing this new app service as “staging application” and the primary app service as “production application”.
Creating an App Service Resource
The very first thing you would want to do is to set up the app service with a sample webserver to test changes and perform the swap. The process includes creating an app service slot with sample code, creating a deployment slot, connecting your slot with CI-CD to enable auto-sync, making changes to the codebase, and finally triggering the slots for the swap.
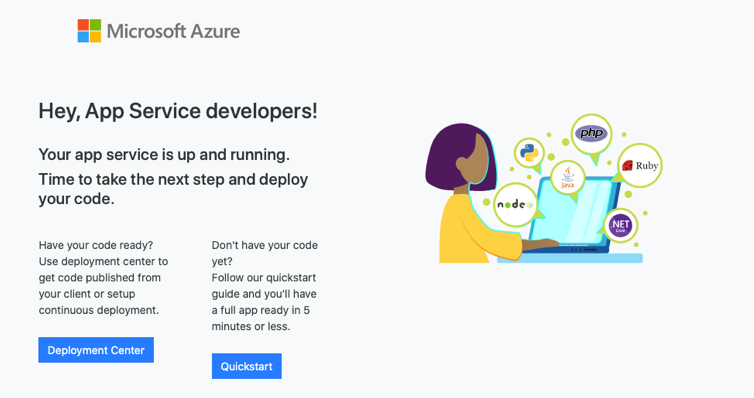
Use the following steps to create a new app service if you don’t have one set up already.
Once your app service is ready, you should see a similar webpage with some generic text confirming that your application is up and running.
Creating an App Service Slot
The next thing you need to do it to create a new slot for running a staging environment. This creates a new resource with the name specified in the steps that will run your staging application. This can be done with a few clicks from the Azure Portal. Follow the instructions below to create your first app service slot:
- Navigate to your Azure App Service that you created in your environment.
- Click on “Deployment Slots” in the left panel and click “Add Slot” to create a new slot.
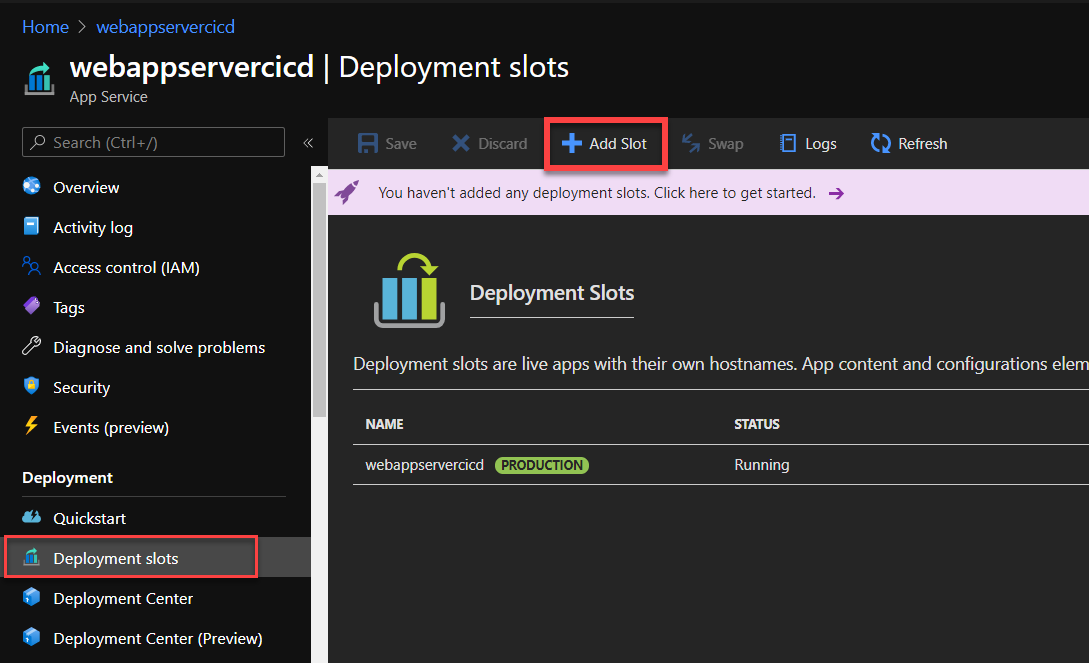
- Give it a name like “staging” so that you can identify it easily.
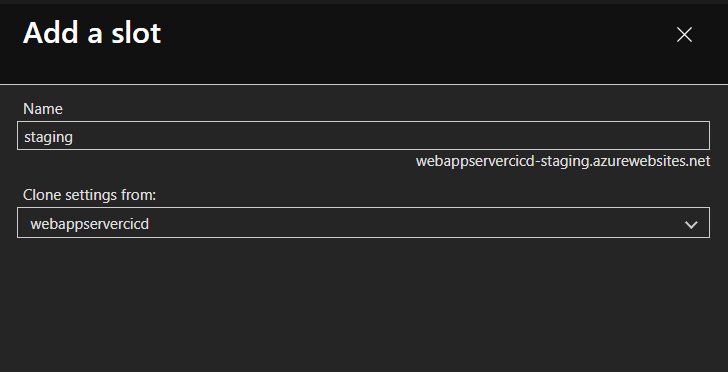
At this point, your deployment slot is ready and you should see a new app service (slot) in your resource group as a dedicated resource that will host your code as you push it from the repository. The staging app name is given a name as “staging<app-name>/<slot-name>” in resource group for easy identification.
Setting up Deployment Center for Staging Slot
Once you configure your staging slot, it’s time to connect that slot to a git repo, whether you are using GitHub or Azure DevOps, so that any code change is deployed to staging for testing before it goes live. This process ensures that you can validate any code changes in the staging environment and then swap when changes are validated. Follow the steps below to configure your deployment source for staging slot:
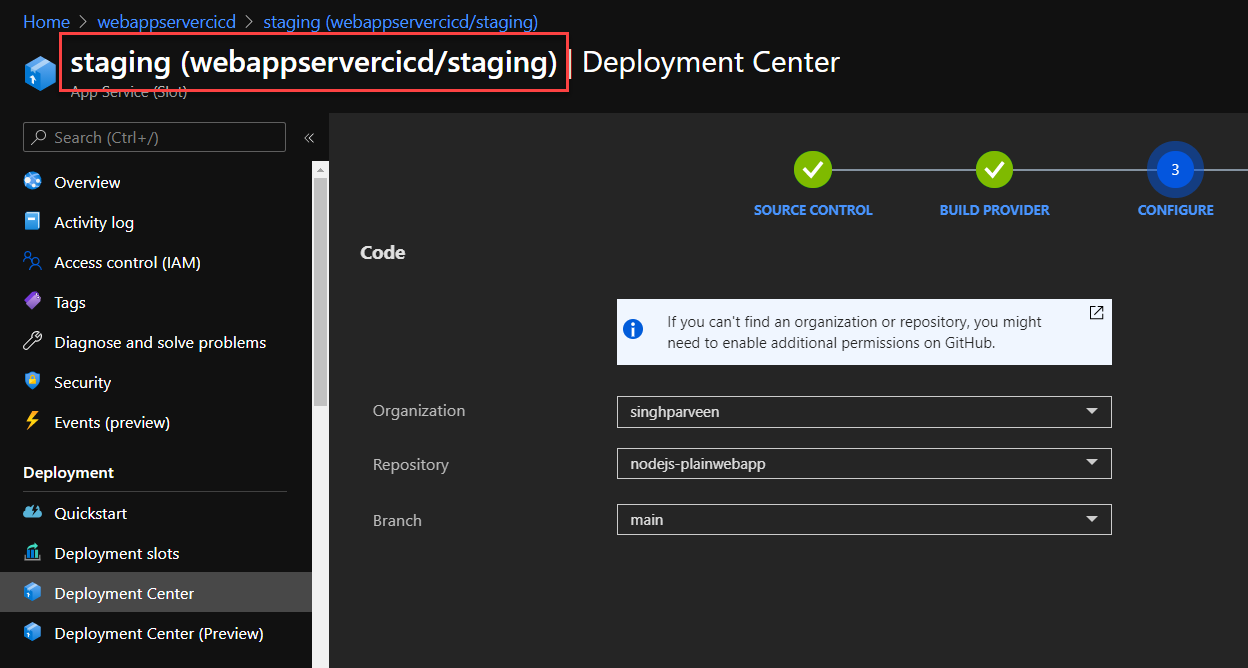
- Navigate to the deployment slot and click on your newly created staging slot.
- Navigate to “Deployment Center” for the slot. Make sure you are working with your slot named “staging (appname/staging)”
- Choose the repo location of your choice and finish the repo integration.
- Give it about 5–10 mins for the deployment to finish and code to update in the app service.
Now you should start seeing your staging application running on https://appname-staging.azurwebsites.net.
Changing Code on Local Repo
The next step is to make changes to your code and push it back to your repository so that the changes can be synced and visible on staging slot. You can use VS Code or any other editor of your choice. If you are using GitHub or Azure DevOps, you can make changes directly to the file by clicking “edit” for any particular file while logged in to GitHub or Azure DevOps portal.
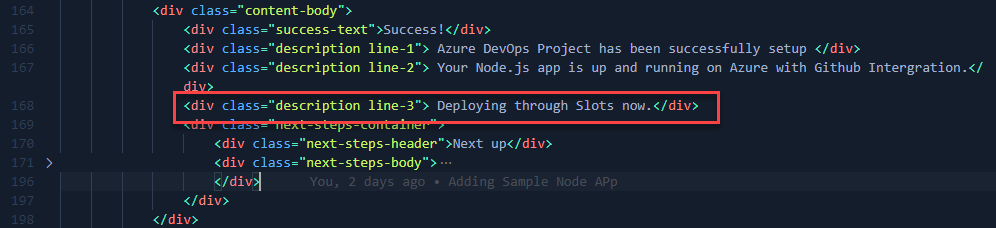
- Open “index.js” file, if you are using “nodejs-planwebapp” from my GitHub Repo.
- Add the following text at line 167/168.
- If you using VS Code, run the following commands in your terminal to save and commit your code back to the remote repository.
PS> git add .
PS> git commit -m "Adding line-3 for staging slot"
PS> git pushThe changes should reflect on your staging environment. If you see the changes on your staging website, Good job! Keep going through the rest of the article to finish the swap process.
Swapping Production Slot with Staging Slot
If you made it to this point, you are almost done. The last steps in here it to press “swap” button to perform the swap and observe the magic app service does in the backend to replace the production app code with staging and vice-versa. Follow along the steps explained below to finish the swap:
- Navigate back to your production app and click on “Deployment Slots”.
- Click “Swap” option to initiate the swap process.
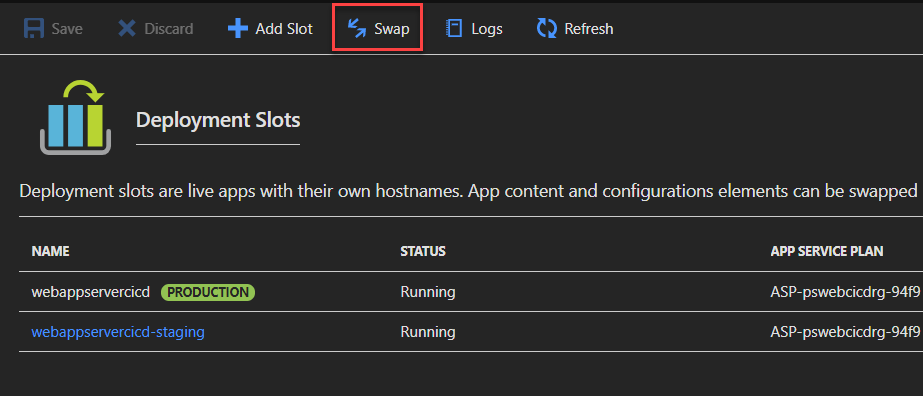
- Select the source and target repo to deploy to and proceed with the swap.
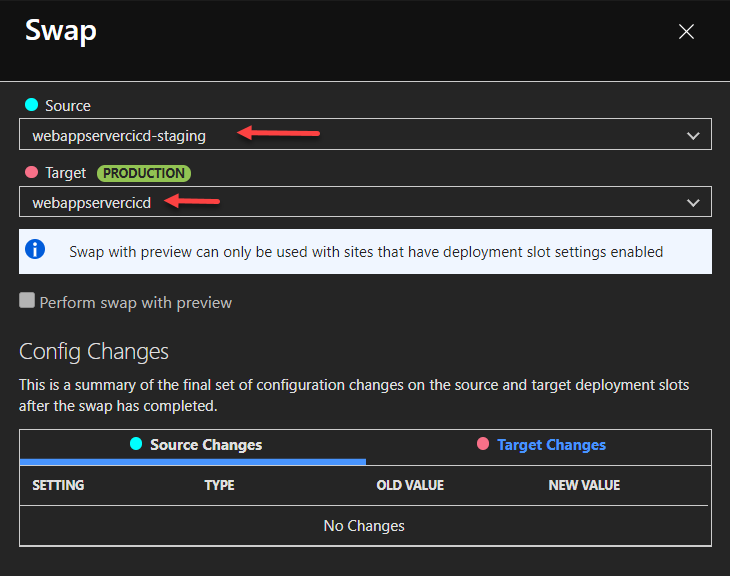
- You should see a success message saying that the swap is complete now.

The swap should take only a few seconds and your code will reflect on the production slot. You should see that your production code is swapped with a staging app and the production application is running the latest changes made to the code earlier.
Conclusion
As you saw, swapping two slots only takes a few clicks. However, it’s never that simple in production running applications. Is it? 😉 You should always test your application in non-production environment before using slots for your production application as there might be little nuances that can cause trouble during the swap.
Start using Deployment Slots and let me know what you think of them in the comments below!
Feel free to send me your feedback or ideas if you’d like me to write about any particular configuration in Azure App Service.
If it’s your first time here, check out other articles in the series:
Part 1: Up and Running with Azure App Service
Part 2: Continuous Deployment for Azure App Service
Part 3: Using Deployment Slots with Azure App Service
Part 4: Setup Custom Domain for Azure App Service
Part 5: Deploying Next.JS App on Azure App Service
Part 6: Next.JS App with Cosmos DB on Azure App Service
Part 7: Why Should You Use Azure App Service?
Part 8: Easy Auth for Azure App Service
Part 9: How To Clone An Azure Web App?
Discover more from Parveen Singh
Subscribe to get the latest posts sent to your email.


