Next.JS App with Cosmos DB on Azure App Service

This is the sixth article in the "Getting Started with Azure App Service" Series where I publish in-depth tutorial and walkthrough on using Azure App Service and best practices every week. In the last article, we talked about how you can Deploy Next.JS App on Azure App Service.
Whenever I look at some kind of data in Azure, I feel the urge to display it in some way or form. I learned Flutter, Node JS, .NET and then tried other web frameworks. A lot of them require you to spend a huge amount of time upfront to get started. I believe Next.JS has been the ea
Creating Next.JS Application
siest of all for me to wrap my head around and build something in a matter of weeks.
While working with sample Next.JS deployment on Azure App Service, I started looking at using some backend source to fetch data from and it had to be Azure resource to stay in the Azure Ecosystem. I finally decided to use Cosmos DB and Next.JS to give my data a visual representation.
In this article, I'll walk you through the exact steps you need to build a Next.JS application that will fetch data from Cosmos DB in real-time to display a list of items in the database container.
Prerequisites
If you choose to follow along, make sure you fulfill the following requirements.
- Windows or Linux machine with Node.js installed
- An active Azure subscription to create Cosmos DB resource.
Preparing Cosmos DB Resource
You need to create a Cosmos DB resource if you don't have one already. Follow the steps below where you'll create a brand new Cosmos DB instance with an empty database.
- Login to your Azure Portal and use the search bar at the top to find "Cosmos"
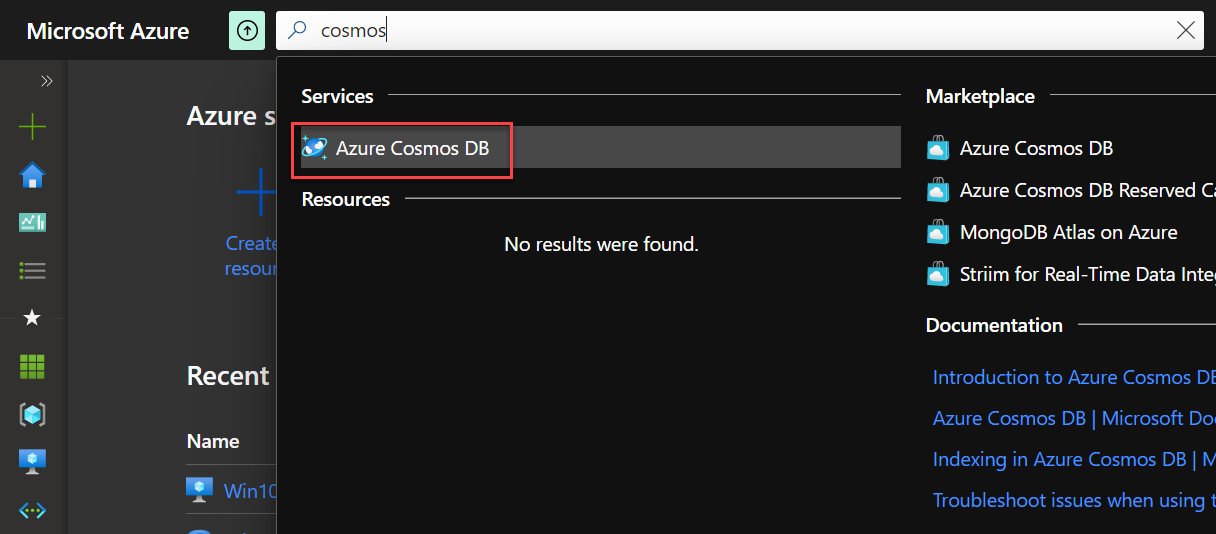
Search Cosmos DB Resource
- Select the Cosmos DB resource and click "+Add" to create a new Cosmos DB resources.
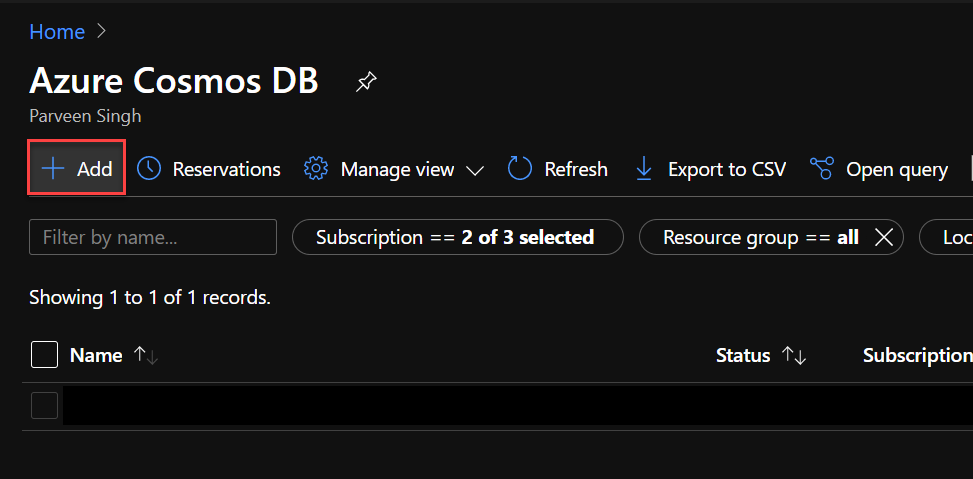
Add new Cosmos DB Instance
- Fill out the resource group name, resource name, location, and make sure you choose "Apply Discount" if it's your first time provisioning Cosmos DB resource.
- Click "Review and Create" to trigger the deployment.
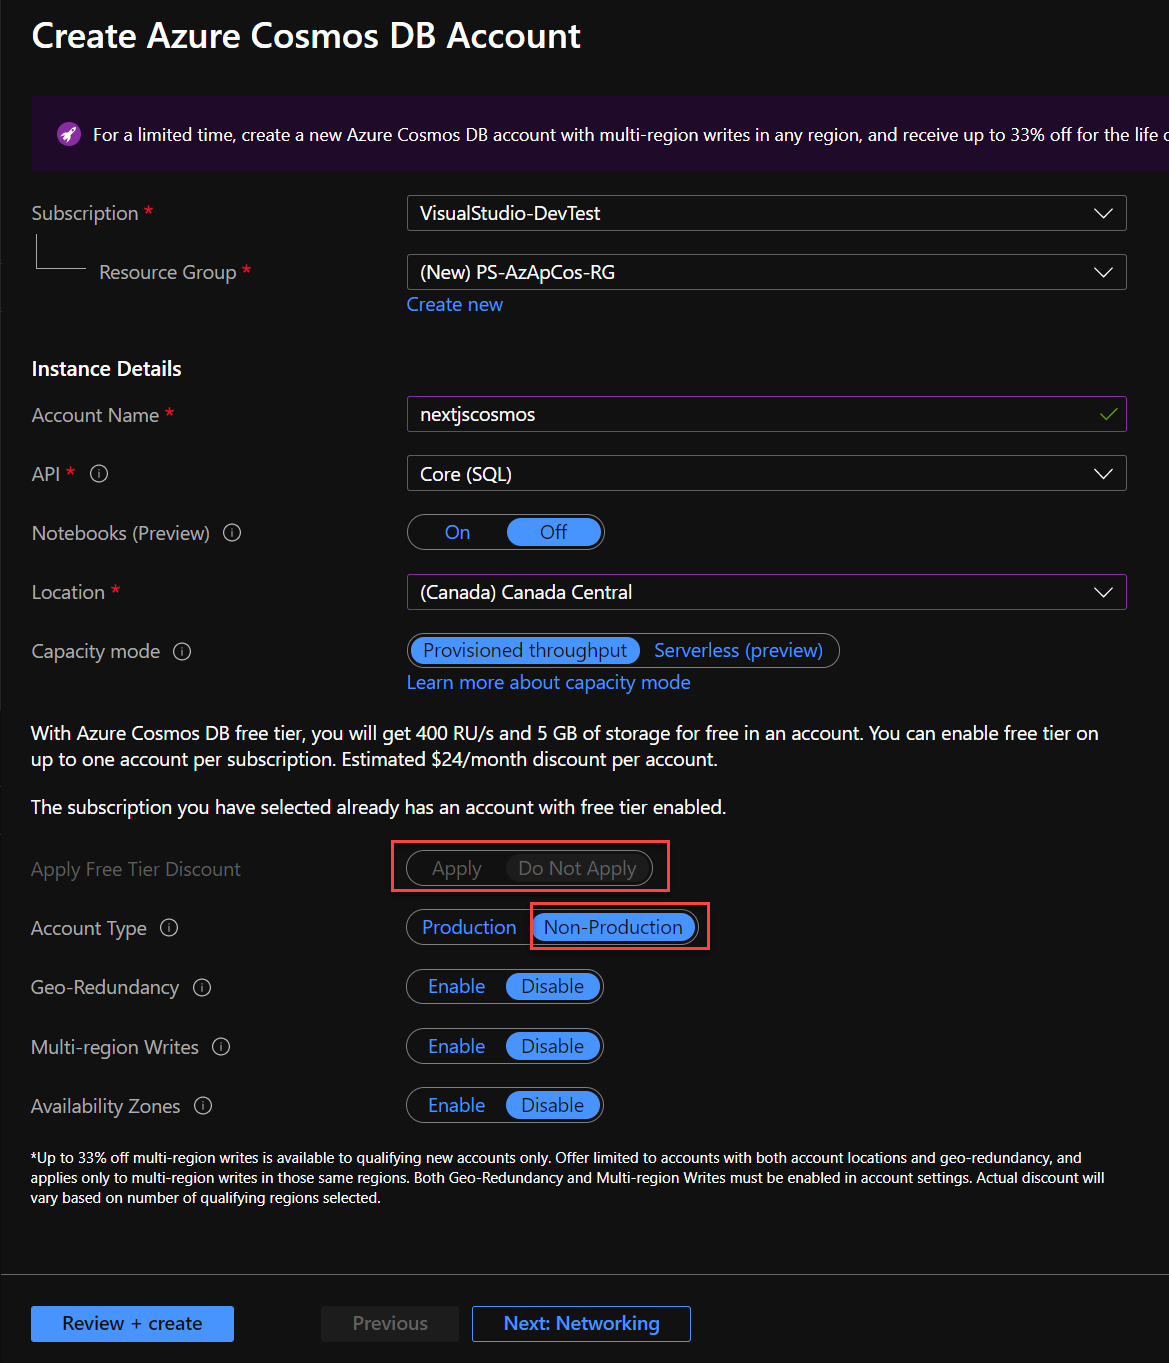
Create Cosmos DB Instance
Creating Items Container
- Once resource deployment is complete, click "Go to resource"
- Click "Quick Start" from the left side blade and select "Create items container". This will create an empty container for you.
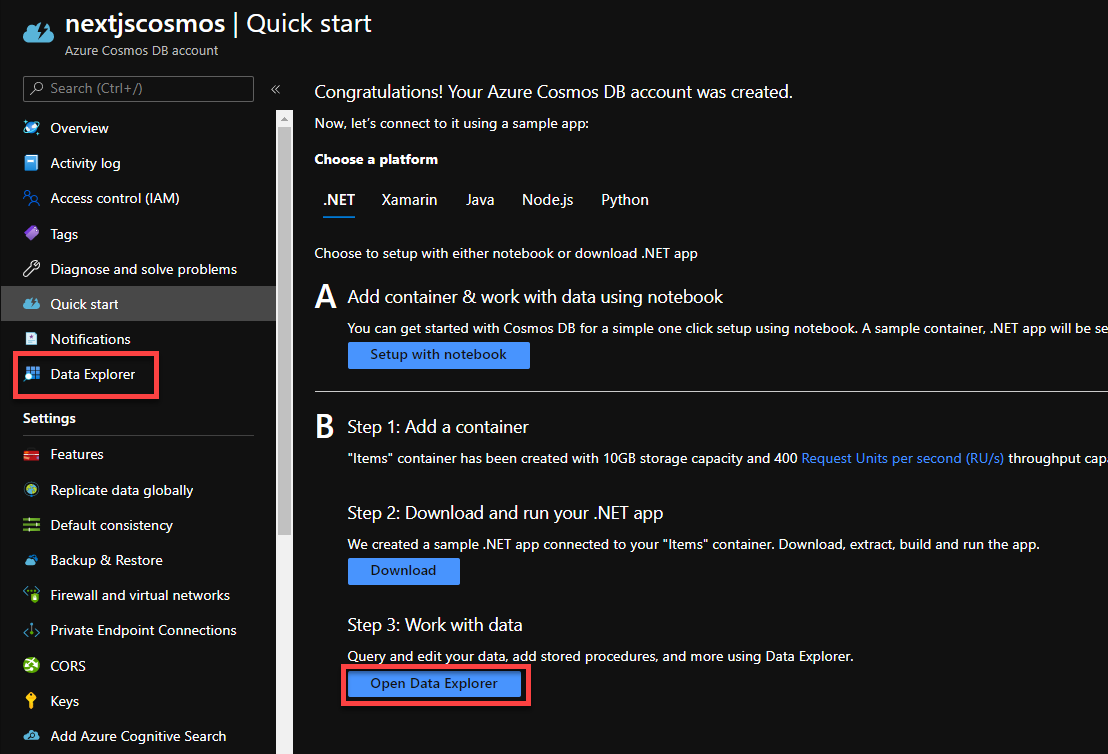
Create Container and View Data Explorer
- Click "Open Data Explorer" to open the container now.
- At this point, your container is empty. Use the following code to populate some data inside the container.
- Click on "New Item" to add the following data inside the editor and click "Save". Change the value of
idto add multiple items sinceidneeds to be unique for each entry.
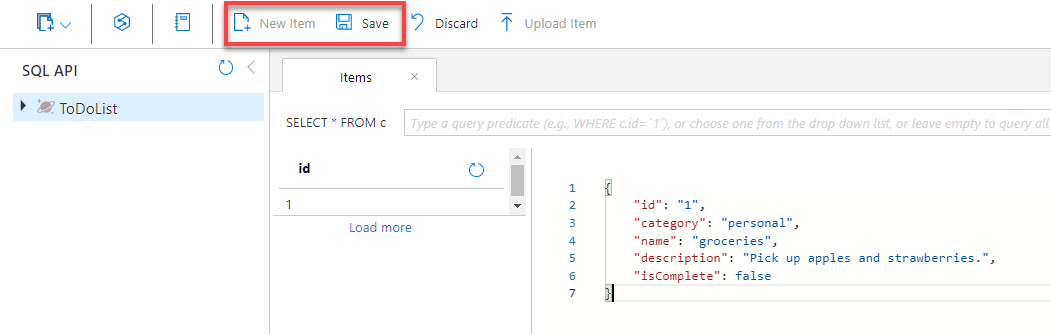
Adding Item to Container
{ "id": "1", "category": "personal", "name": "groceries", "description": "Pick up apples and strawberries.", "isComplete": false}
- Also, take note of your Database name and container name. The default database and container name created by a quick start would most likely be "ToDoList" and "Items". You'll need this information in your application code to create the connection.
Collecting Database Keys and URI
- Navigate to Keys from the left blade.
- Click the "Read-only Keys" tab and copy both URI and Primary Key to use later in the code
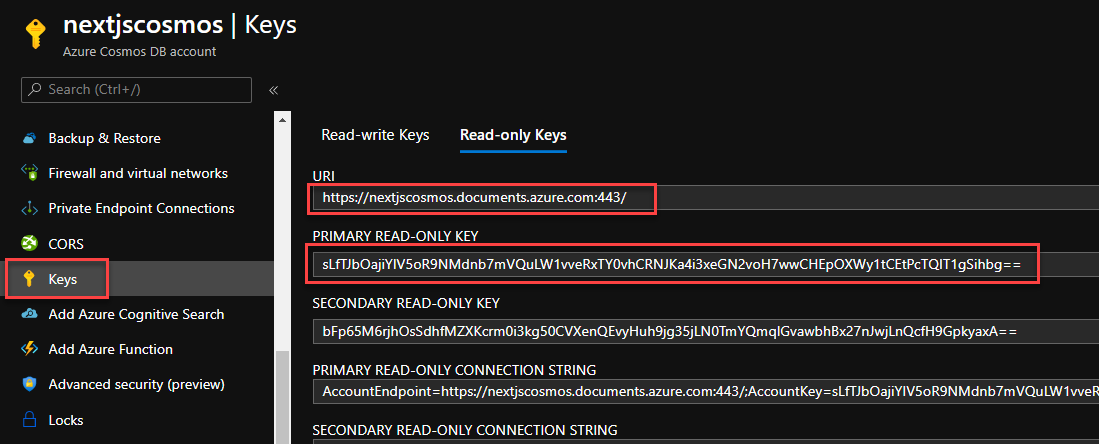
Copying URI and Key for Cosmos Connection
Creating Next.JS Application
I won't cover the part on how to create the started template for Next.JS as I've already covered it in my last blog of this series. Please check out the article below on setting up your Next.JS starter template.
Deploying Next.JS App on Azure App Service
You can alternatively choose to clone my GitHub Repo which already contains the started code that you can work on top of.
singhparveen/NextJS-AzureAppService
Preparing the Layout for Homepage
Run the following command in your terminal within the folder to install Cosmos NPM package. This package is required to support a connection to Cosmos for your application. You need to import tailwind as well so that you don't write custom CSS to design the homepage. If you are looking for more information on Tailwind, check out this link here.
The next step is to configure your tailwind for the application. Create a new folder called "styles" at the root of the site and then create a file called "tailwind.css". Paste the following code inside the file.
File - tailwind.css
Tailwind needs two last config file where it can find the plugins and other modules information. Create the following two files (postcss.config.js & tailwind.config.js) at the root of your application directory and paste the content within respectively.
File - postcss.config.js
File - tailwind.config.js
Create one last file named _app.js under "pages" folder and paste the following content inside the file. This page acts as a component to initialize pages as the website loads. You can check out some of the amazing features it offers here.
Advanced Features: Custom `App` | Next.js
File - _app.js
At this point, your folder structure should look something like this.
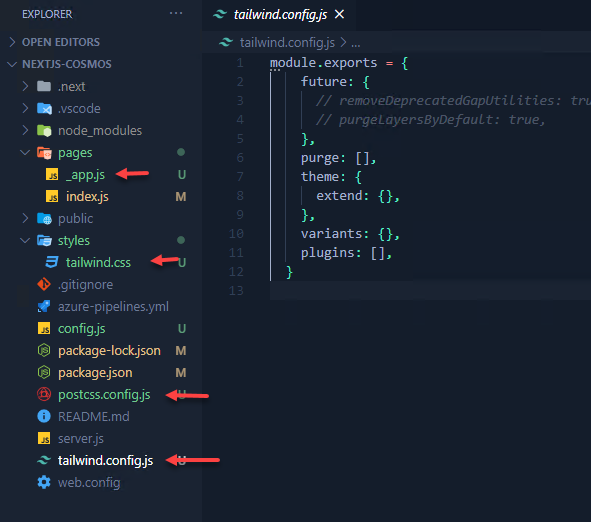
Folder structure for Code
Cosmos DB Connection Strings
Now it's time to add the connection string and create a view for your Cosmos DB data. Create a new file config.js at the root of the folder and paste the following line of code. Be sure to change the endpoint URI and Primary Key with your Cosmos DB keys information gathered earlier.
File - config.js
Adding View for Cosmos Data
Connection string ensures that you have an endpoint configuration outside your index file. It's not the best way to store the information however we'll leave it here for demo purpose. Ideally, you'd want to use environment variables or key vault secret in Azure to pull the endpoint information.
Open the index.js file inside Pages folder and paste the following code.
File - index.js
The first part of the code is simply importing the configuration and module required to make Cosmos DB call from the code. The next function Home.getInitialProps runs during the initial startup of the application before other code to ensure that the data is pulled before the other code run. The last section is what's displayed on the screen as an output.
As you can see, CosmoData is being returned by the second section of the code which is used in the last section as an input which further displays it on screen. You can learn more about getinitialProps here.
Data Fetching: getInitialProps | Next.js
The final code is store at this GitHub repo which you can simply clone and change the connection strings. (Don't worry about the Cosmos URI and Key information you find in existing config.js file. The resource will probably be removed by the time you see this 😉)
Building and Deploying Application to Azure App Service
The step is to build your application and finally push it to Azure App Service. I'll be using VS Code to deploy the code directly to Azure. Check out steps at the link below on how to deploy the code to Azure App Service using VS Code.
Deploying Next.JS App on Azure App Service
Your homepage should look something like this as the deployment finished on Azure App Service.
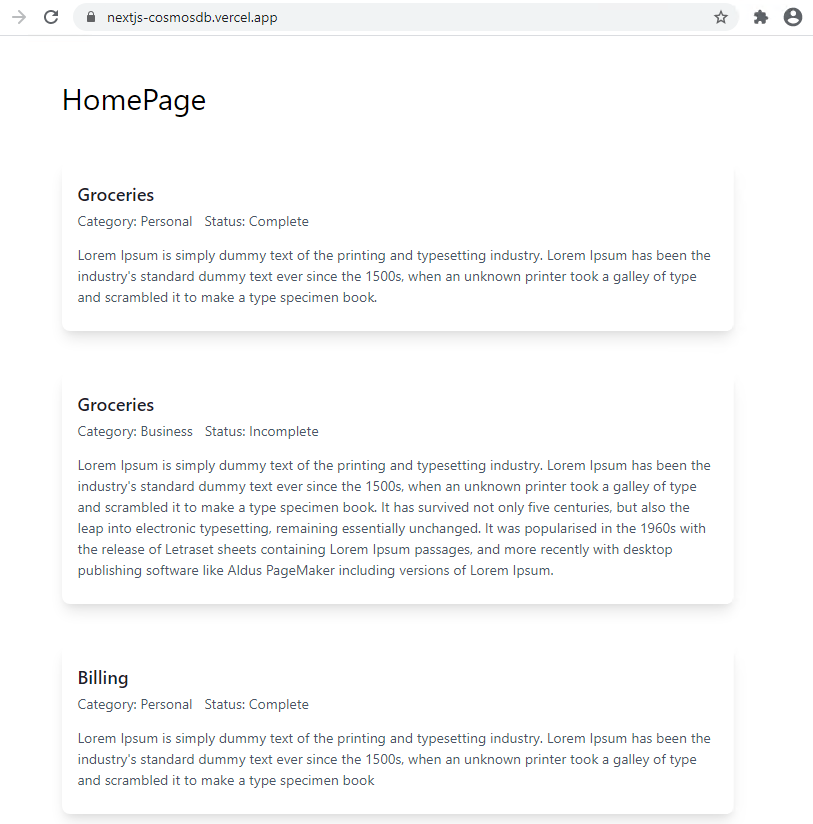
Result of Next.JS Code
Here's by Live Running version of this build:
Conclusion
I hope you get a quick idea of how you can use Cosmos DB with NodeJS framework such as Next.JS. The same strategy can be used for other similar frameworks like React, Express, React Native, or regular Node JS application. Tailwind is another CSS framework that really takes out the heavy lifting off of your codebase and provides a lot of flexibility in terms of the design and layout of the whole website.
If you like the article, please share it with your friends and reach out to me on Twitter if you have any questions.
If it's your first time here, please check out other articles in the series:
Part 1: Up and Running with Azure App Service
Part 2: Continuous Deployment for Azure App Service
Part 3: Using Deployment Slots with Azure App Service
Part 4: Setup Custom Domain for Azure App Service
Part 5: Deploying Next.JS App on Azure App Service
Part 6: Next.JS App with Cosmos DB on Azure App Service
Part 7: Why Should You Use Azure App Service?
Part 8: Easy Auth for Azure App Service
Part 9: How To Clone An Azure Web App?