


This is the tenth article 🎉 in the “Getting Started with Azure App Service” Series where I publish in-depth tutorials and walkthroughs on using Azure App Service and best practices every week. In the last article, we discussed how you can Clone An Azure Web App.
Azure App Service offers an impressive SLA number of 99.95% for all web applications running on the Standard and higher tier. However, it’s often a good idea to plan for the failure and design your infrastructure to be more resilient. One way to achieve this is to perform regular backups and test those backups every once in a while to make sure you have a firm disaster recovery plan.
This week, we are looking at how to perform backup and recovery on Azure App Service. I’ll walk you through each step to perform the backup and then restore the application to make sure the backup works! Let’s dive right in…
Prerequisites
If you decide to follow along, confirm the following pre-requisites before you begin.
- You have an Azure account with an active subscription.
- Your app service plan is running on at least Standard Tier to perform the backup and restore operation on the application. This operation cannot be performed on the Basic/Free Tier applications.
- You are running a sample web App to perform the test. Follow alone once you have a POC web application to test the backup & restore steps.
Considerations
Before we move into the steps, I’d like to cover some of high level information and things to consider related to backup and restore operation.
- The Backup and Restore feature requires you to have an App Service plan that is in the Standard, Premium, or Isolated tier. The daily backup limit differs based on the plan tier.
- Web App backup needs acces to a storage account that is in the same subscription and ideally the same region as your web app.
- You can only perform the backup for up to 10GB including the database backup. If you are looking for backing up more than 10GB, consider using Azure Backup instead.
- TLS enabled Azure Database for MySQL and PostgreSQL is not supported for backup at this point. Consider alternate options if you have TLS enabled.
- In-app MySQL databases are automatically backed up without any configuration. If you make manual settings for in-app MySQL databases, such as adding connection strings, the backups may not work correctly.
- The storage account used for backup storage should not have a firewall configured on it.
Performing A Web App Backup
Assuming that you already have a web application running in your environment, let’s see what you need to do in order to perform the backup for your web app. As of now, you can either trigger the backup using Azure Portal or opt for PowerShell automation and get similar results using a terminal.
To perform manual backup using Azure Portal, follow the steps below:
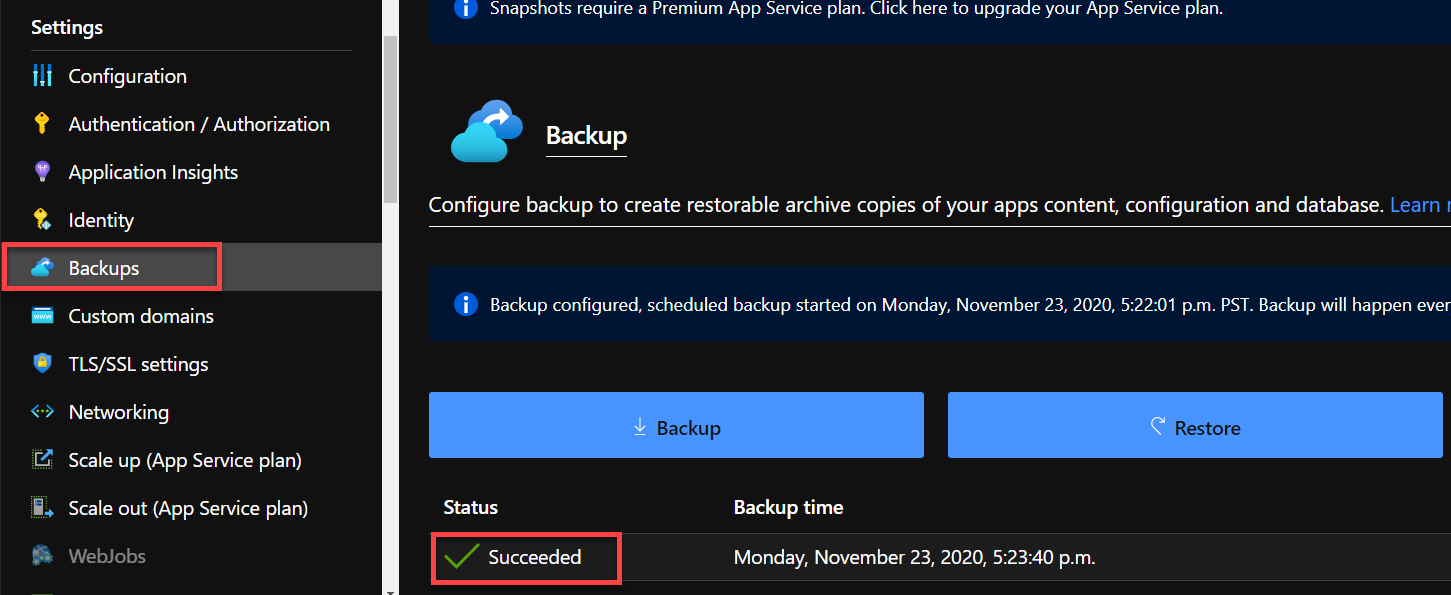
- Navigate to your Web Application and click “Backups” on left-side panel.
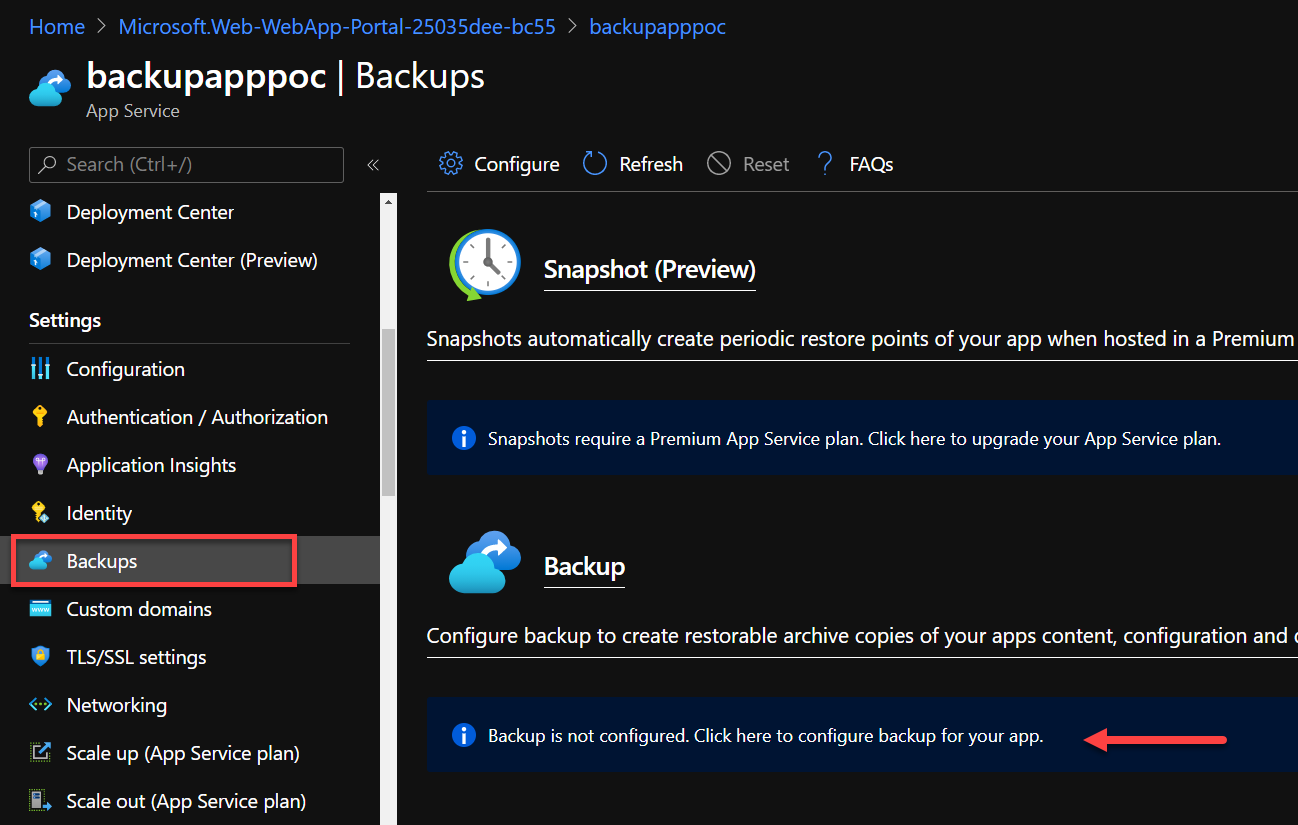
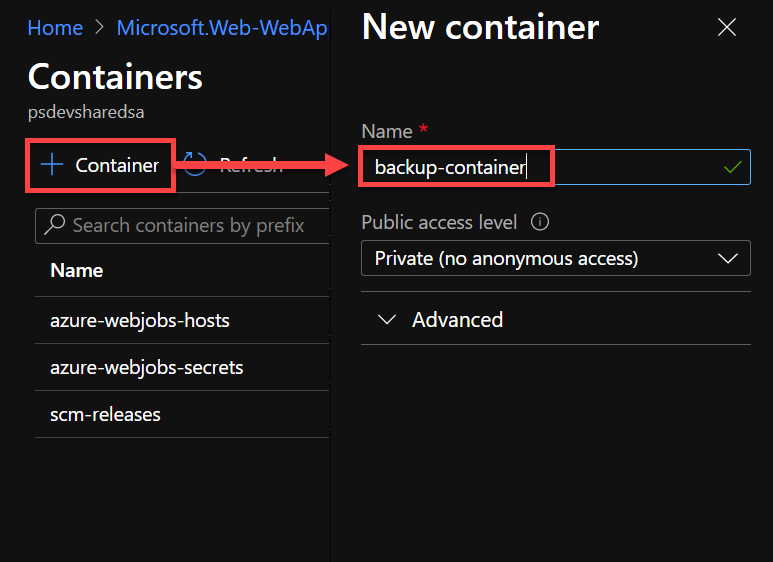
- Choose a storage container that will be used to store your backup files. Optionally create one if you don’t have one already.
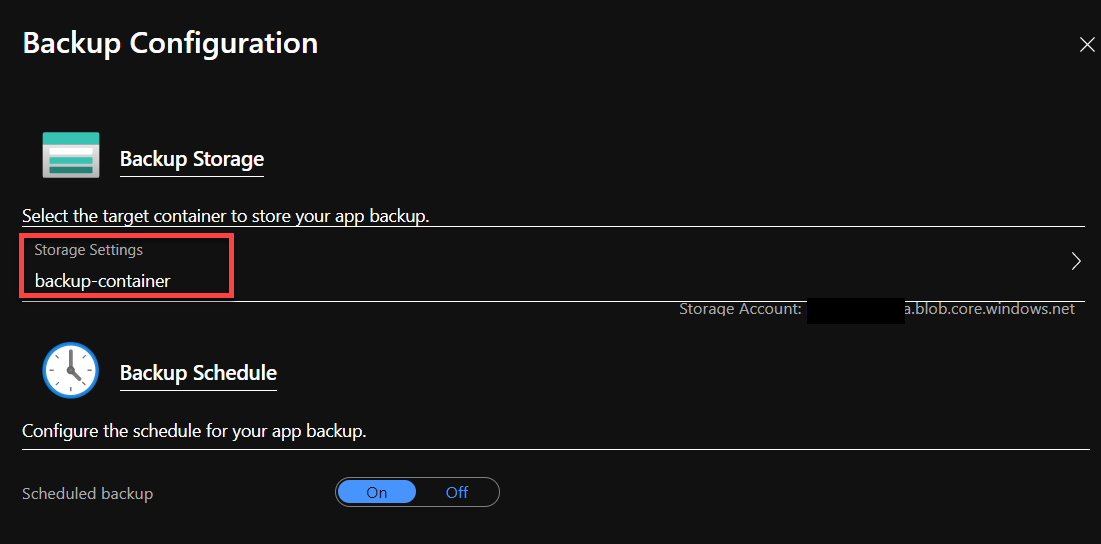
- The container you use for storage should ideally be a separate that you don’t use for any other storage documents. Create a new container once you select a storage account that you decide to use.
- The next step is to configure the backup schedule that will trigger the backup at a specified time automatically for you.
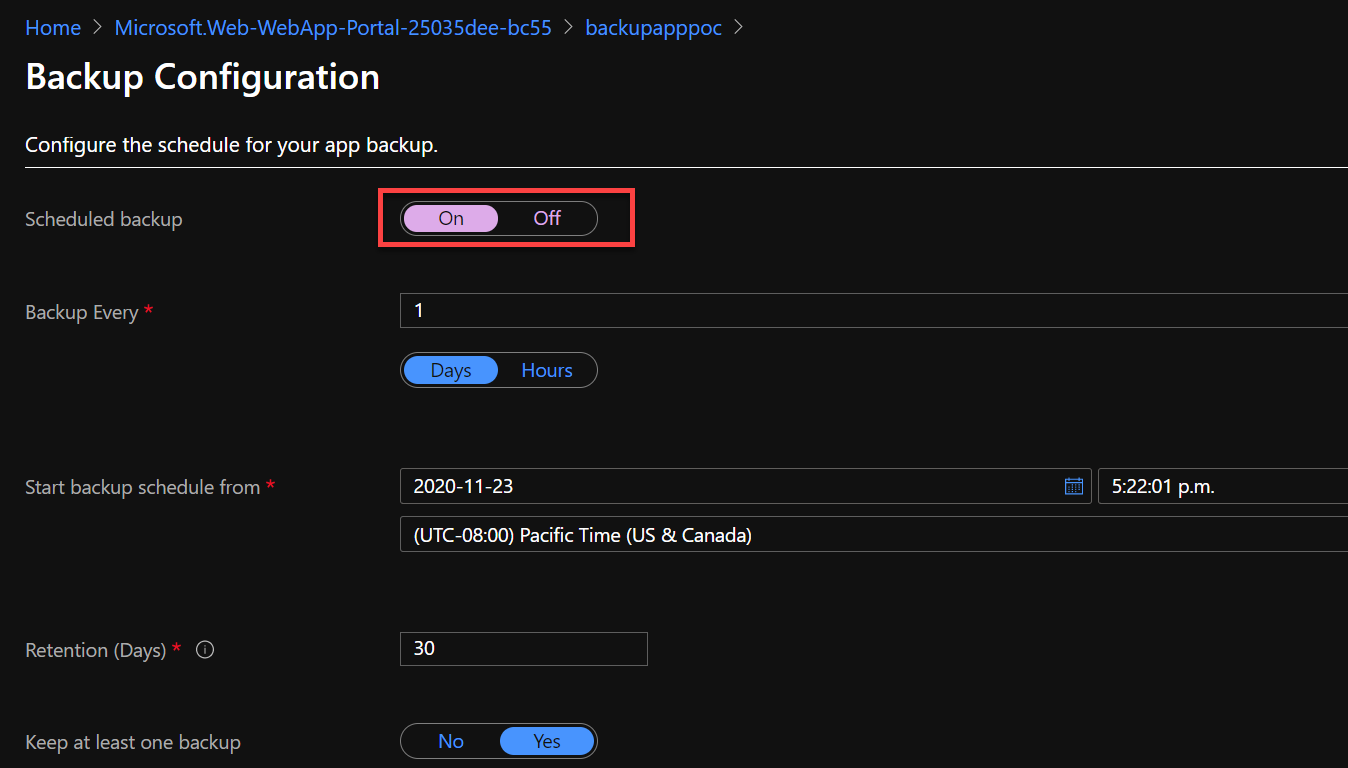
- Once you save the settings, it should kick off the initial backup already. Wait for the backup operation to complete and you should be able to see a success message on the backup page.
- Click on the backup item to view additional information about the backup. Click the download button to download a local copy of backup data or simply refer to this as a reference point to confirm the operation.

Restoring An App Using Existing Backup
Once you have your App service backed up, it’s time to test a restore operation to validate the backup and make sure it is still functional after a restore. Follow the steps below to perform a restore operation.
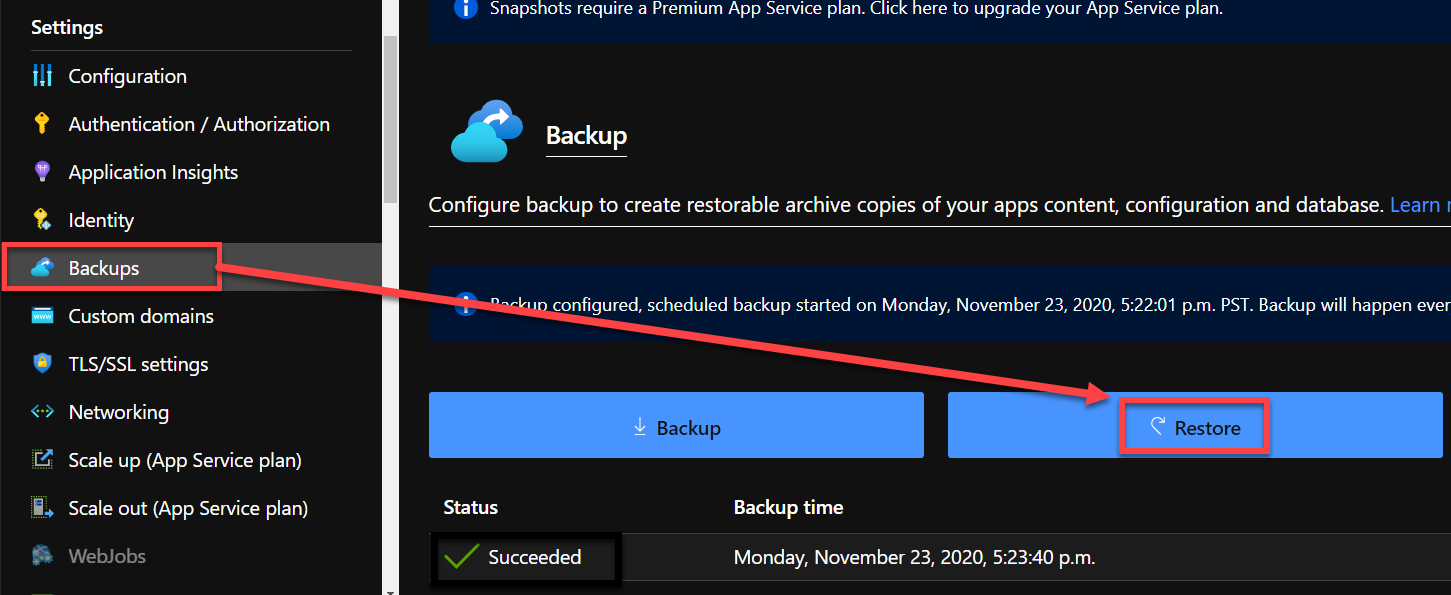
- Navigate to your web app and “Backup” option on the left side blade.
- Click Restore to initiate the restore process.
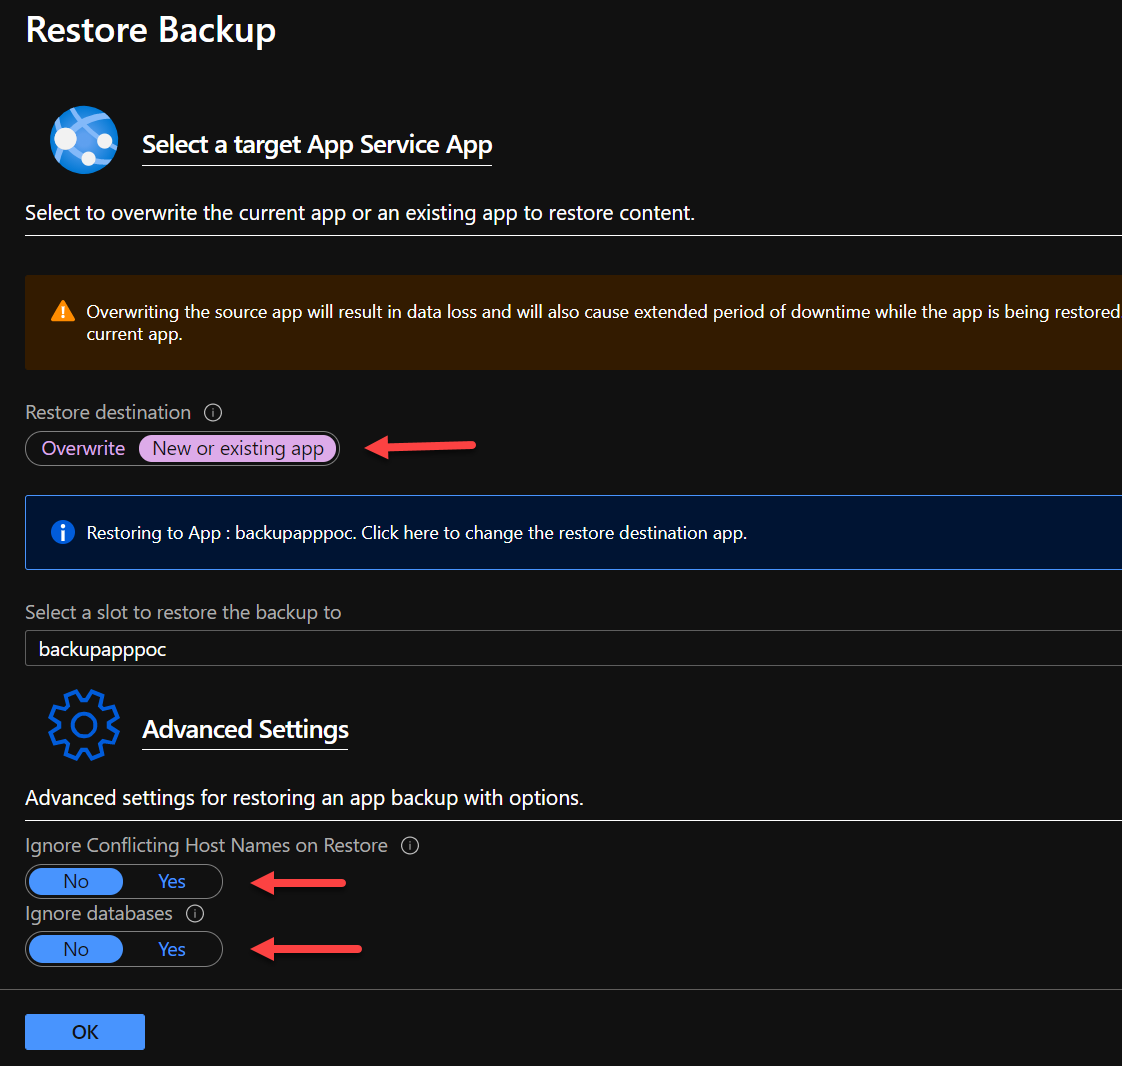
- Fill out the information below to define the target app service where you’d like to restore the backup to. You can choose to restore to a brand new web app, slot, or overwrite the existing application. Optionally set the “Advanced Settings” if you have any preference for databases and hostname conflict actions.
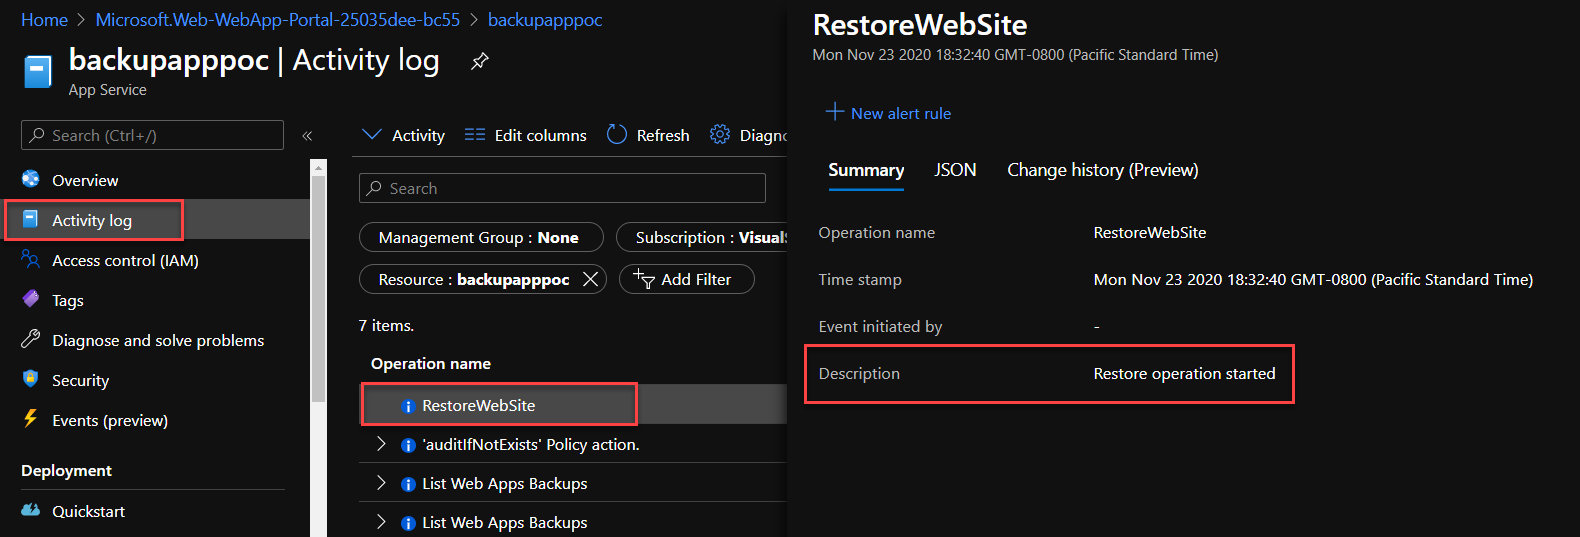
- Once the restore process is triggered, navigate to “Activity Log” for the web app resource and confirm the activity progress as it performs the restore.
Automating Backup & Restore Operation
If you are looking to automation any of the back-ups or restore task or any other associated tasks related to Azure App Service, check out the following URLs for the latest scripts:
Conclusion
I hope you get some valuable information from this article. Check out the other articles in the series and also support me on Twitter if you enjoy reading my blogs.
Reference
If it’s your first time here, please check out other articles in the series:
Part 1: Up and Running with Azure App Service
Part 2: Continuous Deployment for Azure App Service
Part 3: Using Deployment Slots with Azure App Service
Part 4: Setup Custom Domain for Azure App Service
Part 5: Deploying Next.JS App on Azure App Service
Part 6: Next.JS App with Cosmos DB on Azure App Service
Part 7: Why Should You Use Azure App Service?
Part 8: Easy Auth for Azure App Service
Part 9: How To Clone An Azure Web App?
Part 10: Safeguard Your Web App from Disaster


